DeepSeek Harness: A Complete Guide from Zero Installation to Plugin Mastery

From Node.js environment to plugin selection, the shortest path to getting DSH installed and working.
Based on a hands-on tutorial by Bilibili creator Jingxing, this article lays out the complete path from zero to a usable DeepSeek Harness (DSH). It opens by correcting the common mistake of "looking for the installer first," explaining that DSH is a desktop tool written in JS/TS and requires Node.js 22+ as a runtime prerequisite, advises avoiding the system drive, and demonstrates version verification and manual environment variable configuration. It then covers three companion tools—Git (pulling plugin repositories), NPM (local compilation), and FFmpeg (video plugins)—before moving into DSH installation, login, and the four work modes: Standard (all-round), PTC (batch), Minimal (troubleshooting), and Creation (plugin management). The plugin section presents three installation paths—marketplace, GitHub command line, and local folder—along with the npx substitution trick, then introduces must-have, token-saving, and work/entertainment plugins by category, finally noting the conflict between the long-term memory and "fish memory" plugins (choose one) and that rolling back the plugin version resolves incompatibility errors.
DeepSeek Harness (DSH for short) is a desktop tool that lets AI read your files, write code, create PPTs, and even raise a desktop pet. But most people's first instinct is to hunt for an installer, only to find it won't run after installation—the problem usually lies in environment configuration. This article, based on a hands-on tutorial by Bilibili creator Jingxing, lays out the complete path from environment setup to plugin selection.
Install the Engine First: Node.js Is the Prerequisite for Running DSH
DSH itself is written in JavaScript and TypeScript. A browser can only run JS inside web pages, but Node.js lets JS run independently on your computer. The creator uses a metaphor: DSH is the car, Node.js is the engine—without an engine, no matter how good the car is, it won't move. All subsequent launch commands, plugin downloads, and compilation depend on it.
There are two hard requirements for installation. The version must be 22 or above; the tutorial demonstrates version 24, and DSH won't recognize anything too old. Don't install it on the system drive (C drive), because the main program plus NPM cache and plugin cache will keep ballooning in size—installing on C drive will fill it up before long, so change it to D drive or another location.
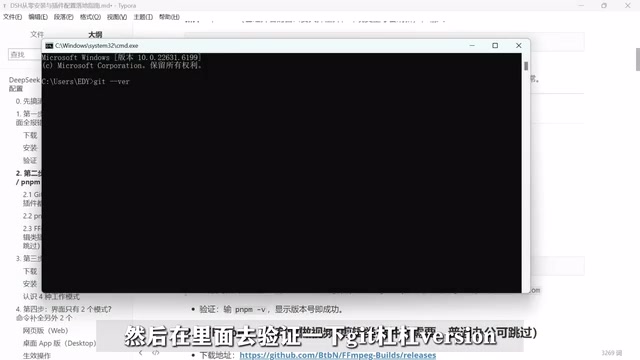
After installation, press Win+R and type CMD to open a terminal, then run node -v. If you see the version number, it's successful. If not, you need to manually configure environment variables: right-click This PC → Properties → Advanced system settings → Environment Variables, add Node.js's installation path to the Path variable, confirm, and re-verify.
Environment Variables and PATH
Environment variables are key-value pairs the operating system uses to pass configuration information to programs, and Path is the most commonly used one. When you type a command like node or git in the terminal, the system searches the directories listed in Path one by one for the corresponding executable; if the installer didn't write Node.js's installation directory into Path, the terminal can't find node.exe and reports "not recognized as an internal or external command." When manually configuring, enter the directory level that contains node.exe (e.g., D:\nodejs), not its parent or subdirectory. After making changes, you must close and reopen the terminal, because an already-open terminal reads environment variables only once at startup. Only when node -v properly outputs a version number is the path configuration truly in effect.
Three Companions: Git, NPM, and FFmpeg
Git is the mover of plugin source code. Plugins on GitHub aren't zip files but entire code repositories, and Git's job is to pull the repository completely to your local machine. Installing plugins, updating plugins, and even modding plugins yourself all rely on it. Download the Windows 64-bit version from the official site, and again avoid the system drive during installation. After installation, run git --version in the terminal to verify.
NPM is the package management tool bundled with Node.js, specializing in compilation work. Many plugins can't be used directly after obtaining the source code—they need to be packaged locally first, and that's what NPM does. Just run the installation command in the terminal; the first installation may take a moment. Verify the version number with npm -v.
FFmpeg is related to video editing and auto-video-generation plugins. If you're only doing office work, you can skip this step entirely.
Package Management and Local Compilation
NPM is the package manager released alongside Node.js. It maintains a global public software repository (registry) holding millions of reusable JS packages. When you run an install command, NPM first resolves the dependency tree, then downloads the source code into the local node_modules directory, and if necessary runs the build scripts declared in the package to complete compilation. This is exactly why "plugins can't be used directly after obtaining the source code and need local packaging first": TypeScript needs to be transpiled into JS, and some native modules also need to invoke a compiler to generate binary files. NPM's cache is located in the user directory by default, which is one reason the installation path shouldn't be on the system drive. When domestic networks are slow to access the official source, the registry is usually switched to a mirror for speed.
Install DSH Itself and Complete Initial Configuration
Go to the official website to download the desktop client and choose the Windows version. During installation, change the path to D drive, keep the directory hierarchy shallow, click Install Now, wait for completion, and launch it.
On first launch, you need to log in, using either WeChat or a phone number, and after logging in you enter the onboarding page. The onboarding will ask you to choose a use case—office work or code development—so pick as needed, or skip it. Once in the main interface, click your avatar → Settings, and you'll see the 4 work modes offered in the built-in plugin area.
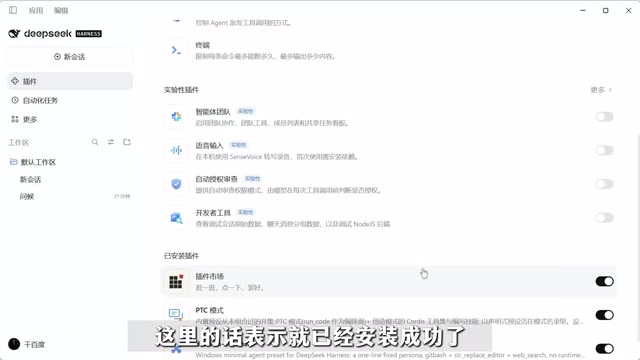
Standard mode is the all-rounder: file editing, terminal use, and search are basically all enabled, covering the vast majority of daily projects. Code mode (PTC mode) lets the AI write scripts itself to perform operations in batches, which is faster and saves more tokens when batch-editing files or organizing data, but once the direction is wrong, the whole batch fails rather than a single point—beginners should start with standard mode. Minimal mode keeps only the terminal and file editor; the environment is clean, making it suitable for troubleshooting plugin conflicts or testing bugs. Creation mode is equivalent to administrator privileges: you can dynamically write and test plugins, making it a must-have for plugin tinkerers and pet-raising players.
Three Paths for Plugin Installation
The easiest is the plugin marketplace. Add the DSH plugin marketplace on the plugins page; after installation, click Enable Now, and the marketplace entry appears in Settings—just click Install on whatever you want. If the entry doesn't appear, restart or refresh.
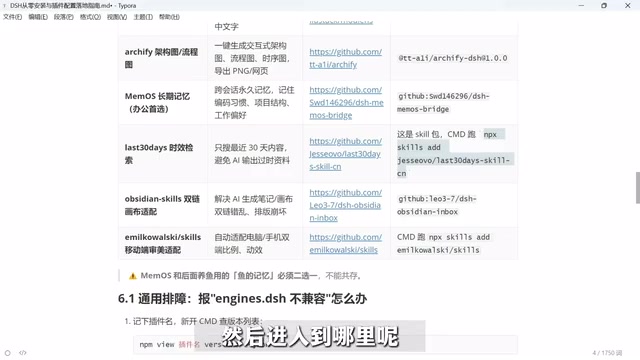
The second is installing via GitHub command line. Many niche plugins (like the fish-raising plugin) can't be found in the marketplace, so you need to copy their install command and paste it into the terminal. There's a universal patch here: if it says the DSH command isn't found, change the dsh at the start of the command to npx, which basically solves the problem.
The third is installing from a local folder, which requires downloading and extracting the source code locally, modifying it, and then installing—the most troublesome process.
What npx Does
npx is a command execution tool provided alongside NPM. It first looks for the target command in the local project's node_modules/.bin, and if not found, temporarily downloads and executes it. Changing the dsh at the start of a command to npx solves "DSH command not found" because calling dsh directly requires that executable to be registered in Path, whereas npx bypasses this requirement and lets NPM locate or temporarily pull the corresponding package itself. The trade-off is that the first execution may require extra downloading and take slightly longer, and the version is whatever the package manager resolves.
Must-Have Plugins: Filling the Gaps in DSH's Capabilities
After a bare installation, DSH is actually an empty shell—its real power comes entirely from plugins. Before installing plugins, clarify your needs first; you don't have to install them all.
The image recognition plugin addresses a native weakness—DSH can't see images, so throwing a screenshot or error screen at it leaves it blind as a bat. Once installed, it's like giving it a pair of eyes, and it can even recognize text in images. When tweaking frontend pages or reviewing design mockups, just paste the error image and toss it over. During installation, remember to remove the semicolon at the end of the command; what follows it is the version number.
The diagram plugin generates architecture diagrams, flowcharts, and sequence diagrams in one sentence, and can export directly to images or web pages. When writing technical docs or aligning plans with the team, you no longer need to open a drawing tool and drag boxes by hand.
The long-term memory plugin lets DSH remember things across conversations. By default it has only goldfish memory—close and reopen it and it won't know who you are, where the project is, or what coding style you like, and you have to explain everything again each time. This plugin saves your coding habits, project structure, and work preferences; the longer you use it, the smoother it gets, and it's strongly recommended for coding and projects.
The timeliness plugin forces the model to search only for content from the last month, avoiding outdated approaches and pitfalls. It's a skill pack, not used in the DSH interface—you need to run the corresponding command in the terminal to load it.
The Obsidian note adaptation plugin is for Obsidian users. When AI writes notes, links often point to the wrong place and whiteboards get messed up; this plugin keeps links from jumping wrong and whiteboards from breaking.
The UI design skill pack comes from a set of design skills compiled by a former Vercel engineer, containing 16 mini-skills covering motion design approaches, Apple design style, UI library selection for Swift development, and other prototyping scenarios. After installing, when you have the AI build a web page with animations or adjust mobile layouts, it automatically invokes the corresponding skill for more professional output. During installation, choose global, choose symlink, and press Enter all the way with defaults.
One conflict to note: installing the long-term memory plugin and the "fish memory" plugin from the fish-raising section later on will clash. For coding and projects choose the memory plugin; for raising fish and playing a persona choose fish memory—don't be greedy.
Token-Saving Plugins: Spend Money Where It Counts
DSH burns tokens, which means burning money—this group of plugins helps you control costs.
The billing panel shows in the sidebar in real time how much this conversation has cost, how much balance remains, and where the money went, solving the anxiety of "money vanishing without a trace." The context dashboard visualizes context usage—how much content takes up space without doing work, how much cache was hit; only by seeing the bottleneck at a glance can you optimize accordingly. The context doctor automatically scans like a physical exam doctor, cleaning up redundant and conflicting plugin instructions—only with a clear environment does it run fast. The smart compression plugin compresses returned content once, keeping answer quality intact while reducing token consumption. The thought solidification plugin locks in your work habits, thinking logic, and output format requirements so they can be called directly next time without repeating yourself. The deep streamlining plugin compresses long conversations before feeding them to the model; the first run consumes some tokens, but long-term savings are significant.
Pick these six plugins as needed; you don't have to install them all.
Tokens and the Context Window
A token is the basic unit of measurement for how large language models process text. A passage of text is split into several tokens for billing; in Chinese, roughly one to two characters correspond to one token, while English is split by word fragments. The context window is the total upper limit of tokens the model can "see" in a single pass—system prompts, plugin instructions, conversation history, file contents, and model output all have to squeeze into this one window. Once the window is full, earlier content gets truncated or dropped, and the model starts "forgetting"; and every round of conversation re-bills the content within the window, so the longer it gets, the more expensive it is. This is the fundamental reason the context dashboard visualizes usage and smart compression and deep streamlining compress before sending to the model—what's reduced is billed tokens, what's preserved is useful information.
Work and Entertainment Plugins
The one-click PPT plugin generates a PPT file with a template style from just a topic, with quite a rich selection of templates. The installation method is special: don't install it in DSH; first install Git and Python, then run commands in the system terminal or PowerShell (not DSH's built-in terminal), and restart DSH when done. It pulls source code from GitHub, so domestic networks may need a proxy.
The auto-video plugin covers the whole pipeline—scriptwriting, shot breakdown, subtitle compression, and voiceover—producing a complete video with narration from a single topic. Tasks like tutorials and product intros that used to take a whole day can now just be handed to it.
On the entertainment side, the boot animation plugin gives startup a dedicated animation, adding a bit of ceremony over a bare white screen. Wallpaper Engine integration connects dynamic wallpapers from Wallpaper Engine. Sidebar enhancements add a Git panel, file preview, and project structure tree, making it easier to find things and view projects. The read-aloud bridge lets AI read in a real human voice and chat output sound automatically, which is handy for tutorials and listening to long texts. The desktop pet plugin places a floating little pet on your desktop, with adjustable size, animation, and position. The fish memory plugin is the soul of fish keepers—it permanently saves the AI's persona, personality, and conversations, so after closing and reopening it still remembers who it is.
What to Do About Version Incompatibility Errors
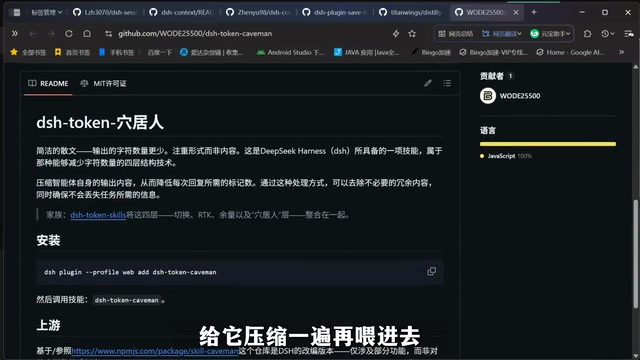
If you get a version incompatibility error when installing a plugin, don't panic—it's most likely that the plugin is too new and the current DSH version can't keep up. Just roll the plugin version back one step to solve it.
Going through the whole process: environment first, then the main program, then plugins—the order can't be scrambled. Choose plugins by need, and remember the conflict point about choosing one of the two memory-type plugins, and you'll basically be able to get DSH up and running.
Related articles
 Tech Frontiers
MuJoCo: An Analysis of DeepMind's Open-Source General-Purpose Physics Simulator
An in-depth analysis of Google DeepMind's open-source physics simulator MuJoCo: high-performance C++ kernel, MJCF modeling format, contact solving principles, MJX GPU acceleration, and robot reinforcement learning use cases.
 Tech Frontiers
Claude API Quick Start: The Official Quickstarts Project Collection
Anthropic's official claude-quickstarts project collection helps developers quickly build deployable apps with the Claude API. Nearly 20k stars, Python-based, great for beginners and prototyping.
 Tech Frontiers
AI Agents Connecting Directly to APIs: Which Calls Can Be Safely Allowed?
AI agents can call any API, but the real challenge is deciding which calls can be safely allowed. This article analyzes allowance decisions from three dimensions—intent matching, least privilege, and controllable impact—and argues that the control layer should sit outside the agent, combined with audit traceability to build a trustworthy API call governance mechanism.