Zero-Cost Local Run: MiniMax H3 V2 Ultra-Realistic Video Generation and ComfyUI Workflow Explained

Run MiniMax H3 V2 locally for free from 8GB VRAM and generate ultra-realistic videos with sampler and prompt tricks.
This article covers a Bilibili creator's local AI video generation solution using MiniMax H3 Singularity V2 with ComfyUI for free, unlimited ultra-realistic video output from 8GB VRAM. It explains why the advanced custom sampler outperforms KSampler, how the Oiler sampler plus Beta scheduler combo works best, why stacking skin details in prompts backfires versus a simple F16 aperture phrase, and how three reference images suffice while multi-image inputs slow generation above one megapixel. It also includes resolution trade-offs, GGUF quantized models, and one-click installer guidance.
AI video generation is becoming dramatically more accessible. While most people are still worrying about subscription fees and queue times for cloud services, a solution that can generate ultra-realistic videos locally for free and without limits has quietly matured. A Bilibili creator shared the MiniMax H3 Singularity V2 model paired with a ComfyUI workflow, demonstrating a viable path that starts from 8GB of VRAM and puts an end to "plastic skin" for good. This isn't just a tool recommendation—it's a systematic breakdown of sampler selection, prompt logic, and parameter tuning.
Why Running MiniMax H3 V2 Locally Is Worth Your Attention
Cloud AI video generation services typically charge by generation duration or count, which gets expensive over time, and they're constrained by platform content moderation and queueing. The core appeal of MiniMax H3 Singularity V2 is that the model is completely free, can generate unlimited content once configured, and keeps your data and creative process entirely local. For creators who need to batch-produce virtual influencer videos or build a personal brand, this freedom is hard for cloud services to match.
According to the creator's testing, the model's hardware requirements are friendlier than expected—a small version of the model can run on as little as 8GB of VRAM. That means an ordinary creative workstation with an RTX 3060-class GPU can participate, rather than requiring top-tier hardware. Of course, hardware performance directly determines generation speed: under identical settings, the time difference between a high-end GPU and a mid-range one is nearly double, but output quality itself doesn't collapse just because the hardware is downgraded.
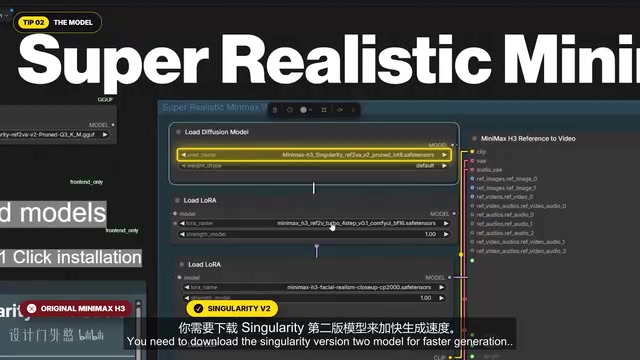
The Core of the Workflow: The Sampler Makes or Breaks It
Advanced Custom Sampler Replaces KSampler
In comparative testing, the creator discovered a key issue: the MiniMax H3 workflow using a standard KSampler performs poorly at preserving the original appearance and coherence of the input image—the generated video character deviates severely from the original reference image in clothing and facial features. After switching to the Sampler Custom Advanced, this problem was resolved in the vast majority of generation cases, and the character's clothing and other elements from the input image could be reproduced with high precision in the video.
The importance of this finding lies in revealing the decisive impact of workflow node selection on final output fidelity. Many creators put all their energy into prompts while overlooking the differences in the underlying pipeline that the sampler represents.
The Difference Between Sampler and KSampler
In ComfyUI, KSampler is the most widely used default sampling node. It integrates model loading, sampler selection, scheduler selection, steps, CFG, and other parameters. Sampler Custom Advanced is a more recently introduced node in ComfyUI that splits the sampling process into multiple independent stages, allowing users finer control over noise generation, sampling algorithms, and scheduling strategies. For video generation models like MiniMax H3 that demand extremely high fidelity to the input image, the advanced custom sampler can control the sampling trajectory more precisely and reduce information loss, thereby better preserving details such as clothing and facial features from the input image. Although KSampler is easy to use, its internally fixed pipeline may deviate when handling complex conditions, leading to character feature drift.
The Golden Combination of Sampler and Scheduler
Regarding sampler types, after testing multiple combinations the creator concluded that the Oiler sampler paired with the Beta scheduler performs best for generating realistic videos. This isn't an absolute rule, but it provides beginners with a reliable starting point. Combined with the four-step iteration 0.1 version LoRA and a dedicated facial realism close-up LoRA, skin texture can be significantly improved, bidding farewell to that greasy plastic look.
For step count, ten steps is the choice for better results; for lower-spec computers, four steps still delivers acceptable results, though audio and video quality will decline somewhat. This flexible design lets users at different hardware levels find their balance point.
Oiler Sampler and Beta Scheduler
Oiler is a sampling algorithm in ComfyUI based on ordinary differential equations (ODEs). It belongs to the newer class of higher-order samplers and, compared with traditional Euler, DPM++, etc., strikes a better balance between preserving image structural integrity and detail richness. The Beta scheduler is a noise scheduling strategy that controls the decay curve of noise levels during each denoising step. The Beta scheduler retains more noise in early steps, which helps the model build overall structure, then rapidly denoises in later steps to refine details. This characteristic aligns closely with the need in video generation to balance inter-frame coherence and single-frame quality. After actual testing on MiniMax H3 V2, the combination of the two effectively improves skin texture and background clarity.
The Counterintuitive Logic of Prompts: Less Is More
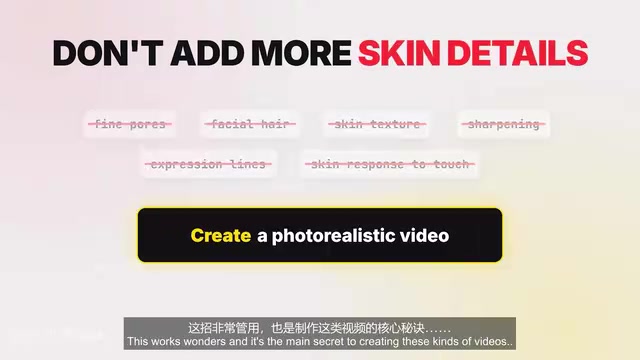
Stop Stacking Skin Details
This is the most颠覆颠覆颠覆颠覆颠覆颠覆颠覆颠覆颠覆颠覆颠覆颠覆subversive discovery in the entire tutorial. Intuitively, to make skin realistic you'd think you should fill the prompt with descriptions like "fine pores," "faint facial peach fuzz," "natural variations in skin texture," and "no over-sharpening." The creator initially did exactly that, and the result was the opposite—not only did the model fail to add skin detail, but the skin looked greasy and plastic.
The reason is that MiniMax H3 V2 is itself a model specifically trained to generate natural skin details. Over-description actually interferes with capabilities the model has already internalized. The solution is extremely simple: on the first line, just tell it to "create an ultra-realistic video with F16 aperture texture and deep depth of field." With just that short description, the model fills in natural skin details on its own.
Aperture Terminology Controls Depth of Field
The phrase "F16 aperture" in the prompt isn't decoration—it directly controls the video's depth of field performance. Using F16 yields a clearer background, greatly reducing background blur and bokeh, making the overall image look more realistic. The smaller the aperture number, the shallower the digital depth of field. The creator listed different apertures and their clarity levels in the slides for creators to flexibly use in prompts.
The Relationship Between Aperture Value and Depth of Field
In photographic optics, the aperture value (f-number) represents the relative size of the lens opening. A smaller number (e.g., f/1.8) means a larger opening, more light intake, and shallower depth of field (stronger background blur); a larger number (e.g., f/16) means a smaller opening and deeper depth of field (everything from foreground to background is sharper). In AI video generation prompts, using "F16 aperture" essentially borrows photographic terminology to guide the model toward generating a deep depth of field effect—clear background with minimal bokeh. This is especially important for virtual influencer videos that need to show environmental details or multi-person scenes, because shallow depth of field tends to blur the background and look unrealistic. By adjusting the aperture value, creators can control the sense of space and realism in the frame.
Reference Image Strategy and the Cost of Multiple Image Inputs
Three Images Are Enough
You don't need to pile up character reference images. The creator's approach is: one ultra-high-definition facial close-up plus two full-body shots (front and back) is enough for the model to perfectly preserve facial features and clothing. The key is to explicitly tell the model in the prompt how to use these images—"use the first image as the sole reference for character features, keeping his accurate facial features, hairstyle, long-sleeved clothing, body proportions, and appearance unchanged throughout the video." If you don't explicitly specify to use the clothes from the input image, the model may replace the clothing on its own, because it assumes the choice is yours.
Multiple Image Inputs Slow Down Generation
MiniMax H3 V2 supports more than one input image, and you can add multiple characters. But the creator's testing found that when the generation resolution reaches about 1.2 million pixels or higher, increasing the number of input images makes the workflow far more demanding on hardware, and generation time can triple. The reason is that the model must continuously process these input images throughout the entire generation process, and the burden increases accordingly.
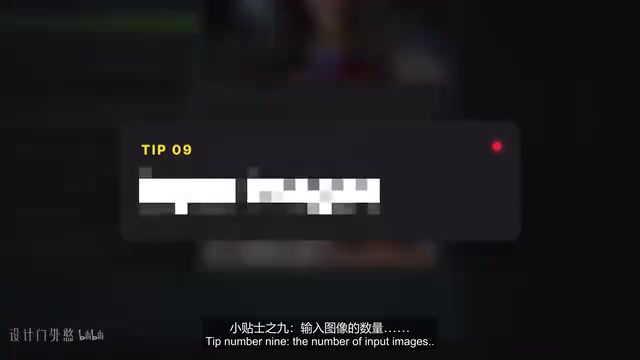
If you really need two subjects, the creator's advice is: place them side by side in the same image, pass it to the model as the first reference, and then explain the characters' positional relationship in the prompt. This is more efficient than passing in multiple images separately.
Resolution, Hardware, and Installation in Practice
The Trade-off Between Pixel Count and Generation Speed
The workflow includes a built-in guide mapping pixel values to resolutions. The creator usually chooses between 0.7 and 1.5 million pixels, and the sample clips shown at the beginning were generated at 1.5 million pixels with 10 sampling steps. For weaker computers, keeping the pixel value at 0.8 or below can significantly speed things up—at 0.7 million pixels, generation speed can be twice as fast.
In terms of actual measurements, the creator's high-end GPU with 32GB of VRAM took 6 minutes 51 seconds to output, while a mid-range GPU with 12GB of VRAM took 13 minutes 10 seconds. This gap reminds creators to set reasonable expectations based on their own hardware.
Small Models and One-Click Installer Packages
For low-spec GPUs, MiniMax Singularity offers GGUF quantized versions, such as the 8GB Q3 model. To use it, place the model in the unet folder and connect it to the LoRA node in the workflow, then select the corresponding model from the dropdown menu. If you use the one-click installer package, the installer automatically handles model downloads and folder placement—just restart ComfyUI.
The creator also prepared an all-in-one package for beginners: download the zip, extract it, run the BAT file, and after asking one or two system-related questions the program automatically installs ComfyUI, downloads the six or seven required models, installs custom nodes, and works around potential errors. Even experienced ComfyUI users can use this file to help with downloads, error fixes, and node installation.
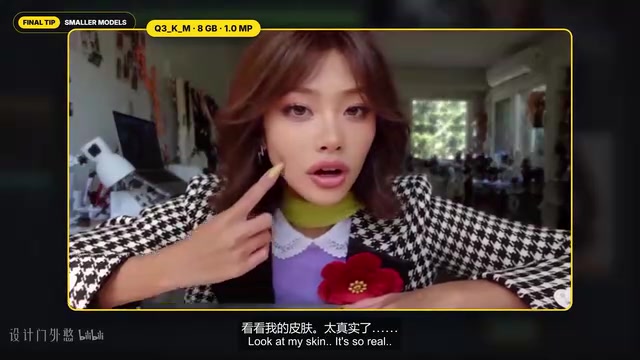
GGUF Quantization Format and the UNet Folder
GGUF (GPT-Generated Unified Format) is a model quantization format optimized specifically for local inference, originally popularized by the llama.cpp project and now extended to the diffusion model space. By quantizing model weights from FP16/FP32 to lower-precision formats such as 4-bit, 5-bit, and 8-bit, it greatly reduces VRAM usage and file size while preserving output quality as much as possible. In ComfyUI, GGUF models must be used with a dedicated GGUF loader node, and the model files go in the models/unet folder (rather than the traditional checkpoints folder), because UNet is the core denoising network of the diffusion model and loading it separately makes it easier to combine with modules like LoRA and ControlNet. Q3 refers to 3-bit quantization, and an 8GB file size corresponds to roughly 8GB of VRAM requirement, making it suitable for low-spec GPUs.
Who This Solution Is For
The combination of MiniMax H3 Singularity V2 and the ComfyUI workflow is valuable above all because it moves ultra-realistic AI video generation from paid cloud services to a free local environment. It's best suited to three types of people: self-media creators who need to batch-produce virtual influencer content, technical users who require data privacy and creative freedom, and enthusiasts who want to deeply understand how the AI video generation pipeline works.
The cost is the learning curve—sampler selection, prompt structure, reference image organization, and resolution trade-offs all have room for pitfalls. But the creator's value lies precisely in having stepped into those pitfalls in advance and fully disclosing the parameter settings and prompt techniques. When the hardware threshold drops to 8GB of VRAM and the installation process is simplified into a one-click script, all that's left is the question of whether you're willing to get your hands dirty.
One-line Summary
Run the MiniMax H3 V2 model locally for free, starting from 8GB of VRAM, and generate ultra-realistic videos through sampler and prompt techniques.
Paragraph Summary
This article introduces a local AI video generation solution shared by a Bilibili creator: using the MiniMax H3 Singularity V2 model with a ComfyUI workflow to achieve free, unlimited generation of ultra-realistic videos. The solution runs on as little as 8GB of VRAM, and the key lies in sampler selection—replacing the KSampler with the advanced custom sampler greatly improves input image fidelity, with the Oiler sampler plus Beta scheduler combination performing best. The prompt logic is counterintuitive: stacking skin details actually causes a plastic look, while a single line about "F16 aperture plus depth of field" unlocks the model's internalized natural skin generation capability. Three reference images are enough, and multiple image inputs above one million pixels slow down generation. The article also provides practical guidance on resolution trade-offs, GGUF quantized small models, and one-click installer packages.
Related articles
 Tech Frontiers
MuJoCo: An Analysis of DeepMind's Open-Source General-Purpose Physics Simulator
An in-depth analysis of Google DeepMind's open-source physics simulator MuJoCo: high-performance C++ kernel, MJCF modeling format, contact solving principles, MJX GPU acceleration, and robot reinforcement learning use cases.
 Tech Frontiers
Claude API Quick Start: The Official Quickstarts Project Collection
Anthropic's official claude-quickstarts project collection helps developers quickly build deployable apps with the Claude API. Nearly 20k stars, Python-based, great for beginners and prototyping.
 Tech Frontiers
AI Agents Connecting Directly to APIs: Which Calls Can Be Safely Allowed?
AI agents can call any API, but the real challenge is deciding which calls can be safely allowed. This article analyzes allowance decisions from three dimensions—intent matching, least privilege, and controllable impact—and argues that the control layer should sit outside the agent, combined with audit traceability to build a trustworthy API call governance mechanism.