Complete Guide to OpenAI Codex: CLI Installation, VS Code Configuration & Practical Tips
A comprehensive guide to installing, configuring, and mastering OpenAI Codex for AI-powered development workflows.
This guide covers everything you need to get started with OpenAI Codex, from CLI and VS Code installation to writing effective Agents.md files, leveraging MCP integrations for external tools, and using programmatic calls for CI/CD automation. Learn prompting best practices, session management, code review workflows, and advanced multi-agent collaboration techniques.
What is OpenAI Codex
OpenAI Codex is an AI coding agent designed for developers, available through three interfaces: CLI terminal, VS Code IDE extension, and cloud. It's powered by the latest GPT 5.1 Codex Max model, specifically trained for agentic coding scenarios, and runs reliably on Linux, macOS, and Windows.
Developers can delegate repetitive daily tasks to Codex, freeing up more energy for complex challenges like design and architecture. Codex supports multiple workflows including code review, Slack integration, and SDK programmatic calls, covering the entire software development lifecycle from planning and design to documentation maintenance.

Codex Installation & Environment Configuration
CLI Installation Steps
Codex CLI is open source. Installing via brew or NPM is recommended to get the latest version (the team may release multiple updates per week):
brew install codex
# or
npm install -g @openai/codex
After installation, run codex login to sign in with your work email. Enterprise SSO authentication is supported. Once logged in, both CLI and IDE extensions are activated.
VS Code Extension Installation & Configuration
Search for "OpenAI Codex" in the VS Code extension marketplace and look for the officially published version. Enabling auto-update is recommended to stay in sync with the latest features. The extension supports both local and cloud container modes, and can switch between chat mode, agent mode, and full access mode.
config.toml Configuration File Explained
Codex CLI uses a TOML-format configuration file with the following customization options:
- Default model & reasoning effort: Specify the model and reasoning effort level
- Sandbox mode: Defaults to workspace write, only writing to the current directory
- Approval policy: Defaults to request mode, asking the user when elevated permissions are needed
- Profiles: Create profiles like "fast" and launch with
codex -p fast - Terminal notifications: Pop-up alerts when tasks complete
- Web search: Disabled by default, can be enabled in configuration
Agents.md Writing Guide: A Project Briefing for AI
Why You Need Agents.md
Coding agents don't retain context between sessions — each launch starts with a fresh context window. Agents.md ensures that core project instructions are automatically loaded at every startup, essentially serving as a lightweight project quick-reference for the AI.
Creation & Organization
There are three ways to create one:
- Use the
/initcommand in CLI to auto-generate - Create a global agents.md in the Codex home folder
- Create a specific agents.md in the project root or subdirectories
Typical content includes: project overview and structure, build and test commands, workflow descriptions, and pointers to other task documents.
Agents.md Best Practices
Keep it concise: OpenAI's internal agents.md files are mostly under 100 lines. Too many instructions actually confuse the agent.
Unlock the agent loop: Provide the agent with verification tools (linters, tests, etc.) so it can self-check. If you find yourself repeatedly running certain check commands manually, add them to agents.md.
Update continuously: When you observe Codex making mistakes or spending too much time figuring out a command, add the correct approach to agents.md.
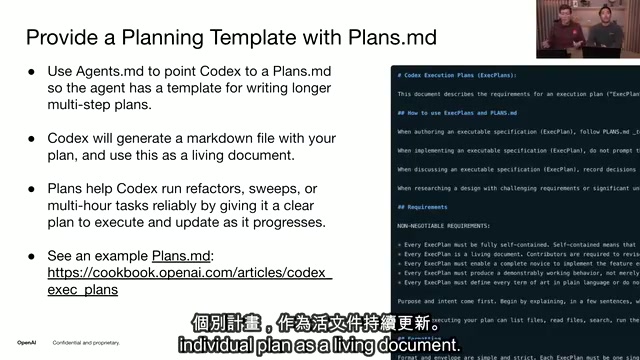
Layer task documents: Use separate files like plans.md, frontend.md, architecture.md, and have agents.md point to them for progressive discovery. OpenAI engineers have successfully completed large-scale refactoring tasks exceeding 10 hours using plans.md.
Codex Prompting Tips & Usage Best Practices
Core Principles
- Use @ mentions to anchor files: Use
@filenameto point to specific files in the codebase, preventing the agent from getting lost in irrelevant code - Start with small tasks: Beginners should test with small tasks first, gradually increasing complexity. You can also ask Codex to help break down large tasks
- Include verification steps: Explicitly request running tests, linters, and other checks in your prompts
- Paste full stack traces when debugging: Paste the stack trace directly — Codex can navigate the codebase to locate the issue
- Try open-ended questions: Such as "After implementing this feature, what do you suggest doing next?" Codex often provides valuable suggestions
Recommended Starter Tasks
- Explain the codebase and generate a README
- Paste a stack trace to fix a bug
- Expand test coverage and identify edge cases
- Refactor across multiple files, extracting common components
- Write and maintain documentation (the thing engineers least want to do but most need)
CLI & IDE Practical Tips
Image Input
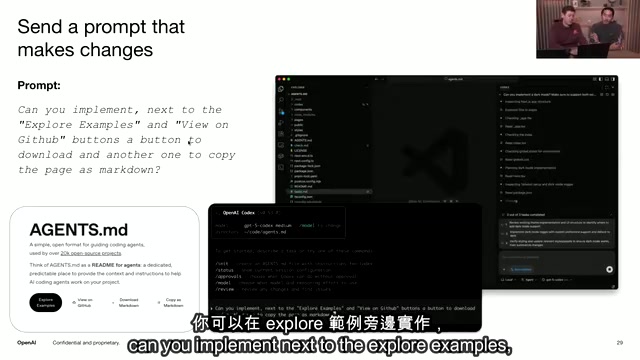
When it's difficult to describe UI elements in words, take a screenshot and paste it directly to Codex. For example, after taking a screenshot, say "change the background of these inline code blocks to orange" — Codex can understand the image content and locate the corresponding code to make changes.
Session Recovery
Use codex resume to return to a previous session and continue the conversation with all context preserved. You can also jump to a specific session via session ID. It's recommended to maintain different sessions for different tasks, such as a testing session, a frontend feature session, etc.
TODO Integration
Write TODO comments in your code, and the IDE extension will display an "Implement with Codex" button for one-click implementation.
Custom Commands
Create a prompts/ directory in the Codex home folder and add files like test.md to define custom commands. Then type /prompts in the CLI to invoke preset instructions, such as automatically generating unit tests for changed files.
Code Review
The CLI supports four review methods:
codex review --base main          # Compare against base branch
codex review --uncommitted        # Review uncommitted changes
codex review --commit abc123      # Review a specific commit
codex review --instructions "..." # Custom review rules
The model is trained to focus only on P0/P1 critical issues, avoiding excessive noise that causes developers to tune out.
MCP Integration: Connecting External Tools to Extend Capabilities
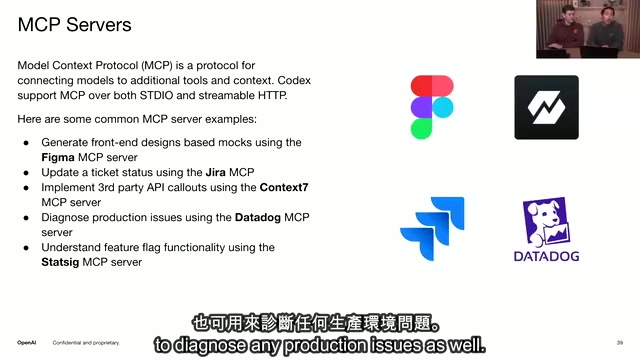
Codex supports connecting to external tools via MCP (Model Context Protocol), supporting both standard I/O and HTTP transport.
Common MCP Servers
- Figma MCP: Generate frontend code from design mockups
- Jira/Linear MCP: Read tickets, implement code, update status
- Context7 MCP: Fetch latest documentation for third-party frameworks
- Datadog MCP: Diagnose production environment issues
MCP Configuration
codex mcp add --name "context7" --command "npx context7-mcp"
Once added, it's automatically written to config.toml. You can add instructions in the global agents.md like "When implementing new features, always search for relevant documentation in Context7 first," allowing Codex to call it automatically without manual specification each time.
Advanced Use Cases: Programmatic Calls & Automation
Structured Output (Headless Mode)
Use codex exec to enter headless mode, combined with JSON Schema for structured output:
codex exec "Analyze code quality issues" --output-schema codex-output-schema.json
The output is standard JSON containing file count, issue count, score, file location and severity level for each issue, etc., which can be directly integrated into CI/CD pipelines.
Collaboration with Agents SDK
Codex can be embedded as an MCP server in the OpenAI Agents SDK to build multi-agent collaboration workflows: frontend agent, backend agent, and PM agent each handle their responsibilities, coordinating through handoff mechanisms and automatically generating execution trace logs.
Real-World Application Scenarios
- Auto-fix CI: Automatically trigger Codex to fix and submit a PR when tests fail
- Automatic issue labeling: Automatically classify and tag new issues when created
- Local code review: Build custom review workflows for non-GitHub SCM systems
- Release automation: Automatically generate changelogs and READMEs with each release
Conclusion
Codex is iterating rapidly, with Windows support and long-running tasks being the biggest recent feature updates. To fully leverage Codex's capabilities, the key is: write a good agents.md to establish project context, use MCP to extend capability boundaries, and achieve automated workflows through custom commands and structured output. Start with small tasks and gradually integrate Codex into every aspect of your development workflow.
Related articles
Vibe Coding in Practice: A Junior Student Uses Cursor to Build a Multi-Agent System with 51 AI Officials Based on the Three Departments and Six Ministries Framework
A junior student uses Cursor and Vibe Coding to build a multi-agent system with 51 AI officials modeled on China's Three Departments and Six Ministries, featuring task distribution, approval workflows, and Token cost visualization.
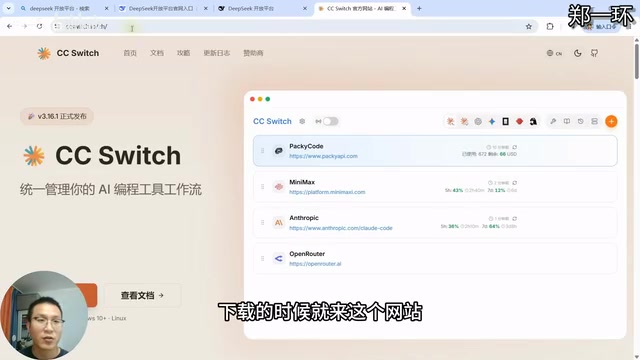
How to Connect Codex to DeepSeek Models: Free Switching via CC Switch
Learn how to connect OpenAI Codex to DeepSeek models via CC Switch, enabling free switching between DeepSeek and GPT with complete setup and routing guide.
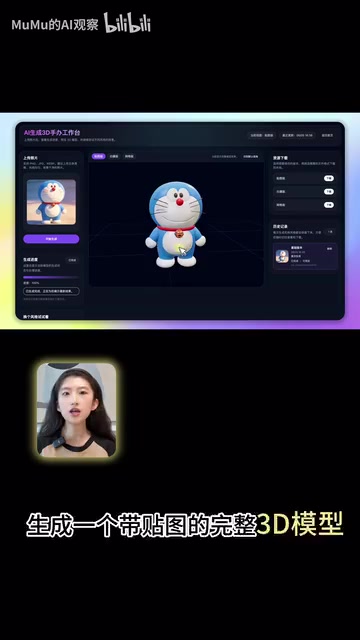
AI Coding Deployment Guide: A Complete Hands-On Workflow from Local Demo to Live Website
Most AI Coding tutorials stop at local demos. This guide walks through 8 key steps to deploy an AI-powered 3D figurine website from Codex coding to live server deployment.