DeepSeek Harness from Beginner to Practice: Installation and Plugins Explained
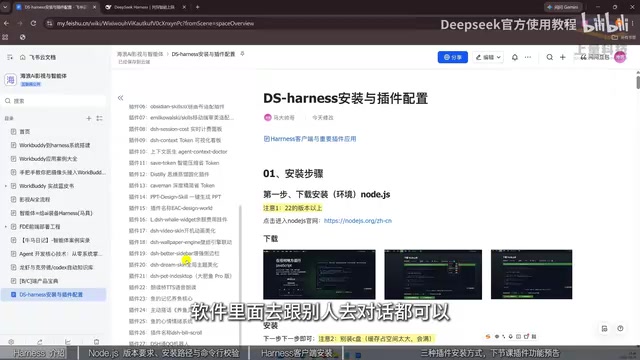
DeepSeek Harness getting-started path: install NodeJS, install the client, install plugins three ways.
Based on a Bilibili tutorial, this article outlines how to get started with DeepSeek Harness, a plugin-based AI agent runtime platform. It explains that the core value lies in taking AI from chatting to executing—writing code, processing files, calling tools, and building Agent workflows—with the plugin architecture driving capability expansion. Installation has two steps: install the NodeJS environment (version 22+ recommended, on the D drive, verified with node -v), then install the Harness client on the D drive. The client can add local folders for read/write access, filling the web version's gap. Plugins can be installed three ways: letting the AI install them in chat (consumes credits), the plugin marketplace (credit-free), and the command line. The article also covers application directions like vision plugins and knowledge base management, plus getting-started advice.
DeepSeek Harness is an AI agent runtime platform that takes AI from chatting to executing: writing code, processing files, calling tools, and building Agent workflows. Based on a Bilibili tutorial video, this article lays out a practical path to get started, from installation to the plugin ecosystem.
Why DeepSeek Harness Is Worth Your Attention
According to observations from the Bilibili creator in the tutorial, the DeepSeekAd model itself offers strong value for money, but previously lacked a desktop client. With the release of the Harness client, pairing it with plugins can significantly expand its capability boundaries. Its core differentiator: it doesn't just let AI chat with you—it gives AI genuine task-execution ability: writing code, processing files, calling tools, automating office work, and even building your own AI Agent workflows.
Even more important is the plugin-based architecture. This means strong extensibility and customizability—you can build a truly personal AI assistant tailored to your needs.
Step 1: Install the NodeJS Environment
Installation has two steps: first install the NodeJS environment, then install the Harness client. Many AI tools are built on NodeJS—including tools like CloudCodex, which also require NodeJS first.
Key points: download from the official NodeJS website, which auto-detects your system. On version, the creator recommends choosing version 22 or above, not below 22. You can download either the ZIP or the MSI; the MSI can be installed with a direct click, while the ZIP needs to be extracted. During installation, change the path to the D drive to avoid taking up C drive space and to prevent cache files from filling up the C drive.
After installation, verify: open the command line (type CMD if you can't find it) and enter node -v (note the space between node and -v). If a version number appears and is not lower than required, the environment is set up correctly.
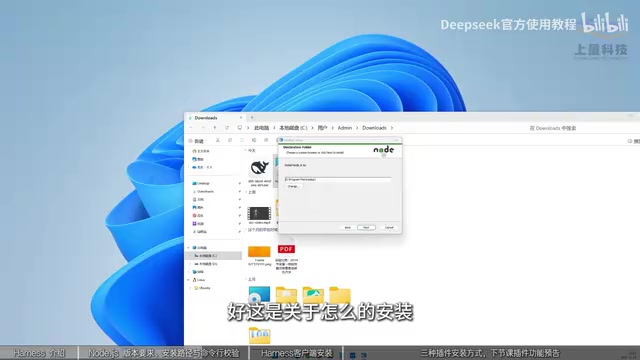
NodeJS is a JavaScript runtime environment based on the Chrome V8 engine that lets JavaScript run directly on the operating system outside the browser. Many modern AI tools, CLI clients, and plugin systems rely on NodeJS as their underlying runtime, which is why it's often a prerequisite for installing such tools. Tools like CloudCodex mentioned in the article also require NodeJS to be configured first. On version numbers, even-numbered versions (such as 22) are Long-Term Support (LTS) releases with better stability, while odd-numbered versions are better suited for trying new features. Choosing the MSI during installation automatically configures environment variables, whereas the ZIP package requires manual setup—making the MSI easier for beginners.
Step 2: Install the Harness Client
Click the link to go to the download page and select the client file for your system. The creator uses Windows as an example, downloading the installer, right-clicking to open it, and again recommending the D drive for the install location. Click Install Now, then Finish when done, and you can open the DeepSeek Harness interface.
The interface resembles a web-based chat window, but with one key difference: you can add local folders. Once added, it can read, modify, and save the contents of that folder—something the online web version cannot do. The interface also lets you select among several DeepSeek models.
The "add local folders" capability mentioned in the article rests on the client being granted read/write access to the local file system. Web-based chat windows run in the browser's sandbox environment and, for security reasons, cannot directly access files on the user's disk; a desktop client, as a native application, can read, modify, and save contents within a specified folder once the user authorizes it. When using it, only add project folders that the AI genuinely needs to operate on—avoid exposing directories containing sensitive information to the model wholesale—and pay attention to change records after the AI modifies files, rolling back with version control tools when necessary.
Plugins Are the Real Capability Amplifier
Harness is based on Codex's plugin architecture, and its real strength lies in plugin integration. The creator lists three installation methods in the tutorial:
Method 1: Let the AI Install It Itself
Once you know the plugin name, simply send its GitHub link to the AI in the chat window and let it install the plugin itself. This method consumes Tokens and credits.
A Token is the basic unit of measurement for how large language models process text; models bill by the number of input and output Tokens. That's why "letting the AI install plugins itself" consumes more Tokens and credits—the AI needs to read the plugin repository's documentation, understand the installation steps, and execute commands, and all the context generated throughout this process may count toward consumption. By contrast, installing from the plugin marketplace simply downloads and enables an already-packaged plugin without model inference, so it's credit-free. Understanding this distinction helps you choose the more economical installation method based on plugin complexity.
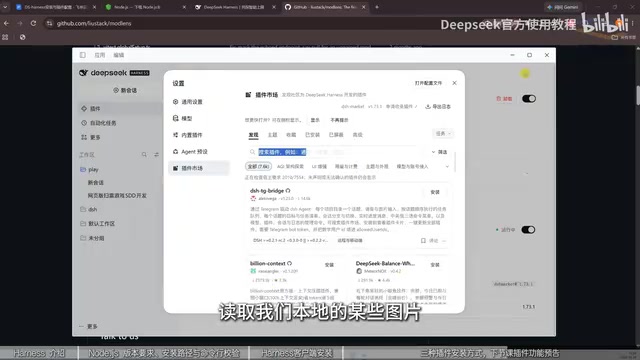
Method 2: Plugin Marketplace Installation (Credit-Free)
On the plugins page, click Add Plugin, enter the plugin name (e.g., DSH Market), click Install, and once detected, click Launch Now to browse the plugin marketplace. The marketplace entry is under "More" → "Settings," where you can search and filter. It may contain tens of thousands of plugins, with recommendations and descriptions—such as a little goldfish widget or a desktop pet—installed with a single click.
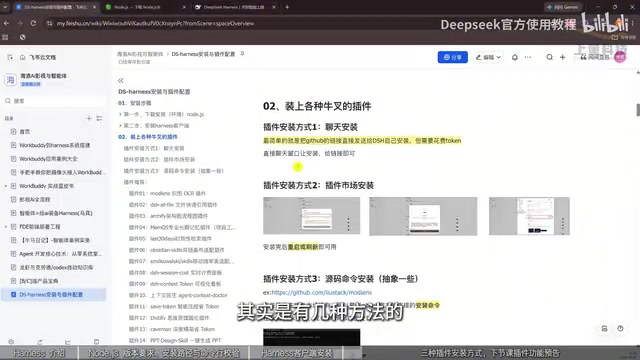
Method 3: Command-Line Installation
Suited to users with some technical background. Take "the most powerful DeepSeek Harness vision plugin on the internet" as an example: native DeepSeek cannot read local images or recognize image content, but with this plugin installed it can identify people, clothing, and other details in images. To install, find the "option one installation" section on the plugin's GitHub page, copy the code into the command line, and run it, then wait for installation to finish. The creator also notes that this method feels abstract to some viewers and is less convenient than the first two.
Command-line installation usually means running an installation script or package-manager command provided in the plugin repository within a terminal. The "option one installation" section mentioned in the original article is generally located in the installation instructions of a GitHub project's README, where the author lists multiple installation methods in recommended order. Before running such commands, confirm the code source is trustworthy and avoid running scripts of unknown origin; when copying commands, be careful not to omit parameters or line breaks. After installation, you usually need to restart the client or confirm on the plugins page that the plugin has loaded, and some plugins additionally require configuring an API Key or model permissions to take effect.
Application Possibilities Mentioned in the Tutorial
The creator lists several demo directions: having Harness read content on Bilibili and feed it into a knowledge base for knowledge management; generating videos; organizing knowledge directories; "raising fish"; and even connecting to chat apps to converse with others. These scenarios show that combining plugins greatly expands the capability boundary.
Getting-Started Advice
If you only want to seriously learn one AI Agent tool, Harness deserves a place on your list. The path is clear: first install NodeJS (version 22 or above, on the D drive, verified with node -v), then install the Harness client (choose the right system, install on the D drive), then pick plugins from the marketplace—and whenever you're stuck, just hand the GitHub link to the AI and let it install. The creator also plans to cover the installation methods and business uses of common plugins in follow-up content.
This article is compiled from a Bilibili tutorial video; please refer to the latest official information for specific download links, interfaces, and plugin names.
One-line Summary
DeepSeek Harness getting-started path: install NodeJS, install the client, install plugins three ways.
Paragraph Summary
Based on a Bilibili tutorial video, this article lays out the getting-started path for DeepSeek Harness, a plugin-based AI agent runtime platform. It notes that its core value is taking AI from chatting to executing—writing code, processing files, calling tools, and building Agent workflows—with the plugin architecture being the key to capability expansion. Installation has two steps: first install the NodeJS environment (version 22 or above recommended, on the D drive, verified with node -v), then install the Harness client (choose the right system, install on the D drive). The client can add local folders for reading and writing, filling the web version's gap. Plugins can be installed three ways: letting the AI install them in chat (consumes credits), installing from the plugin marketplace (credit-free), and command-line installation. The article also lists application directions such as vision plugins and knowledge base management, plus getting-started advice.
Related articles
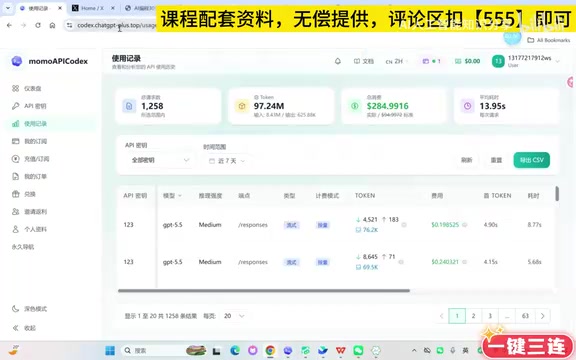
Codex Getting Started Tutorial: From Installation and Deployment to API Relay Configuration in Practice
A detailed Codex tutorial: bypass the credit card and phone number barriers of official login, complete registration, top-up, and key configuration through an API relay station, with a hands-on demonstration of editing the config.toml file on Windows—deploy in ten minutes.

DeepSeek Harness Tutorial: From Installation to Plugins — Building an AI Super Agent
DeepSeek Harness tutorial: detailed guide to Node.js installation, Harness client setup, and three plugin installation methods—self-install via AI, plugin marketplace, and command line—to turn AI into a super Agent that handles local files and complex tasks.

Slavic Polytheist Art: Marian Wawrzeniecki's Neopagan Paintings Rediscovered
Explore Polish painter Marian Wawrzeniecki's neopagan paintings (1891–1923), how Slavic polytheist art was rediscovered, and why this marginal art-history topic drew attention on Hacker News.