DeepSeek Harness in Practice: Building an AI Agent and Plugin Ecosystem from Scratch
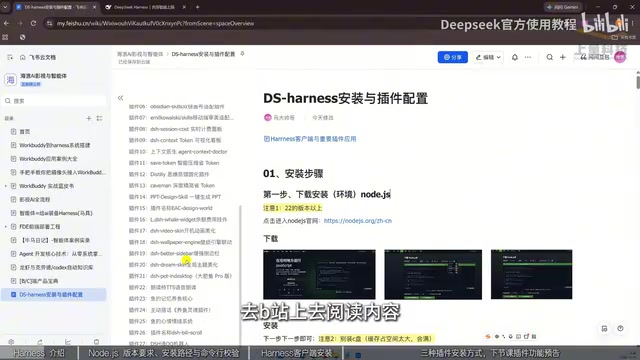
Zero-basics tutorial: install Node.js and the Harness client, then use three methods to install plugins and extend AI agent capabilities.
The article targets complete beginners, explaining how the DeepSeek Harness client upgrades AI from a web chat window into an agent that can operate on local files. Based on the Codex plugin architecture, it inherits the existing plugin ecosystem for reading web pages, managing knowledge bases, generating videos, and connecting to chat apps. Installation has two steps: install Node.js 22+ (avoiding the C drive), then install the Harness client and add local folders for read/write access. Three plugin install methods: conversational installation (costs Tokens and credits), plugin marketplace (free, rich selection), and command line (follow GitHub instructions, higher barrier). A visual plugin example shows native models can't read images and plugins fill the gap; beginners are advised to ask DeepSeek for a popular plugin list first.
After the release of the DeepSeek Harness client, AI agents are no longer exclusive to developers—ordinary users can now extend their capabilities through plugins, letting AI read web pages, manage knowledge bases, generate videos, and even connect to chat apps. This tutorial is aimed at complete beginners, covering everything from installation and configuration to the three ways of installing plugins, helping you quickly build an understanding of how agents work.
What Harness Is: From Chat Window to Local Agent
According to a hands-on share from a Bilibili creator, after DeepSeekAd released the Harness client, its capability boundaries were greatly expanded when paired with excellent plugins. It looks similar to the web-based chat window, but the key difference is that you can add local folders—the AI can read and modify folder contents and save files locally, which the online version cannot do. For model selection, you can switch directly between several DeepSeek models within the client.
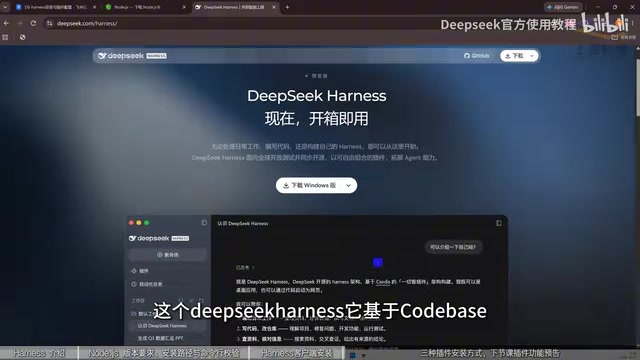
What truly makes Harness powerful is its plugin architecture. The creator points out that DeepSeek Harness is based on Codex's plugin architecture, so it can inherit a large existing plugin ecosystem. Once plugins are installed, you can have Harness read content on Bilibili and import it into a knowledge base for management, generate videos, organize a knowledge directory, or even connect to chat apps to converse with others.
The Codex plugin architecture refers to a software design pattern centered on a "host program + external extensions": the host handles model invocation, conversation management, and tool scheduling, while plugins register new tools or capabilities (such as reading and writing files, calling external APIs, or parsing images) as independent modules. Because plugins follow a unified interface specification, any plugin compatible with this architecture can be loaded directly—this is exactly why Harness can "inherit a large existing plugin ecosystem." For users, this means you don't have to wait for the official team to develop features one by one; community-contributed plugins can extend capabilities. For developers, it means implementing the interface according to the spec is all it takes for your tool to be called by Harness. Understanding this helps clarify why plugin installation methods are diverse and their sources scattered, and also explains why plugin quality varies and requires careful selection.
Installation Prep: Node.js Environment Comes First
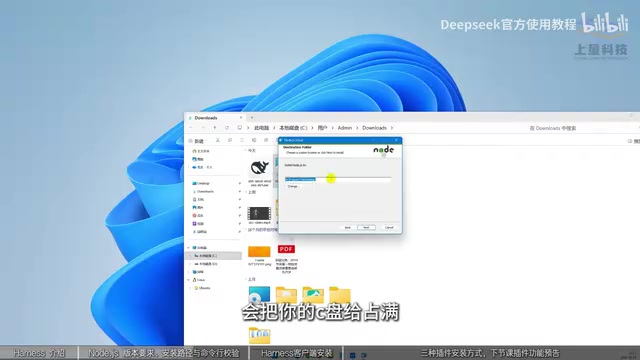
Installation has two steps. The first is installing the Node.js environment, because many AI tools (including CloudCodex and others) run on Node.js. The creator recommends choosing version 22 or above, not lower than 22. When downloading from the official website, the installer package automatically adapts to your system; Windows users can choose the MSI (click to install directly) or the zip (requires extraction).
There's a practical reminder about the installation path: don't install it on the C drive. There are two reasons—the installation itself takes up space, and it generates a large number of cache files during operation, which can easily fill up the C drive. It's recommended to change to the D drive and click next all the way through. After installation, enter node -v in the command line (note the space between node and -v) to verify; if a version number appears and is not lower than 20, the environment is ready.
Node.js is a JavaScript runtime environment based on the Chrome V8 engine that lets JavaScript run directly on the operating system without a browser. A large number of AI command-line tools, plugin hosts, and local server programs are written in JavaScript/TypeScript, so Node.js must be installed first before they can start. The "22" in the version number refers to the major version; the larger the number, the newer the features—some tools depend on newer language features or APIs, which is why the author specifies a minimum version requirement, and going below it may cause errors or installation failures. After installation, checking the version with node -v is the most direct way to confirm that environment variables are configured correctly and the command is recognized by the system. npm (the Node package manager) is installed alongside Node.js and is often needed later when installing plugins via the command line.
Installing the Harness Client: Path and Folder Permissions
The second step is installing the Harness client. Go to the official website page and choose the installation file for your system. Windows users right-click to open it after downloading, and it's likewise recommended to install to the D drive; click Install Now and open the interface when done.
The client interface is similar to the web chat window, but adds a local folder function. After adding a folder, Harness can read and modify that folder's contents and save files into it. This capability is the foundation for later tasks like knowledge base management and file organization.
Three Ways to Install Plugins
Plugins are the core of Harness's capability expansion. The creator summarizes three installation methods suited to different scenarios.
First: conversational installation. When you know the plugin name and GitHub link, just send the link to it in the chat window and let it install itself. The downside is that it consumes Tokens and credits.
Second: plugin marketplace installation. Click to add a plugin in the interface, enter the plugin name (for example, DSH market), click install and launch, and you can enter the plugin marketplace. Under "More" in settings you'll find the plugin marketplace you just installed, which contains tens of thousands of plugins to search and filter, along with recommendation slots (such as the little whale widget or desktop pets)—one click installs them. This method doesn't consume credits.
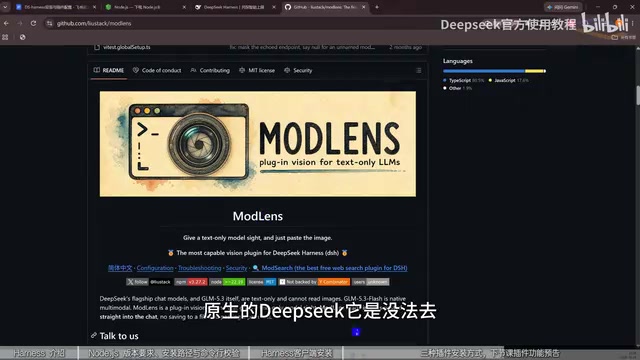
Third: command-line installation. Take the plugin on GitHub known as "the strongest DeepSeek Harness visual plugin on the internet"—native DeepSeek cannot read local images or recognize image content, but with this plugin installed it can identify people, clothing, and other information in images. To install, find the install with command at the bottom of the plugin page and copy the code into the command line to execute. The creator also notes that this method feels abstract to some beginners and isn't as intuitive as the first two.
Tokens and credits are key to understanding the differences among the three installation methods. A Token is the basic unit the model uses to process text; the more Tokens a conversation consumes, the higher the cost. Credits are a virtual unit within the client used to offset model invocation quota. The first method, "conversational installation," requires the model to understand your instructions, plan steps, and call tools to perform the installation—the entire process consumes model inference quota, so it deducts Tokens and credits. The second method, plugin marketplace installation, is handled directly by the client's built-in plugin manager for downloading and registration, bypassing model inference, so it's free. The third method, command-line installation, is executed manually by the user in the terminal, also bypassing the model; it has the lowest cost but requires the user to understand commands and use the terminal. Choosing among them is essentially a trade-off between "convenience" and "saving quota."
Visual plugins are necessary because native large language models can only process text input and cannot directly "see" local image files. Visual plugins typically do two things: first, they call a multimodal model with image understanding capabilities or a local recognition library to convert the image into a text description; second, they return that description as context to the main model so it can answer questions like "who is in the picture" or "what are they wearing." This also shows that plugins are not independent intelligence but rather fill in input channels or tool capabilities for the host. Similarly, plugins for reading web pages, managing knowledge bases, generating videos, and connecting to chat apps all extend Harness's boundaries by adding new input sources or output channels. When using such plugins, pay attention to image privacy and local file permissions, and avoid uploading sensitive content to external services.
Suggested Learning Path for Beginners
If you don't know what plugins are available, the creator suggests simply asking DeepSeek for a list of popular plugins and then picking the ones you need. This course will later cover supplementary planning operations, command-line operations, work modes, and permission settings, and will use hands-on cases (such as making a mini-game) to help you understand an agent's task execution flow. For beginners who want to boost efficiency and explore automation applications, building foundational understanding first and then gradually getting hands-on is the more reliable path.
One-line Summary
A zero-basics tutorial: install Node.js and the Harness client, then use three methods to install plugins and extend your AI agent's capabilities.
Paragraph Summary
The article is aimed at complete beginners and explains how the DeepSeek Harness client upgrades AI from a web chat window into an agent that can operate on local files. Based on the Codex plugin architecture, it can inherit the existing plugin ecosystem to enable extensions such as reading web pages, managing knowledge bases, generating videos, and connecting to chat apps. Installation has two steps: first install Node.js version 22 or above and avoid installing on the C drive, then install the Harness client and add local folders to gain read/write permissions. There are three ways to install plugins: conversational installation consumes Tokens and credits, plugin marketplace installation is free with a rich selection, and command-line installation suits following GitHub instructions but has a higher barrier to entry. The article uses a visual plugin as an example to show that native models cannot read images and that plugins can fill the gap, and suggests beginners ask DeepSeek for a list of popular plugins before choosing which to use.
Related articles
 Tech Frontiers
MuJoCo: An Analysis of DeepMind's Open-Source General-Purpose Physics Simulator
An in-depth analysis of Google DeepMind's open-source physics simulator MuJoCo: high-performance C++ kernel, MJCF modeling format, contact solving principles, MJX GPU acceleration, and robot reinforcement learning use cases.
 Tech Frontiers
Claude API Quick Start: The Official Quickstarts Project Collection
Anthropic's official claude-quickstarts project collection helps developers quickly build deployable apps with the Claude API. Nearly 20k stars, Python-based, great for beginners and prototyping.
 Tech Frontiers
AI Agents Connecting Directly to APIs: Which Calls Can Be Safely Allowed?
AI agents can call any API, but the real challenge is deciding which calls can be safely allowed. This article analyzes allowance decisions from three dimensions—intent matching, least privilege, and controllable impact—and argues that the control layer should sit outside the agent, combined with audit traceability to build a trustworthy API call governance mechanism.