Claude Agent SDK Python in Practice: Custom Tools, Multi-Turn Conversations & Hooks Security Control
Claude Agent SDK gives developers four levels of control for building custom AI Agents on Claude Code.
Anthropic renamed the Claude Code SDK to Claude Agent SDK, offering Python and TypeScript versions that let developers build custom AI Agents on top of Claude Code's Agent Harness. The SDK's core features span four levels: Query for basic queries, custom tool integration via @tool decorators and MCP Servers, CloudSdkClient for multi-turn conversation management, and a Hooks mechanism for security intervention before and after tool execution. The project is currently in its early stages under the MIT open-source license.
Anthropic recently renamed the Claude Code SDK to Claude Agent SDK, giving developers the ability to build custom AI Agents on top of Claude Code's Agent Harness. Based on a comprehensive 12-minute walkthrough video, this article systematically covers the core concepts and practical usage of the Claude Agent SDK (Python version) to help you get started quickly.
Background: Agent Harness and the Significance of the Rename The Claude Agent SDK's predecessor, the Claude Code SDK, originated from Anthropic's Claude Code product — a command-line AI coding assistant for developers. The "Agent Harness" refers to the complete Agent execution framework already implemented within Claude Code, including task planning, tool invocation, result feedback, and other closed-loop mechanisms. The rename to Claude Agent SDK is more than just a branding change — it signals Anthropic's elevation of this framework from "an internal implementation of a coding assistant" to a "general-purpose Agent building platform." Developers can layer their own business logic on top of this mature execution infrastructure without building an Agent loop from scratch.
Why Do You Need the Claude Agent SDK?
If you're just using Claude Code itself, the default interaction mode is sufficient. But when you need more fine-grained control — such as injecting custom tools, integrating MCP services, or inserting security checks before and after tool execution — that's when you need the Claude Agent SDK.
In short, the Claude Agent SDK enables you to:
- Inject custom logic into the Agent's execution loop
- Provide custom tools to Claude Code in the form of MCP Servers
- Intervene before and after tool execution through the Hooks mechanism
- Maintain multi-turn conversation Sessions for continuous interaction
The SDK is available in both TypeScript and Python versions. This article focuses on the Python SDK. Its core API includes: Functions (query, tools, hooks) and Classes (CloudSdkClient, CloudAgentOptions).
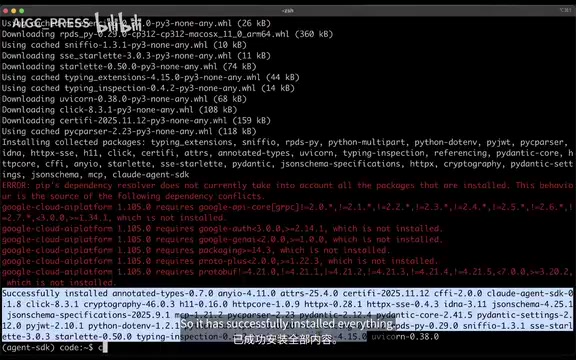
Environment Setup and Installation
Before getting started, complete the following preparations:
# Create project directory and virtual environment
mkdir cloud-agent-sdk-demo && cd cloud-agent-sdk-demo
python3.12 -m venv agent-sdk
source agent-sdk/bin/activate

# Install the SDK
pip install cloud-agent-sdk

# Set API Key
export ANTHROPIC_API_KEY="your-api-key-here"
You can create an API Key on the API Keys page at console.anthropic.com.
Core Feature 1: Query — Basic Queries
The simplest way to use the SDK is to call the query function directly, which is equivalent to sending a one-shot request to Claude Code:
from cloud_agent_sdk import query

result = query(prompt="Hello Cloud")

for message in result.messages:
    if message.role == "assistant":
        print(message.content)
The model will return a response like "Hello! How can I help you today? Whether you need help with coding, file management, debugging, or anything else, I'm here for you."
You can also pass in configurations such as system prompts via CloudAgentOptions:
from cloud_agent_sdk import query, CloudAgentOptions

options = CloudAgentOptions(system_prompt="You are a helpful assistant")
result = query(prompt="Hello", options=options)
This provides flexible parameter control for each query.
Core Feature 2: Custom Tools Integration
One of the most powerful features of the Claude Agent SDK is the ability to define custom tools and provide them to the Agent as MCP Servers. Unlike the typical approach of creating external MCP Servers, you can define tool functions directly in your code.
What is MCP? MCP (Model Context Protocol) is an open protocol released by Anthropic in late 2024, designed to standardize communication between AI models and external tools and data sources. It draws inspiration from LSP (Language Server Protocol) in the editor ecosystem — just as LSP unified communication between editors and language services, MCP unifies communication between AI models and tool services. An MCP Server can expose three types of capabilities: Tools, Resources, and Prompts. The
create_sdk_mcp_serverfunction in the SDK eliminates the need to manually implement the full MCP protocol layer. You simply define your tool functions, and the SDK automatically handles serialization, capability declarations, and message routing, significantly lowering the integration barrier.
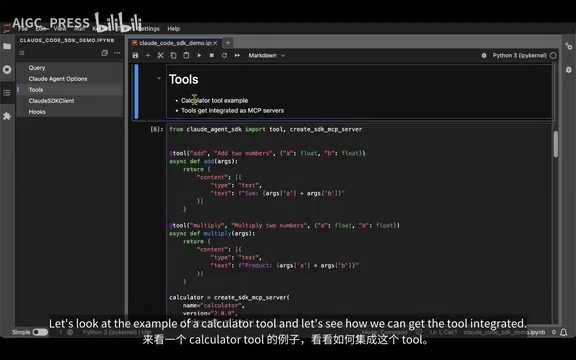
Here's an example using a calculator tool:
from cloud_agent_sdk import tool, create_sdk_mcp_server

@tool
async def add(a: float, b: float):
    """Add two numbers"""
    return {"type": "text", "text": str(a + b)}

@tool
async def multiply(a: float, b: float):
    """Multiply two numbers"""
    return {"type": "text", "text": str(a * b)}

# Create MCP Server
calculator_server = create_sdk_mcp_server(
    name="calculator",
    version="1.0",
    tools=[add, multiply]
)
Key steps explained:
- Use the
@tooldecorator to mark functions as custom tools - Async functions accept typed parameters and return a dictionary containing
typeandtext - Use
create_sdk_mcp_serverto bundle multiple tools into a single MCP Server
Once the MCP Server is created, pass it into CloudAgentOptions:
options = CloudAgentOptions(
    mcp_servers={"calculator": calculator_server}
)
result = query(prompt="What is 3 times 2?", options=options)
When you run this, you can see that the Agent uses the Claude Sonnet 4.5 model, correctly invokes the multiply tool, and returns the result 6. The response also includes complete metadata information.
Core Feature 3: CloudSdkClient — Multi-Turn Conversations
The query function is suitable for one-shot interactions, but if you need to maintain multi-turn conversation Sessions — similar to having an ongoing conversation with a chatbot — you'll need the CloudSdkClient class.
Why Does the SDK Use async/await Extensively? The execution process of an AI Agent is inherently I/O-intensive: calling LLM APIs requires waiting for network responses, and tool execution may involve file I/O or external service calls. Python's
asyncioevent loop allows switching to other tasks while waiting for I/O, avoiding thread blocking. Theasync with CloudSdkClient()async context manager ensures proper initialization and release of connection resources. For developers unfamiliar with async programming, think ofawaitas "pause here and wait for the result, but don't block other tasks from running" — this is a foundational capability for building high-performance Agent applications.

from cloud_agent_sdk import CloudSdkClient, tool, create_sdk_mcp_server

@tool
async def greet_user(name: str):
    """Greet a user by name"""
    return {"type": "text", "text": f"Hello, {name}!"}

my_tools_server = create_sdk_mcp_server(
    name="my_tools",
    version="1.0",
    tools=[greet_user]
)

options = CloudAgentOptions(
    mcp_servers={"my_tools": my_tools_server}
)

async with CloudSdkClient(options=options) as client:
    result = await client.query("Greet Alice")
    # You can continue sending more queries within the same session
    result2 = await client.query("Now greet Bob")
After creating a client object using the async with context manager, you can call client.query() multiple times within the same session. The Agent remembers the previous conversation context, enabling true multi-turn interaction. From the returned results, you can see the Agent first says "I'll use the MCP Greet Tools to greet Alice," then actually invokes the tool and returns "Hello, Alice!"
Core Feature 4: Hooks — Execution Intervention Mechanism
Hooks are the most security-critical feature in the Claude Agent SDK. Within the Agent's execution loop, custom inspection logic can be inserted before and after tool invocations.
AI Safety and the Industry Context of Hooks The problem that the Hooks mechanism addresses is known as "Tool Misuse" risk in the AI safety domain. As AI Agents gain increasing system privileges, preventing models from being tricked by malicious prompts into executing destructive operations becomes a critical challenge. This type of attack is called "Prompt Injection" — attackers can craft special inputs to make an Agent execute
rm -rf /or leak sensitive files. Thepre_tool_useinterception point essentially inserts a "Human-in-the-loop Checkpoint" into the Agent's execution chain, closely aligning with the "Principle of Least Privilege" recommended in OWASP's "Top 10 Security Risks for LLM Applications." In production environments, organizations typically implement multiple layers of protection at this level, including operation audit logs, sensitive path whitelists, and dangerous command regex matching.
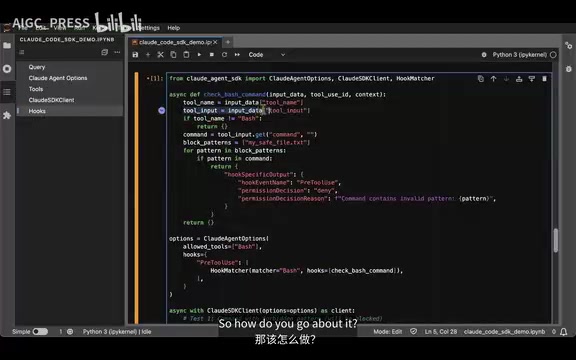
A typical security scenario: blocking dangerous Bash command execution.
from cloud_agent_sdk import HookMatcher

async def check_bash_command(event):
    """Check if a bash command contains dangerous operations"""
    if event.tool_name == "bash":
        dangerous_pattern = "mysavefile.txt"
        if dangerous_pattern in event.command:
            event.tool_use_permission = "deny"
            event.reason = f"Command contains invalid pattern: {dangerous_pattern}"

options = CloudAgentOptions(
    hooks={
        "pre_tool_use": HookMatcher(
            match="bash",  # Exact match on tool name
            hook=check_bash_command
        )
    }
)
How Hooks work:
pre_tool_use: Triggers before tool execution, allowing you to intercept dangerous operationspost_tool_use: Triggers after tool execution, allowing you to audit or modify resultsHookMatcher'smatchparameter performs exact matching on the tool name- Setting
tool_use_permission = "deny"directly rejects execution
This mechanism is critical for security protection in production environments. You can prevent the Agent from executing fatal commands like rm -rf, or protect specific files from being deleted or modified.
Summary and Outlook
The Claude Agent SDK provides developers with four levels of control:
| Feature | Use Case | Complexity |
|---|---|---|
| Query | One-shot queries | ⭐ |
| Tools + MCP Server | Extending Agent capabilities | ⭐⭐ |
| CloudSdkClient | Multi-turn conversation management | ⭐⭐⭐ |
| Hooks | Security control and execution intervention | ⭐⭐⭐ |
One detail worth noting: the project is still in its early stages and is released under the MIT open-source license. As the community gets involved and Anthropic continues to invest, the SDK's features and ecosystem will expand rapidly. For developers looking to build customized AI Agents on top of Claude Code, now is the perfect time to get started.
Related articles
 Tutorials
Cursor + Codex Dual-IDE Collaboration: A Practical Methodology for Open-Source Project Customization
A complete methodology for open-source project customization based on real-world experience, detailing the Cursor+Codex dual-IDE workflow, seven-stage process, MVP validation, and AI source code reading techniques.
 Tutorials
Cursor Multi-Agent in Practice: Building a Full-Stack Next.js Blog in 50 Minutes
Build a full-stack blog in 50 minutes using Cursor IDE's multi-Agent mode with Next.js, Clerk auth, and Supabase. Learn the 4-phase AI Agent workflow and key integration pitfalls.
 Tutorials
Building an AI Software Factory from Scratch: A Cursor Engineer's Hands-On Experience with Multi-Agent Collaboration
Cursor engineer Eric shares practical insights on building an AI software factory: automation levels, guardrail design, parallel Agent management, and scaling to 1000+ Agents for 24/7 development.