OpenAI Codex Installation & Configuration Guide: A Complete Breakdown of Features and Usage Tips

A complete guide to installing, configuring, and mastering OpenAI Codex's core features.
This article systematically covers OpenAI Codex's installation, configuration, and core features. Codex comes in four forms — CLI, web, IDE plugin, and standalone App — with the App form officially recommended. Key advantages include multi-task parallel execution, a sandbox security mechanism, and an excellent frontend development experience. The article also compares Codex with Cursor and Claude Code, advising developers to choose flexibly based on frontend or backend needs.
Introduction: Why Codex Is the New Darling of AI Programming
The AI programming tool space continues to heat up. On Bilibili (China's YouTube equivalent), a flood of beginner-friendly tutorials on OpenAI Codex have appeared, with multiple content creators (such as Tuling Academy and AI Large Model Tech) releasing complete tutorial series from scratch — a testament to just how popular this tool has become.
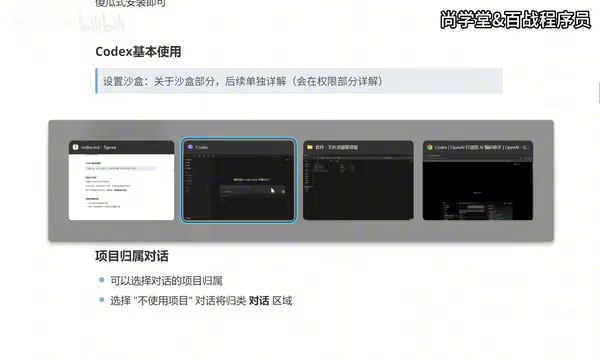
Codex currently comes in four forms: CLI terminal, web interface, IDE plugin, and standalone App. Many developers used to integrate Codex into editors like VS Code via plugins, but the official recommendation now is to use the App form — it offers the most complete feature set and the best experience among all four.

Alongside Cursor and Claude Code, Codex is considered one of the "Big Three" of AI programming tools today. With lower API pricing, no rate-limiting or account-banning headaches, and an outstanding frontend development experience, Codex is attracting a growing number of developers. Based on hands-on experience shared by Bilibili creators, Codex pays more attention to UI details, color schemes, and animations, making it particularly well-suited for frontend and app development. Claude Code, on the other hand, excels in logical correctness and code structure, which backend developers may prefer. Of course, each of these three tools has its strengths — developers are encouraged to master all of them and switch flexibly based on project needs.
Prerequisites: Three Must-Have Software Tools
Before installing Codex, you need to set up three prerequisite tools.
Git — The Foundation of Collaborative Development
Git is the core tool for version control and team collaboration. It's essential regardless of which AI programming tool you use (including Hermes Agent, Claude Code, etc.). Installation is straightforward — just download it from the official website and click "Next" all the way through.
Node.js — Dependency Management Tool
Node.js handles the installation of various dependency packages your project needs. Codex doesn't have strict Node.js version requirements, so simply install the latest version. After installation, you can verify it by pressing Win+R to open the Run dialog, typing cmd, and then running node -v — seeing a version number means everything is good to go.
VS Code — Your Code Editing Companion
While VS Code isn't strictly required, it's highly recommended. The reason: Codex itself doesn't provide code editing capabilities. When AI-generated code needs fine-tuning, you still need a traditional editor. VS Code integrates well with Codex, and the two work even better together. After installation, if you want to switch to a different language interface, simply search for the appropriate language pack in the Extensions Marketplace.
Codex Installation Process and Basic Usage
Download and Installation Steps
Installing Codex is equally simple: go to the official website, download the installer for your system (Windows/Mac), and it will connect to the Microsoft Store to download and install approximately 400MB — all automatically. One important note: the entire installation and usage process requires a VPN/proxy connection. Many users get stuck at the startup screen precisely because of network issues.
Creating and Managing Workspaces
One of Codex's highlights is its support for multiple workspace management. You can create multiple folders and drag them directly into the Codex side panel to set them as workspaces. For example, you could create Codex-Shop and Codex-List project folders, then freely switch between projects in the chat window — AI-generated code will automatically be associated with the corresponding project.
Multi-Task Parallelism — Codex's Killer Feature
One of the biggest differences between Codex and other AI programming tools is its support for running multiple tasks simultaneously. You can press Ctrl+N (or Command+N on Mac) to open a new chat window and assign tasks across different projects — they'll execute in parallel without interfering with each other. Each task has a clear status indicator in the side panel:
- Spinning circle: Task in progress
- Blue prompt: Awaiting user approval (e.g., when files need to be created or dependencies downloaded)
- Blue dot: Task completed
If you choose to chat without selecting a project, the content goes into the "Conversations" area at the bottom, which is suitable for non-project-related Q&A.
Deep Dive into Core Feature Modules
Search and Conversation Management
You can search all historical conversations via the search bar on the left or the shortcut Ctrl+G, but only conversation titles are searchable — content within conversations cannot be searched. Therefore, it's recommended to rename important conversations (double-click the title to edit) with special markers for easier retrieval later.
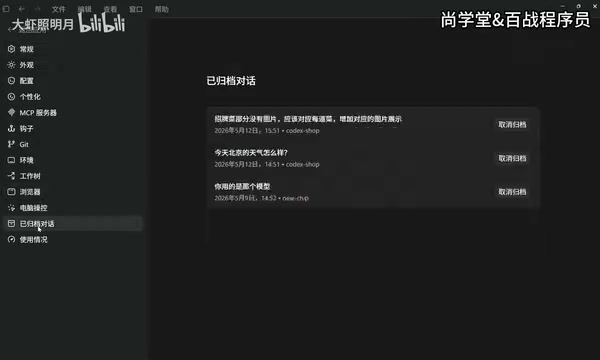
For conversations you no longer need, click the archive button to move them to the archive list. You can unarchive and restore them at any time under "Settings → Archived Conversations."
Permission Management — The Sandbox Security Mechanism
Codex's permission control revolves around a sandbox mechanism that isolates and manages the current project folder as a sandbox. This is more elegant than Claude Code's approach — the latter requires manual sandbox setup, while Codex works out of the box.
The three permission modes each serve different use cases:
| Permission Mode | Characteristics | Use Case |
|---|---|---|
| Default | Read/write only within sandbox files; no internet access or external file modifications | Everyday safe usage |
| Auto-review (Recommended) | Uses a smaller model to automatically assess risk levels; low-risk actions are auto-approved, high-risk ones require manual review | Balancing efficiency and security |
| Full Access | Ignores sandbox restrictions; can access external files and the internet | Special needs; use with caution |
The auto-review mode is recommended — it avoids the hassle of frequent manual confirmations while preventing security risks from unauthorized operations.
Context Management and Model Selection
Each conversation has a context capacity limit, which you can check via the progress bar icon in the chat box. When the context approaches its limit, Codex automatically compresses historical information. You can also manually trigger compression by typing /compress. However, a better practice is to start a new conversation for each new task, because clearing is better than compressing — residual historical information can distract the model's focus and increase token consumption.

Model selection offers three dimensions of configuration:
- Intelligence level: Low / Medium / High / Ultra-high — choose based on task complexity
- Model version: Default is GPT-5.5 (latest), but you can switch to older versions
- Speed mode: Standard or Fast (1.5x speed but consumes 2x tokens)
Steer — Real-Time Control and Guidance
Codex's Steer feature allows you to course-correct in real time while the AI is executing. When you notice the AI has misunderstood something, there's no need to wait for the task to finish — simply type a new instruction and click the "Steer" button. The AI will immediately interrupt its current direction and re-execute according to the new instruction. If you send a message without clicking Steer, the task enters queue mode — the current task finishes first before the new one begins.
You can change the default "follow-up behavior" (queue or steer) in settings, but it's recommended to keep the default queue mode and manually trigger steering only when needed.
Conclusion and Tool Selection Recommendations
As a major player in the AI programming tool landscape, Codex demonstrates clear advantages in multi-task parallelism, sandbox security mechanisms, and frontend development experience. For beginners, its learning curve is relatively gentle; for experienced developers, it can significantly boost frontend development efficiency.
Developers are advised to keep Codex, Claude Code, and Cursor all in their toolbox — prioritize Codex for frontend projects, pair Claude Code with logic-intensive backend projects, and choose flexibly based on the actual scenario to maximize AI-powered programming productivity.
Related articles
 Tutorials
Cursor + Codex Dual-IDE Collaboration: A Practical Methodology for Open-Source Project Customization
A complete methodology for open-source project customization based on real-world experience, detailing the Cursor+Codex dual-IDE workflow, seven-stage process, MVP validation, and AI source code reading techniques.
 Tutorials
Cursor Multi-Agent in Practice: Building a Full-Stack Next.js Blog in 50 Minutes
Build a full-stack blog in 50 minutes using Cursor IDE's multi-Agent mode with Next.js, Clerk auth, and Supabase. Learn the 4-phase AI Agent workflow and key integration pitfalls.
 Tutorials
Building an AI Software Factory from Scratch: A Cursor Engineer's Hands-On Experience with Multi-Agent Collaboration
Cursor engineer Eric shares practical insights on building an AI software factory: automation levels, guardrail design, parallel Agent management, and scaling to 1000+ Agents for 24/7 development.