Beginner's Guide to Installing Claude Code: Complete Tutorial for Connecting to DeepSeek via CC Switch
A complete beginner's guide to installing Claude Code and connecting it to DeepSeek via CC Switch.
This article covers the easiest way for beginners to install and use Claude Code: one-click installation via AI IDEs like Cursor or Trae, connecting to domestic Chinese LLMs like DeepSeek through the open-source CC Switch tool to bypass regional restrictions, and achieving low-cost AI-powered coding. A hands-on test generated a desktop app in 20 minutes for just $0.03, with recommended learning resources including official docs and GitHub tutorials.
Claude Code (CC for short) is one of the hottest AI coding tools right now, attracting both developers and non-developers alike. But for beginners, steps like command-line installation, environment variable configuration, and API integration can feel intimidating. Based on a hands-on tutorial by Bilibili creator Wanzi, this article presents the easiest installation and setup method — one that even complete beginners can follow.
Two Installation Methods: Command Line vs. AI-Assisted
Traditional Command-Line Installation
According to the official Claude Code documentation, Windows users need to first install Node.js and NPM, then install Claude Code via the command line. The problem is that many beginners have never installed Node.js before and aren't familiar with command-line operations, making it easy to run into issues.
One-Click Installation via AI IDE (Recommended)
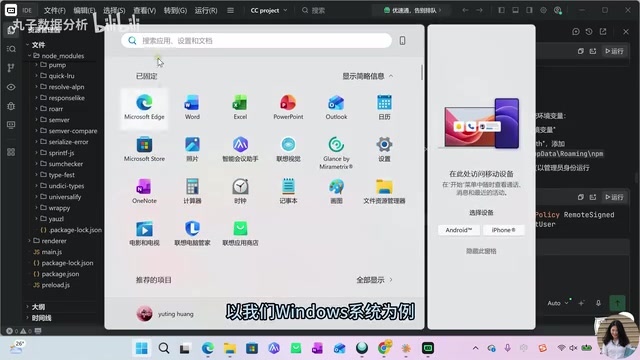
The smarter approach is: let AI install the AI tool for you. You can use Cursor, Windsurf (AntiGravity), or the Chinese-made Trae AI IDE. Switch to Agent mode and simply type:
"Install Node for me and use NPM to install the latest Claude Code"
The AI Agent will automatically execute the installation steps — just click "Run" when prompted for permission. The entire process requires you to remember zero commands.

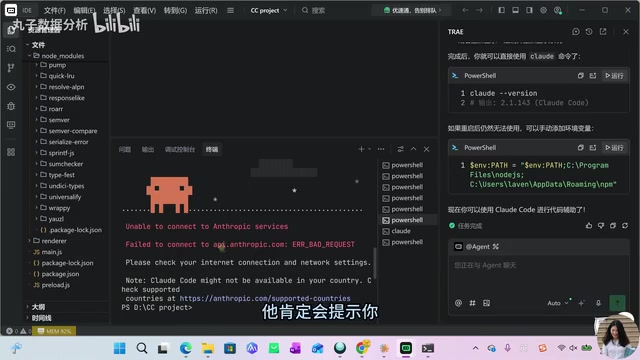
Environment Variable Configuration: Fixing the "Not Recognized" Error
After installation, many people encounter a "not recognized" error when typing claude in the terminal. This happens because the installation path hasn't been added to the system environment variables.
Steps to Set Windows Environment Variables
- Press
Win + Rto open the Run dialog, or search for "environment variables" in the search bar - Open the system environment variables settings
- Find the
Pathvariable and click Edit - Add the paths for NPM, Node.js, etc. (the AI Agent will tell you the exact paths)
If you used an AI IDE for installation and run into problems, simply copy and paste the error message into the chat window and let the AI continue troubleshooting for you. The tutorial author himself failed twice during the actual setup and only succeeded on the third attempt — so don't panic when you hit issues, just hand it off to the AI.
Once configured successfully, if claude code --version outputs a version number, the installation is complete.
Connecting to Chinese LLMs: CC Switch + DeepSeek
When you first launch Claude Code, you'll see a prompt: "Might not be available in your country." This means using Claude's official model directly from China is difficult. The good news is that we can use open-source tools to connect to domestic Chinese LLMs instead.
Step 1: Install CC Switch
CC Switch is a popular open-source project on GitHub designed specifically to let Claude Code connect to third-party LLMs.
- Go to the CC Switch GitHub Release page
- Download the
.msiinstaller for Windows (you may need to expand "Show all assets" to find it) - Double-click to install, clicking Next all the way through
Step 2: Get a DeepSeek API Key
- Go to DeepSeek's official API platform
- Register an account and complete identity verification
- Create an API Key and copy it immediately (it's only visible at creation time — you can't view it later, but you can create a new one)
- Top up with a small amount (a few dollars) to get started
Step 3: Configure the Model in CC Switch
Open CC Switch, select the DeepSeek platform, paste your API Key in the corresponding field, and click Add. You can configure multiple models simultaneously and switch between them using checkboxes.
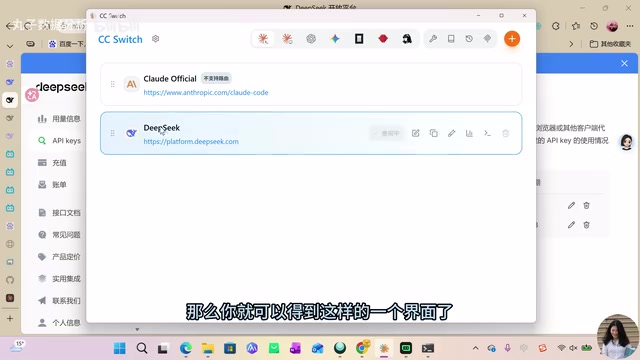
Once configured, type claude in the terminal again and you'll be able to enter the Claude Code interactive interface normally.
Hands-On Test: Generating a Desktop App in 20 Minutes
To test the results, the tutorial author had Claude Code generate a desktop journaling application. Here's how it went:
- Open a project folder (e.g., CCProject) in the IDE
- Enter the requirement: "Generate a desktop journaling application for me"
- Claude Code asks about tech stack preferences, feature requirements, and other details
- Use the arrow keys to select options and Enter to confirm
- Wait about 20 minutes for the software to be generated
The resulting application supported adding tasks, timeline recording, task completion checkboxes, and other basic features. While simple, it was quite impressive as a rapid prototype.
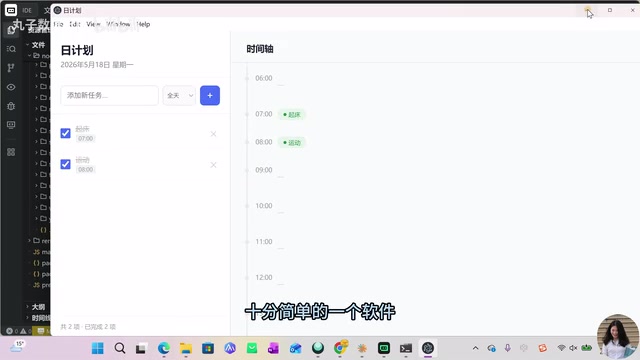
The most important part is the cost: the entire project cost only ¥0.19 (about $0.03). This is the huge advantage of using domestic Chinese LLMs — extremely low cost, perfect for learning and experimentation.
For more complex applications, you'll need to provide more detailed requirement specifications, such as writing skill files and giving clear functional specs, rather than relying on a single simple command.
Recommended Learning Resources for Claude Code
To master Claude Code in depth, here are two recommended learning paths:
Official Documentation
Claude Code Docs provides Quick Start guides and other introductory materials — the most authoritative learning resource available.
GitHub Open-Source Tutorials
The "Claude How To" project is highly recommended. It supports Chinese reading and has an enticing title — "Master Claude Code in a Weekend." The tutorial is divided into three levels:
- Beginner: Learn built-in Slash Commands like
/compact(compress context),/cost(check spending), etc. - Intermediate: Advanced usage patterns
- Advanced: Expert-level techniques
It's recommended to start with the Beginner-level Slash Commands, as these built-in commands are the most frequently used features in daily work.
Summary
For beginners, the easiest path to getting started with Claude Code is: Install via AI IDE → Connect to domestic LLMs via CC Switch → Start practicing at low cost. The entire process requires virtually no memorization of commands — when you hit a problem, just let the AI solve it for you. Rather than using free web-based chat for simple conversations, it's better to invest a small amount in Agent tools like Claude Code for actual file generation and project development tasks.
Related articles
 Tutorials
Cursor + Codex Dual-IDE Collaboration: A Practical Methodology for Open-Source Project Customization
A complete methodology for open-source project customization based on real-world experience, detailing the Cursor+Codex dual-IDE workflow, seven-stage process, MVP validation, and AI source code reading techniques.
 Tutorials
Cursor Multi-Agent in Practice: Building a Full-Stack Next.js Blog in 50 Minutes
Build a full-stack blog in 50 minutes using Cursor IDE's multi-Agent mode with Next.js, Clerk auth, and Supabase. Learn the 4-phase AI Agent workflow and key integration pitfalls.
 Tutorials
Building an AI Software Factory from Scratch: A Cursor Engineer's Hands-On Experience with Multi-Agent Collaboration
Cursor engineer Eric shares practical insights on building an AI software factory: automation levels, guardrail design, parallel Agent management, and scaling to 1000+ Agents for 24/7 development.