Building the Claude Code Frontend from Scratch: A Hands-On Walkthrough of the Welcome Screen Source Code

A hands-on tutorial for building a minimal Claude Code frontend welcome screen from scratch.
This article documents the hands-on process of building a minimal Claude Code frontend from scratch. The Claude Code frontend is built on a TypeScript + React + Ink stack for terminal UI rendering, requiring only three configuration files and two core source files to run a minimal welcome screen. The article explains how the Ink terminal renderer works, the mechanism for keeping a process in a pending state, and highlights the OOM risk of the Bun runtime in low-memory environments. This UI shell lays the groundwork for progressively adding core features in future installments.
Introduction: Why Build the Claude Code Frontend from Scratch
As Anthropic's flagship product, Claude Code has a codebase far more complex than typical projects. Multiple teams collaborate on its development, involving extensive Hardness Engineering techniques. Hardness Engineering refers to the practice of improving system robustness through multiple layers of defense, exception handling, boundary checks, and other measures. In the context of AI coding assistants, this includes safety filtering of model outputs, permission controls for file system operations, and strict validation of user inputs. Since Claude Code is a tool that directly operates on users' codebases, its Hardness Engineering is especially critical — it needs to prevent accidental file deletion caused by model hallucinations, guard against injection attacks, and ensure sandbox isolation. This is one of the key reasons its source code complexity far exceeds that of ordinary frontend projects.
For developers who want to deeply understand how AI coding assistants work, starting with the simplest welcome screen and progressively dissecting the frontend architecture is a practical and effective learning path.
This article is based on the third episode of the Claude Code source code analysis series by Bilibili creator "Tuoba Long's Tech Lab." It documents how to build a minimal version of the Claude Code frontend application from scratch — just the welcome screen "shell," without any model calls, toolchains, or conversation systems.
Analyzing the Native Claude Code Interface
Core Elements of the Startup Screen
The real Claude Code startup screen contains the following key information:
- Product name: Claude Code
- Version number: Displayed with a V identifier
- Model info: e.g., Opus 4.7, with "high effort" indicating deep thinking mode
- Project path: The current project location where Claude Code is being used
This screen looks simple, but there's a key technical detail behind it: as an application launched via NPM, it needs to keep the frontend process running persistently (in a pending state) rather than exiting automatically after execution. Normally, a Node.js script exits the process once all synchronous and asynchronous tasks are complete (the event loop is empty). However, as an interactive terminal application, Claude Code needs to keep the process alive to continuously listen for user input. Common approaches to achieve this include: keeping an unclosed stdin readable stream, using setInterval to create a persistent timer, or relying on the event listeners maintained internally by Ink's render() method to prevent the event loop from exiting. As long as there are still active handles or requests in the Node.js event loop, the process won't terminate — this is the essence of the so-called pending state.
The Slash Command System
In Claude Code's input field, typing a slash / triggers a command menu, including:
/resume- Resume a previous session/reveal- Display relevant information/rename- Rename a session/go- Set a goal and keep executing until completion (new feature)
Hands-On Project Build
Basic File Structure
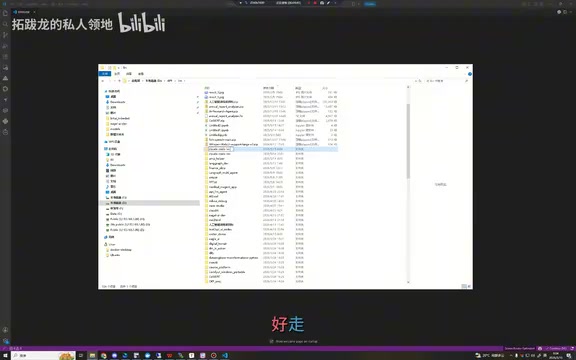
A minimal Claude Code frontend project requires three core configuration files:
- package-lock.json - Dependency lock file that records exact package versions, ensuring team members and CI/CD environments install an identical dependency tree, avoiding the classic "it works on my machine" problem
- package.json - Main project configuration that declares dependencies (similar to Java's pom.xml), while also defining the project's scripts, entry file, version info, and other metadata
- tsconfig.json - TypeScript configuration that defines compiler options, controlling the strictness of type checking and the target environment for output code
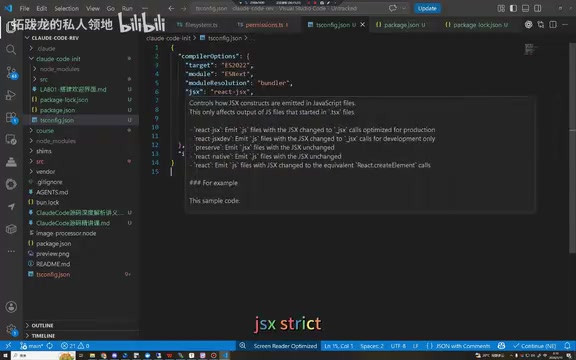
Key configurations in tsconfig.json include:
target- Compilation target, determining the JavaScript version output by the TypeScript compiler (e.g., ES2020, ESNext), which affects available syntax featuresmodule/moduleResolution- Module system, defining the modularization scheme (CommonJS or ESModule) and the module resolution strategy (Node or Bundler)jsx: "strict"- Strict JSX mode, ensuring stricter type checking for JSX syntax, which helps catch component prop type errors in terminal UI scenariosinclude- Project scope, specifying which files participate in TypeScript compilation
Core Files in the src Directory
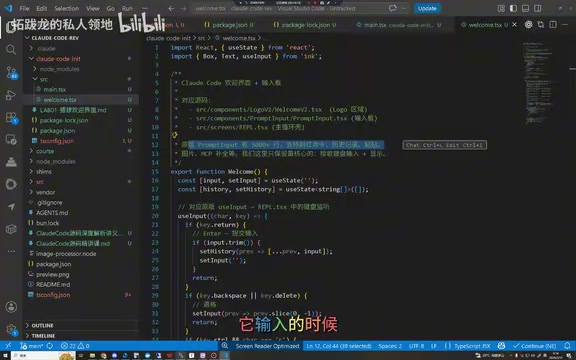
The src directory contains two key files:
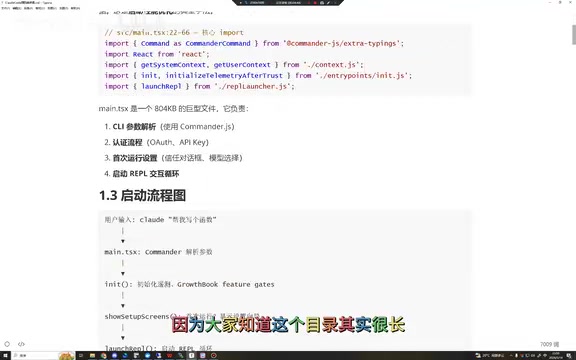
main.ts (entry file): Handles top-level side effects, imports relevant modules, loads conditional configurations, and bootstraps into Claude Code's page loading layer. In Node.js/Bun applications, the entry file typically takes on environment initialization responsibilities, including setting up global error handlers, loading environment variables, and initializing the logging system.
welcome.tsx (welcome screen): Built with the React framework, it imports three core components:
Box- Layout container, similar to adivin web development, supporting flexbox layout propertiesText- Text display, supporting terminal text styles like color, bold, and underlineInput- Input field, handling user keyboard input events
These components are based on the ink library — a React renderer specifically designed for building terminal UIs. Ink is an open-source library created by Vadim Demedes that brings React's declarative programming model to the terminal environment. Traditional terminal UI development requires manually handling ANSI escape codes, cursor positioning, color control, and other low-level details. Ink implements a custom React renderer (React Reconciler) that applies the virtual DOM's diff algorithm to terminal character output. Developers can write components using JSX syntax, and Ink handles converting them into character sequences displayable in the terminal. This architecture enables Claude Code to implement complex terminal interactive interfaces (such as syntax-highlighted code blocks, progress bars, and multi-panel layouts) while maintaining code maintainability and component reusability. Similar terminal UI frameworks include Blessed and Blessed-contrib, but Ink's compatibility with the React ecosystem makes it more popular in modern projects.
Build and Run
# Create project directory
mkdir cloudcode-lab
cd cloudcode-lab

# Install dependencies
npm install

# Start development server
npm run dev
After execution, you'll see Claude Code's mascot and the basic welcome screen — this is the minimum runnable unit of the entire application.
Real-World Pitfall: Memory Issues
It's worth mentioning that Claude Code has a known memory issue in actual use. Its frontend bun module can consume a massive amount of memory in a very short time.
Bun is a high-performance JavaScript runtime developed by Jarred Sumner, written in Zig and powered by the JavaScriptCore engine (rather than the V8 engine used by Node.js). It integrates a bundler, transpiler, package manager, and test runner, offering significantly faster startup and execution than Node.js. However, Bun's memory management strategy is quite aggressive — it tends to pre-allocate large memory pools in exchange for execution speed. This works well on development machines with ample memory but can cause serious problems in low-memory environments. Bun's garbage collection mechanism also differs from V8's, and memory release timing may not be as prompt as expected in certain scenarios.
The author experienced this on a remote machine with only 4GB of RAM (approximately 1.24GB available), where the module instantly consumed 1.8GB, directly causing an OOM (Out of Memory) crash and process termination.
This results in context loss, but Claude Code provides the /resume command to recover previous sessions as a remediation measure. This issue also illustrates from a different angle why understanding the source code architecture is so important for troubleshooting and optimization — when you understand the sources of memory consumption (such as Bun's pre-allocation strategy, large ASTs residing in memory, etc.), you can make targeted decisions about optimization approaches or avoidance strategies.
Summary and Outlook
This hands-on session completed the "skeleton" of the Claude Code frontend — a pure UI shell with no model calls, no toolchain, and no conversation system. The value of this minimal version lies in:
- Understanding Claude Code's frontend technology stack choices (TypeScript + React + Ink)
- Grasping the basic architecture of terminal UI applications
- Laying the foundation for gradually adding core loops, tool calls, closed-loop evaluation, and other features
Subsequent installments in the series will progressively enhance this frontend application, ultimately building it into a complete AI coding agent — which is the essence of Vibe Coding tools. Vibe Coding is a concept coined by Andrej Karpathy in early 2025, referring to a development approach where developers describe requirements in natural language, let AI generate the code, and primarily focus on acceptance and directional guidance rather than writing code line by line. In this development model, developers act more like "technical product managers," driving the development process through conversation. Tools like Claude Code, Cursor, and GitHub Copilot Workspace are all typical vehicles for Vibe Coding.
However, as this hands-on exercise demonstrates, the ability to write code by hand remains irreplaceable in the AI era. Understanding underlying architecture is actually more important in the Vibe Coding era — because when AI-generated code has issues, developers need the ability to diagnose and fix them. Only by personally deconstructing and rebuilding can you truly understand the trade-offs and considerations behind architectural design decisions.
Related articles
 Tutorials
Cursor + Codex Dual-IDE Collaboration: A Practical Methodology for Open-Source Project Customization
A complete methodology for open-source project customization based on real-world experience, detailing the Cursor+Codex dual-IDE workflow, seven-stage process, MVP validation, and AI source code reading techniques.
 Tutorials
Cursor Multi-Agent in Practice: Building a Full-Stack Next.js Blog in 50 Minutes
Build a full-stack blog in 50 minutes using Cursor IDE's multi-Agent mode with Next.js, Clerk auth, and Supabase. Learn the 4-phase AI Agent workflow and key integration pitfalls.
 Tutorials
Building an AI Software Factory from Scratch: A Cursor Engineer's Hands-On Experience with Multi-Agent Collaboration
Cursor engineer Eric shares practical insights on building an AI software factory: automation levels, guardrail design, parallel Agent management, and scaling to 1000+ Agents for 24/7 development.