ChatGPT Codex Phone Verification Solution (With SMS Platform Step-by-Step Guide)
ChatGPT Codex Phone Verification Solut…
Complete tutorial on passing Codex phone verification using the WooSIM SMS platform
When logging into OpenAI Codex with a ChatGPT account, users in unsupported regions face mandatory overseas phone number verification. This article covers the full process of using the WooSIM SMS platform to obtain an overseas number and complete verification. Key points: ensure your IP address matches the phone number's country, use global proxy mode, and select Text Message. Cost is about $1, and verification only needs to be done once.
Introduction: Why Does Codex Login Require Phone Verification?
OpenAI's Codex (coding agent) is a highly anticipated AI programming tool. OpenAI Codex is an AI model based on the GPT architecture, specifically fine-tuned for code generation and comprehension tasks. Its latest form has evolved into a "Coding Agent" capable of autonomously completing multi-step programming tasks, including reading/writing files, executing commands, and debugging code. Unlike earlier tools that could only complete code snippets, the Codex agent can run independently in a sandbox environment, understanding natural language requirements and completing entire development tasks end-to-end.
However, many users outside supported regions get stuck at the same point: Registering a ChatGPT account is no problem, but once you try to log into Codex with your ChatGPT account, the system forces phone number verification — and it doesn't support phone numbers from many countries.
There's a clear technical logic behind this: OpenAI employs a tiered risk control strategy across different product lines. ChatGPT targets general consumers with relatively low registration barriers, while Codex, as an agent product with code execution capabilities that can run arbitrary code on the server side, carries higher abuse risks. Therefore, OpenAI introduces phone number verification as a second layer of identity verification to prevent bulk registration and malicious abuse. This "same account system, different product thresholds" design is quite common in the AI services space.
This verification step cannot be skipped. This article will walk you through the entire process from scratch — from registering a ChatGPT account to successfully logging into Codex — with a focus on how to solve the phone verification challenge using an SMS verification platform.
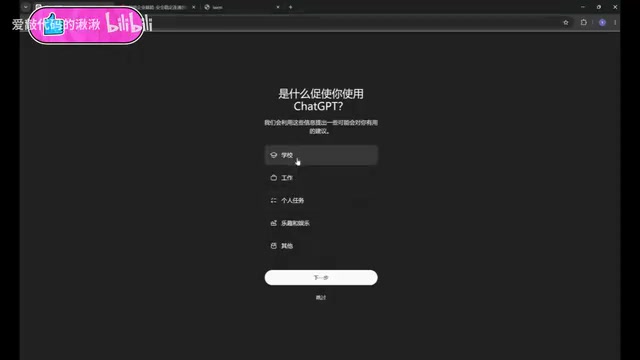
Step 1: Register a ChatGPT Account
First, visit the ChatGPT official website and click "Sign up free." The registration process is straightforward:
- Enter your email address: Any common email provider works
- Receive email verification code: Check your inbox for the verification code sent by OpenAI
- Enter the code and set a username: The username can be anything you like
Most users can complete this step without issues. After successful registration, you'll be in a logged-in state.
It's important to note that successful registration does not mean you can use Codex. Many users report "I didn't need a verification code to register" — that's correct. But to log into Codex with your ChatGPT account, phone number verification is an unavoidable gate.
Step 2: Logging into Codex Triggers Phone Verification
Open the Codex application and select "Continue with ChatGPT" to log in. The system will redirect to a web authentication page. If your browser is already logged into ChatGPT, the system will automatically detect and display your account information.
At this point, clicking login will trigger the phone number verification screen. This is a mandatory step that must be completed before you can proceed.
Quick note: After successful login, the Codex interface will display "remaining usage." Free accounts only have the "per week" option, while Plus accounts get an additional "per day" option.
Step 3: Use the WooSIM SMS Platform to Get an Overseas Phone Number
This is the core part of the entire process. We need to use an overseas SMS verification platform to obtain a usable phone number for receiving the verification code.
How SMS Verification Platforms Work
SMS verification platforms (Virtual Number / SMS Verification Services) essentially pool real overseas SIM card resources and rent them out. Platform operators purchase large quantities of physical SIM cards in target countries or partner with local carriers to obtain virtual number ranges. When a user rents a number, any SMS received by that number is forwarded in real-time to the user's interface via the platform's API. Since the number's registered location is genuine, it can pass the target platform's regional verification. However, because numbers are used by multiple people in rotation, there's a probability that a "number has already been registered," which is the fundamental reason why multiple attempts may be needed.
Why Choose WooSIM?
There are multiple SMS platforms on the market, but based on actual testing, WooSIM has a relatively high success rate and is fairly convenient to use. Of course, SMS platforms inherently have some instability, so be mentally prepared for that.
Registration and Top-up
- Visit the WooSIM platform and register an account
- Top up a small amount — note that the amount is in USD. $1 (approximately ¥7 CNY) is sufficient; don't top up too much at once
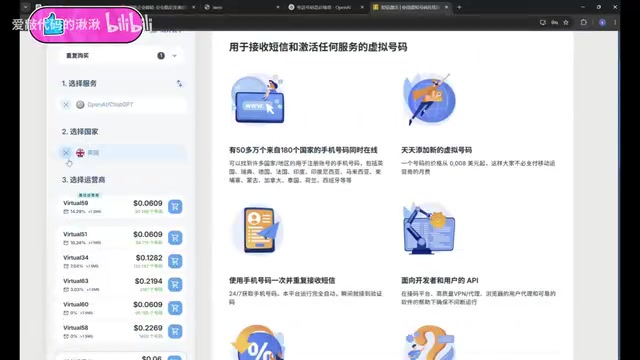
Select Service and Country
In WooSIM's left menu, select the service and search for "OpenAI," then choose the "OpenAI ChatGPT" service. Then select the corresponding country:
⚠️ Three critical points — remember these:
| Point | Explanation |
|---|---|
| IP and phone number country must match | Your VPN/proxy node country must be the same as the phone number's country |
| Use global proxy mode | You must switch your proxy to global/full mode |
| Select Text Message | The verification method must be SMS (Text Message), not WhatsApp |
Among these three, "IP and phone number country must match" is especially critical, with a clear technical reason: OpenAI's risk control system simultaneously checks whether the geographic location of the request source IP matches the registered location of the phone number entered. If there's an obvious geographic discrepancy (e.g., IP shows UK but an Indian number is entered), the system will flag abnormal behavior and reject the verification or trigger stricter scrutiny. This is a common "device fingerprint + behavioral consistency" verification logic in anti-fraud systems. Using global proxy mode (rather than rule-based mode that only proxies browser traffic) ensures all network requests go through the same exit IP, which is key to passing verification.
For example, if your proxy node is set to the UK, you should also select a UK phone number in WooSIM.
Step 4: Receive the Verification Code and Complete Codex Login Verification
Purchase a Number and Send the Verification Code
- In WooSIM, select the country and carrier (you can choose "Any carrier"), then click to purchase a number
- After successful purchase, copy the phone number
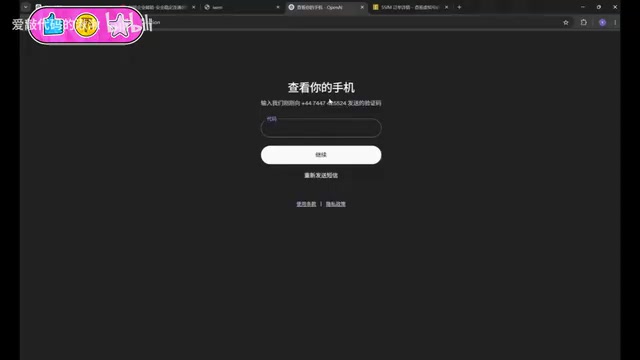
- Return to the Codex verification page, select the corresponding country (e.g., United Kingdom), and paste the phone number
- Select Text Message as the receiving method
- Click "Continue" to send the verification code
Waiting to Receive and Handling Common Issues
After sending the verification code, return to the WooSIM platform and wait. This process requires some patience:
- Normal wait time: 1-3 minutes
- Timeout handling: If nothing is received after 5 minutes, cancel the order (the fee will be refunded), purchase a new number, and try again
- Number already taken: If the system says "this phone number has already been used," cancel the order and purchase a new number
🚫 Important warning: Do NOT repeatedly send verification codes! OpenAI's SMS verification system has a built-in Rate Limiting mechanism — a standard measure to prevent SMS bombing and bulk number farming by verification platforms. When the same IP or account requests verification codes multiple times in a short period, the system triggers an Exponential Backoff strategy, with cooldown times escalating from 2 hours to 24 hours or even 48 hours. Therefore, send once and wait patiently — do not click send repeatedly.
Complete Verification and Enter Codex
Once you receive the verification code:
- Copy the verification code from WooSIM
- Return to the verification page, paste it, and click "Continue"
- Wait for verification to pass — seeing the Codex main interface means success
- Close the browser verification page and return to the Codex application
At this point, you should see your logged-in account information and remaining usage display (default: 97% for the week).
Important Notes and Risk Warnings
Before proceeding, consider these points carefully:
- Cost: The minimum top-up for the SMS platform is about $1. While not much, confirm whether you actually need to use Codex
- Stability risks: SMS platforms themselves may be unstable, with the possibility of failed reception
- Network requirements: A stable VPN/proxy connection is needed throughout, and global mode must be enabled
- One-time operation: Phone verification typically only needs to be done once; subsequent logins won't require re-verification
Summary
The entire Codex login verification process can be summarized in four steps: Register a ChatGPT account → Trigger Codex phone verification → Get an overseas phone number via WooSIM → Receive the verification code to complete authentication.
The core difficulty lies in the SMS verification step. As long as you ensure the IP address matches the phone number's country, use global proxy mode, and select Text Message — these three key points — your success rate will be significantly higher.
For developers who want to experience Codex as an AI programming tool, spending about $1 and ten-plus minutes to complete this one-time verification process is well worth it.
Related articles
 Tutorials
Cursor + Codex Dual-IDE Collaboration: A Practical Methodology for Open-Source Project Customization
A complete methodology for open-source project customization based on real-world experience, detailing the Cursor+Codex dual-IDE workflow, seven-stage process, MVP validation, and AI source code reading techniques.
 Tutorials
Cursor Multi-Agent in Practice: Building a Full-Stack Next.js Blog in 50 Minutes
Build a full-stack blog in 50 minutes using Cursor IDE's multi-Agent mode with Next.js, Clerk auth, and Supabase. Learn the 4-phase AI Agent workflow and key integration pitfalls.
 Tutorials
Building an AI Software Factory from Scratch: A Cursor Engineer's Hands-On Experience with Multi-Agent Collaboration
Cursor engineer Eric shares practical insights on building an AI software factory: automation levels, guardrail design, parallel Agent management, and scaling to 1000+ Agents for 24/7 development.