Claude Code Desktop Installation & Configuration Guide: No Account Required + DeepSeek Integration + Chinese Localization
Claude Code Desktop Installation & Con…
Complete guide to configuring Claude Code Desktop with free DeepSeek integration and no account required.
This article details a five-step configuration process for Claude Code Desktop: installing the app, enabling Developer Mode for account-free usage, integrating low-cost models like DeepSeek via CSwitch (version ≥3.15.0), applying community Chinese localization scripts, and uploading custom Skills as compressed packages—helping developers build a complete AI programming workflow at minimal cost.
Complete Claude Code Desktop Configuration Guide: Full Process for No-Account DeepSeek Integration
Claude Code Desktop has officially launched, but the cost of using the official model has deterred many developers. This article will walk you through the entire process of desktop installation, account-free usage, Chinese localization, integration with domestic models (using DeepSeek as an example), and custom Skill configuration—helping you use this powerful AI programming tool at minimal cost.
Background: Claude Code is an AI programming assistant developed by Anthropic, built on their flagship Claude model. Anthropic was founded by former core members of OpenAI and focuses on AI safety research. The Claude model series is renowned for its long-context processing capabilities and code comprehension abilities. Compared to the CLI (Command Line Interface) version, Claude Code Desktop offers a more user-friendly graphical interface with support for project management, task planning, and other engineering features—making it a productivity tool designed for professional developers. The official model charges per token, which creates significant cost pressure for high-frequency users. This is the core value proposition of the alternative approach described in this article.
Installing Claude Code Desktop
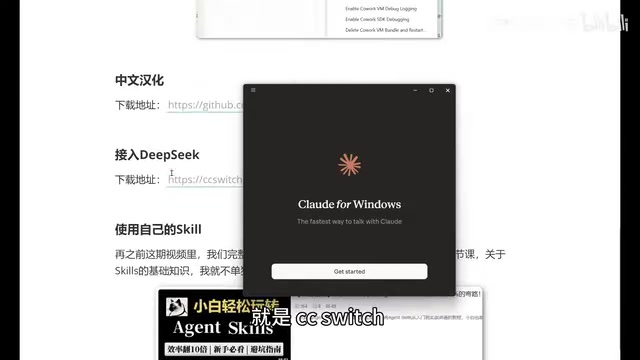
First, visit the official Claude Code page and click the "Get Claude Code" button. You'll see multiple usage options, with Desktop listed first as the desktop version entry point. Clicking it will redirect you to the download page, where the system automatically matches the version for your operating system (Windows/Mac). Download and double-click to run—the entire installation process requires no additional configuration.
After installation, you'll see a login screen offering Google account and other sign-in methods. But if you don't want to deal with the account system, you can skip this step entirely—the account-free method is explained next.
Account-Free Usage: Enabling Developer Mode
The key to using Claude Code Desktop without an account is enabling Developer Mode. Here are the steps:
- Click the hamburger menu (three horizontal lines) in the top-left corner
- Select "Help"
- Find the third option, scroll down to find "Enable Developer Mode"
- Click to enable and confirm
- Wait for Claude Code to restart automatically
Technical Principle: Developer Mode is a debugging and extension mechanism built into many commercial software applications, typically used to allow users to bypass standard authentication flows, connect to custom backend services, or enable experimental features. Developer Mode in Claude Code Desktop essentially opens up custom configuration permissions for API endpoints, allowing users to redirect requests—originally pointed at Anthropic's official servers—to local proxies or third-party compatible interfaces. This is the technical foundation for model replacement—without this step, the software would enforce the use of official accounts and official models, making third-party service integration impossible.
After the restart, you'll see a new interface. Don't worry about it for now—next, you need to install a key auxiliary tool to connect with third-party models.
Integrating DeepSeek Models via CSwitch
Installing CSwitch
CSwitch is a software tool for unified management of AI tool workflows, with the core function of helping you freely switch between different models. You can download it from GitHub. Note that the version must be 3.15.0 or higher, as older versions don't support Claude Code Desktop configuration.
How It Works: CSwitch's core mechanism is launching a local proxy server compatible with the OpenAI API format (i.e., a "local router") that intercepts API requests from Claude Code and forwards them to the user-specified third-party model provider. This technical approach is called an "API compatibility layer" or "reverse proxy." It works because mainstream domestic large models like DeepSeek and Tongyi Qianwen all provide interfaces compatible with the OpenAI API format standard, making tool-level model replacement possible without modifying client source code. Simply put, Claude Code thinks it's communicating with the official service, but the requests have been quietly forwarded to DeepSeek by CSwitch.
Installation is equally simple—double-click to run and click "Next" through the wizard. After installation, you'll notice that in addition to the original command-line mode at the top of the interface, there's now a "Desktop" option with a small computer icon, indicating support for Claude Code Desktop.
Configuring the DeepSeek API
About DeepSeek: DeepSeek is a large language model series from DeepSeek AI, known for its highly competitive pricing and code capabilities approaching top-tier models. DeepSeek-V3 and DeepSeek-Coder perform excellently on multiple programming benchmarks (such as HumanEval and SWE-bench), with API pricing approximately 1/10 or even lower than Claude's official model—making it one of the most cost-effective code assistance models currently available. Additionally, a 1M Token context window refers to the maximum amount of text the model can process in a single session (a Token is the basic unit of text processing for models—approximately 4 English characters or 1.5 Chinese characters equal 1 Token). Standard models typically support only 8K to 128K context, while 1M context means you can load dozens of code files at once for holistic analysis, which is particularly critical for refactoring and comprehension tasks on large codebases.
The configuration process involves the following steps:
- Enable local router: Click "Settings" on the left → "Router" → find "Local Router" → click the arrow to enable
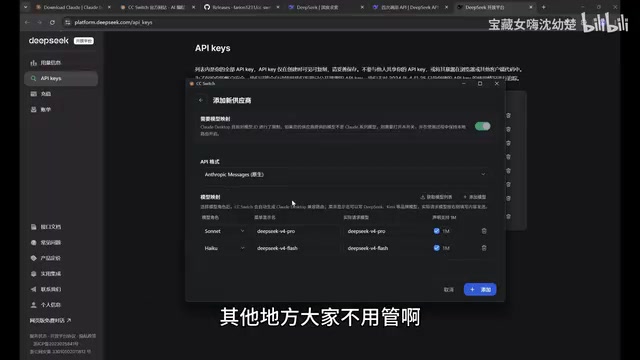
- Add model: Return to the main interface, select "Desktop," click the "Add" button on the right, and choose DeepSeek
- Enter API Key: Go to the DeepSeek official website's API documentation, create a new API Key on the Key management page, copy it, and paste it into CSwitch
- Check context option: It's recommended to check the 1M context size option so the model can handle larger code contexts
- Start the service: After clicking "Add," make sure to click "Start"—otherwise the configuration won't take effect
After starting, you can minimize CSwitch (clicking the close button only minimizes it to the system tray—it won't actually exit).
Completing the Connection in Claude Code
Return to Claude Code Desktop to complete the final connection:
- Click the hamburger menu in the top-left corner—you'll now see a new "Developer" option
- Go to "Developer" → "Configure Third-party"
- You'll find the relevant information has been automatically filled in (CSwitch has done this for you)—no manual modification needed
- Click "Apply" and restart
After restarting, Claude Code will have successfully connected to the DeepSeek model. You can see Flash and Pro versions in the model selection, as well as the 1M context version. Select the Flash version for a test conversation—if you receive a normal response, the configuration is successful.
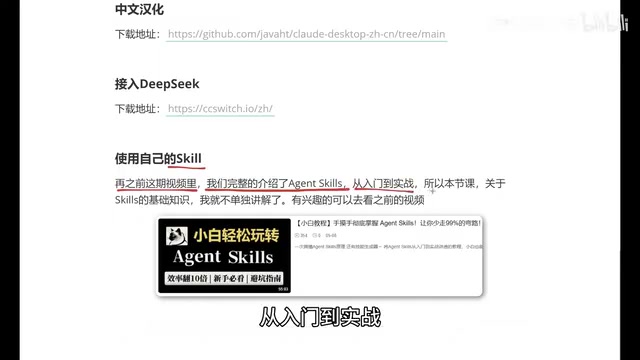
Chinese Localization for Claude Code Desktop
By default, Claude Code Desktop's entire interface is in English, including menus, buttons, and prompt messages. Fortunately, the community has provided a Chinese localization package, and the process is straightforward.
How Localization Works: Community localization packages typically work by replacing language resource files (such as
.jsonor.jslocalization string files) in the software's installation directory. A.batfile is a Windows batch script that can automatically locate Claude Code's installation path, back up original files, and write in Chinese translations—all without requiring users to manually find files, significantly lowering the barrier to entry. The Mac version typically uses a corresponding.shscript with the same principle.
Localization steps:
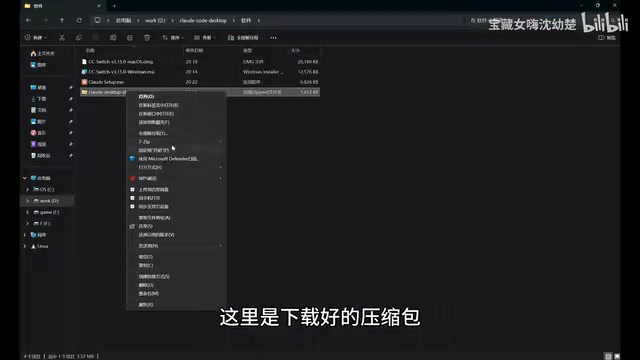
- Download the localization package (includes both Windows and Mac versions)
- After extracting, find the
.batfile (Windows version) and double-click to run - Select option 1 (Install Simplified Chinese) and press Enter to confirm
- The script will automatically close Claude Code and perform the localization
- After completion, Claude Code will restart automatically
When you reopen it, you'll see the interface has been completely converted to Chinese: menu items like "New Task," "Project Plan," "Tasks," and "Customize" are all clearly visible. Previous conversation history can also be viewed normally.
Extending Functionality with Custom Skills
Many users are interested in how to use their own Skills in the desktop version. Unlike the previous CLI version where files were stored in the .claude/skills directory, the desktop version requires uploading and installing Skills as compressed packages.
Skill System Background: Claude Code's Skill system is essentially a structured Prompt Template mechanism that allows users to predefine execution logic, output formats, and constraints for specific tasks. This type of mechanism is known as "system prompts" or "role cards" in the AI engineering field. Written in Markdown format, they can precisely control the model's behavior patterns in specific scenarios. For example, you can create a "Code Review" Skill that requires the model to check code according to specific security standards and coding styles, then output a structured report. The desktop version uses compressed package uploads rather than directly reading local directories for sandbox security isolation purposes—preventing malicious Skill files from accessing user system resources. This is a common security design pattern when commercial software opens up extension capabilities.
How to do it:
- Create a new task
- Click the "+" icon → "Skills" → "Manage Skills"
- Click "Add Skill" → "Upload Skill"
- Supported file formats include:
.mdfiles,.ziparchives,.skillfiles - Compress your Skill folder into ZIP format and drag-and-drop to upload
After successful upload, type a forward slash / in the dialog box, select "Skills," and you'll see your newly added custom Skill. Select it and enter your instruction—the model will execute the task according to your defined Skill logic.
Summary and Configuration Recommendations
Through the five steps above, you can build a complete low-cost Claude Code Desktop workflow:
| Step | Core Operation | Notes |
|---|---|---|
| Install Desktop | Download the version for your OS from the official site | Supports Windows and Mac |
| Account-free usage | Enable Developer Mode | Found in the Help menu |
| Integrate DeepSeek | Configure via CSwitch | Version must be ≥3.15.0 |
| Chinese localization | Run the localization script | Close Claude Code first |
| Custom Skills | Upload as compressed packages | Supports md/zip/skill formats |
Using DeepSeek as a replacement for the official Claude model can dramatically reduce costs while preserving Claude Code Desktop's excellent interactive experience and project management capabilities. For everyday development tasks, this setup is both practical and economical. The core logic of the entire configuration is: open interface permissions via Developer Mode → establish a local API proxy with CSwitch → Claude Code transparently uses low-cost domestic models for inference. These three steps are interconnected and all indispensable.
Key Takeaways
- Claude Code Desktop can be used without an account by enabling Developer Mode, lowering the barrier to entry
- Using CSwitch (version ≥ 3.15.0), you can integrate domestic models like DeepSeek into Claude Code, dramatically reducing costs
- Community-provided localization scripts support one-click interface switching to Simplified Chinese—just run the bat file and select the option
- Custom Skills in the desktop version must be uploaded as compressed packages, supporting md, zip, and skill file formats
- The entire configuration process is beginner-friendly, suitable for users with zero technical background to get started quickly
Related articles
 Tutorials
Cursor + Codex Dual-IDE Collaboration: A Practical Methodology for Open-Source Project Customization
A complete methodology for open-source project customization based on real-world experience, detailing the Cursor+Codex dual-IDE workflow, seven-stage process, MVP validation, and AI source code reading techniques.
 Tutorials
Cursor Multi-Agent in Practice: Building a Full-Stack Next.js Blog in 50 Minutes
Build a full-stack blog in 50 minutes using Cursor IDE's multi-Agent mode with Next.js, Clerk auth, and Supabase. Learn the 4-phase AI Agent workflow and key integration pitfalls.
 Tutorials
Building an AI Software Factory from Scratch: A Cursor Engineer's Hands-On Experience with Multi-Agent Collaboration
Cursor engineer Eric shares practical insights on building an AI software factory: automation levels, guardrail design, parallel Agent management, and scaling to 1000+ Agents for 24/7 development.