Claude Code Installation Guide: Complete Setup for Terminal, VS Code, JetBrains, and Web

Complete installation guide for Claude Code across terminal, IDE, desktop, and web platforms
This guide covers installing Anthropic's AI coding assistant Claude Code across terminal (macOS, Linux, WSL, Windows), VS Code and JetBrains IDEs, desktop app, and web. Terminal installation via curl is recommended for auto-updates. The web version only supports GitHub repos but enables parallel sessions. Terminal always receives new features first, and developers can choose the entry point that best fits their workflow.
Overview
Claude Code is an AI programming assistant from Anthropic that works across terminal, IDE, desktop app, and web environments. This article provides detailed installation instructions and usage entry points for each platform to help developers quickly get started with this powerful coding tool.
Terminal Installation: macOS, Linux & Windows
macOS and Linux One-Line Quick Install
For macOS, Linux, or WSL (Windows Subsystem for Linux) users, the recommended approach is a one-line curl command. This method is simple, fast, and supports automatic updates to ensure you're always running the latest version.
WSL is Microsoft's Linux compatibility layer for Windows 10/11, allowing users to run Linux binaries natively on Windows. WSL 2 runs on a real Linux kernel with near-native file system performance and system call compatibility, making it the preferred way for Windows developers to use Linux toolchains. Installing Claude Code via WSL gives you an experience identical to macOS/Linux.
If you prefer Homebrew, you can also install Claude Code via brew install. Homebrew is the most popular open-source package manager for macOS and Linux. However, note that Homebrew installations do not support automatic updates — you'll need to manually run brew upgrade. This is because auto-update relies on the software's built-in update service, while package managers use independent version tracking mechanisms with fundamentally different update triggers.
Windows Installation Methods
Windows users have multiple installation options:
- PowerShell: Install using
Invoke-RestMethod - CMD: Install using curl
- Winget: Install via Windows Package Manager (also does not support auto-update)
Winget is Microsoft's official command-line package management tool, built into Windows 11 and available for Windows 10. Like Homebrew, software installed via Winget depends on the package manager's repository sync schedule for updates, which may introduce delays.
If you want to always stay on the latest version, use the PowerShell or CMD direct installation methods.
Initial Configuration & Account Login
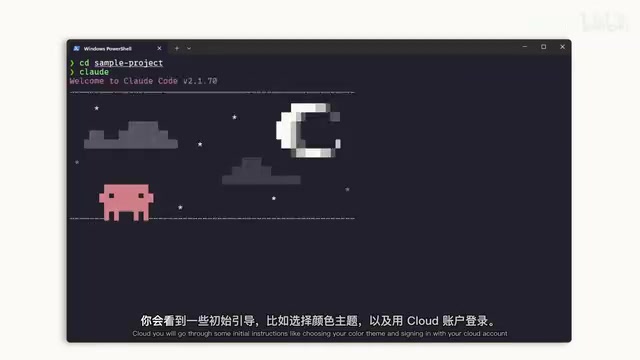
After installation, navigate to your project directory and run claude to start. On first launch, you'll need to complete these initial steps:
- Choose a color theme
- Log in with your Claude account (supports Pro, Max, or Enterprise subscriptions)
- Or authenticate with an API Key
Anthropic offers multiple subscription tiers: Pro is for individual users with higher daily quotas and priority access; Max builds on Pro with larger context windows and more concurrent sessions for heavy users; Enterprise targets organizations with data isolation, SSO, admin console, audit logs, and compliance guarantees. API Key authentication suits pay-as-you-go developers who generate keys through the Anthropic console.
Important: If your organization has a Claude Enterprise account, make sure to select the corresponding enterprise option. Once launched, Claude Code automatically gains access to the current directory and all subdirectories, so it's recommended to start it from your project root.
IDE Integration Installation
Installing Claude Code Extension in VS Code
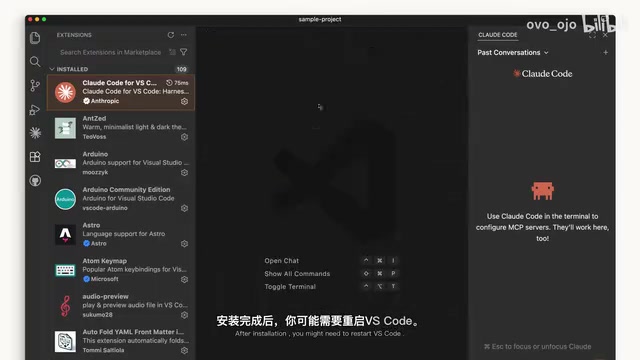
VS Code users can install Claude Code from the extension marketplace:
- Open the Extensions panel and search for "Claude Code"
- Find the official extension published by Anthropic (look for the blue verified badge)
- Click Install — you may need to restart VS Code
After installation, there are multiple ways to open Claude Code:
- Use
Ctrl/Cmd + Shift + Pto open the Command Palette, search "Claude Code" and select open new tab - Click the Claude icon in the editor interface
Additionally, if you prefer a pure terminal experience, you can opt out of UI mode in VS Code settings and interact directly via terminal. This preserves all terminal version features while still benefiting from VS Code's file navigation and version control capabilities.
JetBrains IDE Plugin Installation
For IntelliJ IDEA, PyCharm, WebStorm, and other JetBrains IDE users:
- Install the Claude Code plugin from JetBrains Marketplace
- Restart the IDE after installation
- The Claude icon will appear after reopening
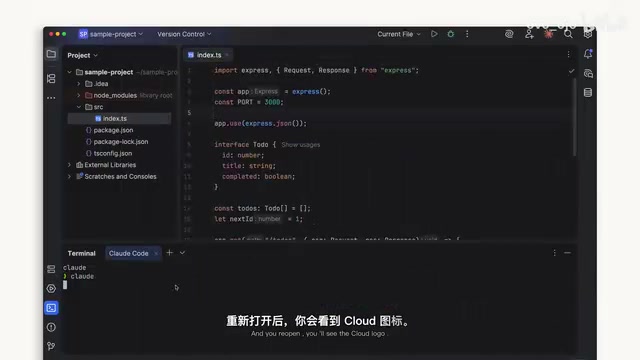
JetBrains IDEs are built on the IntelliJ platform and share a unified plugin architecture, meaning the Claude Code plugin works across all IDEs in the family. Clicking the icon opens a panel with a terminal-style interaction experience where Claude Code collaborates alongside your coding work.
Desktop App & Web Version
Claude Desktop App
After installing and logging into Claude Desktop, you'll see a "Code" toggle button at the top. The interface resembles Claude chat but adds these exclusive features:
- Specify a working folder
- Custom permission settings
- Cloud environment execution support
The desktop version is especially suitable for running Claude in the background while you handle other tasks.
Web Version of Claude Code
Visit claude.ai/code to use the web version. Features are similar to the desktop app, but with one important limitation: only GitHub repositories are supported.
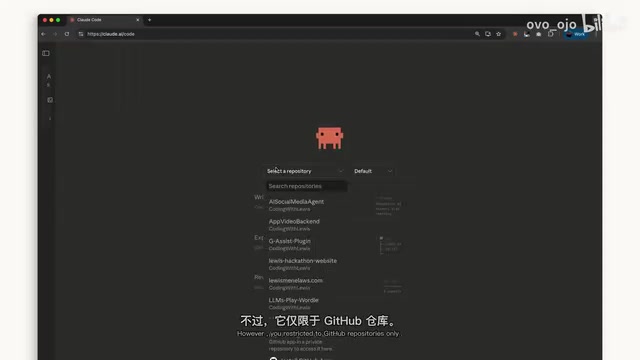
The web version's advantage is remote processing of GitHub projects with multiple parallel sessions — ideal for working on several projects simultaneously. Since everything runs in the cloud, you don't need any local development environment setup; just a browser and GitHub account authorization.
Comparison & Recommendations
| Method | Update Speed | Use Case | Features |
|---|---|---|---|
| Terminal | Fastest | Daily development | New features ship here first |
| IDE Integration | Fast | Editor power users | Seamless editor integration |
| Desktop App | Moderate | Background tasks | Runs in background |
| Web Version | Moderate | Remote collaboration | Parallel multi-session support |
Terminal is the best choice for accessing the latest features — new capabilities always ship to terminal first. IDE integration suits users who want deep fusion between Claude Code and their editor. Desktop is ideal for scenarios where Claude needs to work continuously in the background, while the web version is perfect for remote collaboration and parallel multitasking.
Summary
Claude Code offers flexible installation and usage options across every development environment. For developers who want cutting-edge features, use terminal as your primary interface with IDE integration as a supplement. For team collaboration scenarios, the web version's multi-session capability is worth exploring. Choose the method that best fits your workflow and let the AI programming assistant truly integrate into your daily development.
Key Takeaways
- Claude Code supports installation on macOS, Linux, WSL, and Windows — curl installation is recommended for automatic updates
- IDE integration covers VS Code and JetBrains series, accessible via Command Palette or icon after installation
- Web version only supports GitHub repos but enables parallel sessions; desktop version suits background tasks
- Terminal is the fastest channel for new features — they always ship to terminal first
- Supports Pro, Max, Enterprise subscriptions and API Key authentication methods
Related articles
 Tutorials
Cursor + Codex Dual-IDE Collaboration: A Practical Methodology for Open-Source Project Customization
A complete methodology for open-source project customization based on real-world experience, detailing the Cursor+Codex dual-IDE workflow, seven-stage process, MVP validation, and AI source code reading techniques.
 Tutorials
Cursor Multi-Agent in Practice: Building a Full-Stack Next.js Blog in 50 Minutes
Build a full-stack blog in 50 minutes using Cursor IDE's multi-Agent mode with Next.js, Clerk auth, and Supabase. Learn the 4-phase AI Agent workflow and key integration pitfalls.
 Tutorials
Building an AI Software Factory from Scratch: A Cursor Engineer's Hands-On Experience with Multi-Agent Collaboration
Cursor engineer Eric shares practical insights on building an AI software factory: automation levels, guardrail design, parallel Agent management, and scaling to 1000+ Agents for 24/7 development.