CLIProxyAPI Deployment Guide: Aggregate Multi-Platform AI Accounts for Unlimited Free Tokens
CLIProxyAPI aggregates multiple AI platform accounts into a unified API for low-cost AI usage.
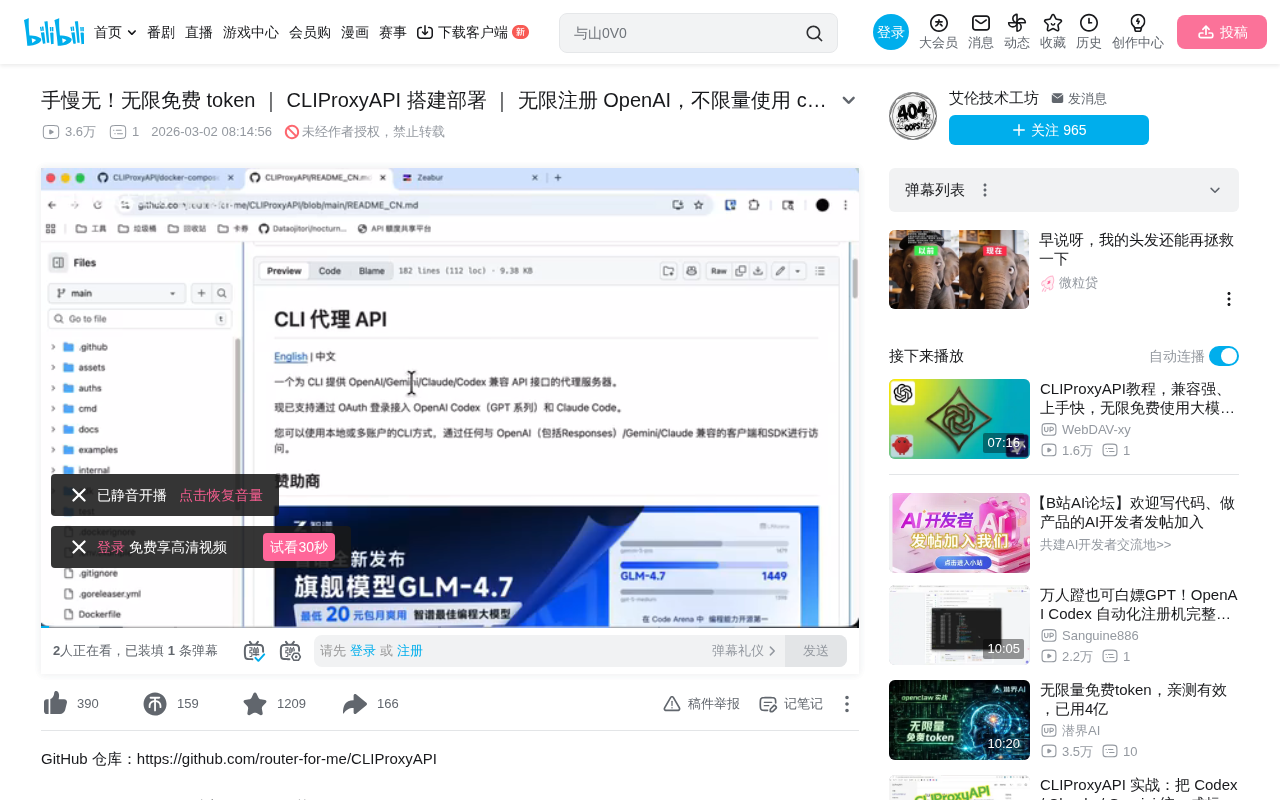
CLIProxyAPI (CPA) is an open-source API proxy aggregation server that consolidates accounts from OpenAI, Gemini, and other AI platforms under a unified interface. Through load-balancing-style multi-account rotation and quota management, it pools scattered free quotas into a substantial resource pool. This article covers the Docker deployment process on the Zipper platform, AI client integration methods, and bulk account registration techniques, while also highlighting risks related to compliance, time sensitivity, and stability.
Introduction
In today's flourishing AI tool landscape, many people hold accounts across multiple platforms like OpenAI, Gemini, and CodeX simultaneously. Switching between different AI services is not only cumbersome, but managing keys and quotas becomes a tangled mess. CLIProxyAPI (CPA) is an open-source proxy server born to solve this problem — it aggregates accounts from multiple AI platforms under a single API interface, enabling centralized management and unified access.
What's more noteworthy is that many AI vendors currently offer free usage quotas to free-tier accounts. Major AI vendors generally adopt a "free tier + paid tier" pricing strategy to attract developers — for example, OpenAI provides new registered users with a certain amount of free API call credits, Google's Gemini API offers a certain number of requests per minute on the free tier, and Anthropic's Claude has similar trial quotas. These free quotas are designed to lower the barrier for developers to try out services, but the free amount for a single account is usually only enough for basic testing. Here's a fundamental concept to understand: A Token is the basic billing unit for large language models — one Token corresponds to approximately 4 characters in English or 1-2 characters in Chinese, and a typical conversation might consume hundreds to thousands of Tokens. A single account's free quota might only be enough for a few rounds of chat, but if you have a large number of accounts and aggregate them through CPA, the cumulative free Token total becomes quite substantial — more than enough to cover personal daily use.
What is CLIProxyAPI? A Load Balancer for AI Accounts
CLIProxyAPI is essentially an API proxy aggregation server with core features including:
- Multi-account aggregation: Consolidate multiple accounts from OpenAI, Gemini, CodeX, and other platforms into a single service
- Unified API interface: Provide standardized API endpoints externally, compatible with mainstream AI clients
- Quota management: Visualize usage and remaining quota for each Token
- Key management: Centrally manage API keys without frequent switching in clients
Simply put, CPA is like a "load balancer" for AI accounts, pooling scattered free quotas from various platforms into a usable resource pool. Load Balancing is a classic architectural pattern in distributed systems, originally widely used in web server clusters, improving system throughput and availability by distributing requests across multiple backend nodes. Common load balancing strategies include Round Robin, Weighted Round Robin, Least Connections, and more. CLIProxyAPI transplants this concept to the AI API management domain — instead of distributing traffic among multiple servers, it rotates requests among multiple AI platform accounts while monitoring each account's quota consumption and automatically skipping accounts that have exhausted their quotas. This design pattern is also common in the API Gateway space — open-source gateways like Kong and Tyk offer similar multi-upstream management capabilities.
This is similar to the approach previously used with Groq API — a single free account has limited quota, but aggregating multiple accounts creates substantial usage capacity.
CLIProxyAPI Docker Deployment Tutorial (Based on Zipper Platform)
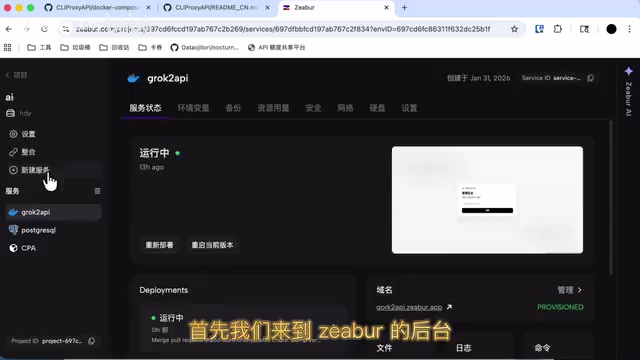
Step 1: Create a Docker Service
This deployment uses the Zipper platform (a convenient server management tool). If you don't have a Zipper account yet, you'll need to register and add your server first.
Before getting started, a brief understanding of how Docker works will be helpful: Docker is an OS-level virtualization technology that packages applications and all their dependencies into standardized containers, ensuring consistent operation across any environment. Compared to traditional virtual machines, Docker containers share the host machine's OS kernel, resulting in faster startup times and lower resource consumption. A Docker Image is a read-only template for containers, containing the code, runtime, libraries, and configuration files needed to run the application.
Here are the specific steps:
- Log into the Zipper dashboard, click "New Service", and select the Docker method
- Enter the CPA Docker image address
- Configure environment variables — just enter
Cloud - Add port mapping: Change the default port 3000 to 8370
- Add a data volume: Enter
Datafor the volume ID, andDatafor the mount path as well - Enter the startup command, then click Deploy
Two core Docker concepts are involved here: Port Mapping is one of Docker networking's core mechanisms — it maps a port inside the container to a port on the host machine, allowing external networks to access services within the container. In this case, it exposes the CPA service from inside the container to port 8370 on the host. Volumes are Docker's persistent storage mechanism — even if a container is deleted or rebuilt, data mounted in volumes won't be lost, which is crucial for preserving CPA's configuration files and Token data.
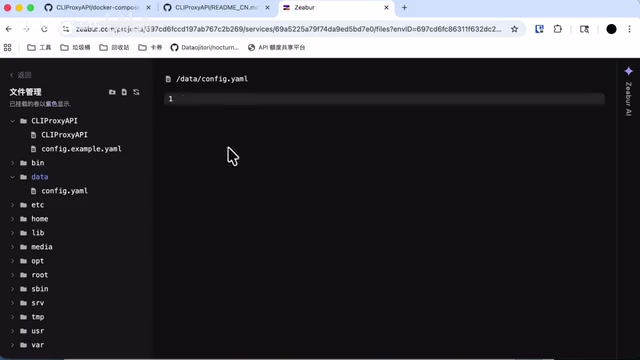
Step 2: Bind Domain and Edit Configuration File
After deployment starts, proceed with domain binding and configuration file setup:
- Add a domain: In the Zipper dashboard, add a custom domain, enter your desired name, and click bind. The domain turns green when binding is successful
- Edit the configuration file: Once the service status shows "Running", enter file management and find the
Configfile under theDatadirectory (if it doesn't appear, exit and re-enter) - Fill in key configurations:
Key: Backend login password (e.g.,Separate123)API Key: The API key provided externally
- After saving the configuration, restart the service for changes to take effect
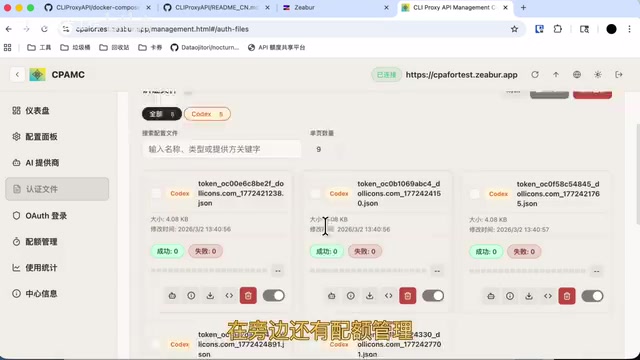
Step 3: Log into the Dashboard and Upload Tokens
Access the CPA dashboard via the bound domain:
- Append the backend path to the domain to navigate to the login page
- Enter the previously set key to log in
- Go to the "Authentication Files" page and upload your AI platform Tokens
- In "Quota Management" you can view the current usage of each Token
- In the "Dashboard" you can see the connected BaseURL address
How to Connect AI Clients to CPA
Once deployment is complete, you can use it in any AI client that supports custom APIs. The key here is that CPA's unified API interface follows the de facto standard format of the OpenAI API, which has become the universal protocol in the AI industry. Its core endpoints include /v1/chat/completions (chat completions), /v1/models (model list), and other RESTful interfaces, with requests and responses in JSON format. Since OpenAI was the first to define this API specification, a large number of subsequent AI clients (such as ChatBox, NextChat, LobeChat) and development frameworks (such as LangChain, LlamaIndex) have built-in support for this format. This means that as long as CPA correctly implements this interface specification, virtually all mainstream AI clients can connect seamlessly without any additional adaptation work.
Specific connection steps:
- Create a new API configuration in the client and enter a name
- For BaseURL, enter the address shown in the dashboard (the BaseURL tells the client to send requests to CPA's address instead of OpenAI's official address, achieving transparent request proxying)
- Copy the API Key from the "Manage Keys" section in the CPA dashboard
- After adding, fetch the model list, select the models you need (such as the CodeX series) and enable them
- Enter the chat interface, select the CPA service and corresponding model you just configured, and start chatting
The entire process is transparent to the client — it only needs to connect to CPA's single API endpoint, while all the multi-account rotation and quota management is handled automatically by CPA behind the scenes.
Methods and Considerations for Bulk Registering OpenAI Accounts
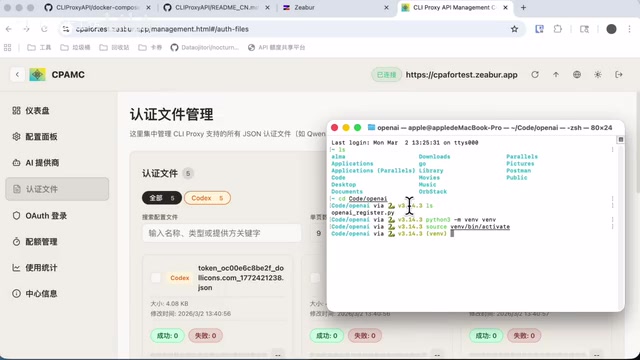
To fully leverage CPA's aggregation advantages, having enough accounts is key. There are currently some automated registration scripts available. The basic process is as follows:
- Obtain the OpenAI registration script (written in Python)
- Create a Python virtual environment:
python3 -m venv env - Activate the virtual environment and install dependencies
- Run the registration script
A brief note on Python virtual environments: A Python Virtual Environment is the standard practice in the Python ecosystem for isolating project dependencies. A virtual environment created with the python3 -m venv command generates an independent Python interpreter copy and package management space within the project directory, avoiding dependency conflicts between different projects. Automated registration scripts typically rely on browser automation frameworks like Selenium or Playwright to simulate user actions, or directly call the platform's registration API endpoints. These scripts need to handle challenges including CAPTCHA recognition, email verification, and IP-based risk controls.
Important points to note:
- Your IP address must belong to a country/region where ChatGPT access is allowed, otherwise registration will fail outright
- Success rates are low in local network environments — it's recommended to run scripts on overseas servers for significantly higher success rates. The reason overseas servers have higher success rates is twofold: they avoid network access restrictions in certain regions, and IP addresses from overseas data centers typically have higher reputation scores in platform risk control systems
- Some registration failures during script execution are normal — just run it a few more times
Risk Warnings and Usage Recommendations
Potential Risks
While this solution looks appealing, there are several risks you must understand upfront:
- Compliance issues: Bulk registering accounts may violate the terms of service of various platforms, carrying the risk of account bans. Most AI platforms explicitly prohibit one person from holding multiple accounts in their Terms of Service, and violators may face permanent bans on all associated accounts
- Time sensitivity: Free quota policies may be adjusted at any time, and vendors may strengthen anti-abuse detection. AI vendors typically detect bulk registration and abuse through device fingerprinting, IP correlation analysis, usage pattern recognition, and other methods — these risk control systems are continuously being upgraded
- Stability: Solutions relying on free Tokens are inherently unstable and unsuitable for production environments
Summary
As an API aggregation proxy tool, CLIProxyAPI has a very practical design philosophy — unified interface, centralized management, and automatic rotation. For individual users, it provides a low-cost or even zero-cost pathway to use multiple AI models. Combined with deployment tools like Zipper, the entire setup process isn't overly complex.
However, "free lunches" often come with uncertainty. It's recommended to treat this as a tool for learning and experimentation. If you have stable usage needs, you should still consider paid plans. Technology itself is neutral — what matters is how you use it responsibly.
Related articles
 Tutorials
Cursor + Codex Dual-IDE Collaboration: A Practical Methodology for Open-Source Project Customization
A complete methodology for open-source project customization based on real-world experience, detailing the Cursor+Codex dual-IDE workflow, seven-stage process, MVP validation, and AI source code reading techniques.
 Tutorials
Cursor Multi-Agent in Practice: Building a Full-Stack Next.js Blog in 50 Minutes
Build a full-stack blog in 50 minutes using Cursor IDE's multi-Agent mode with Next.js, Clerk auth, and Supabase. Learn the 4-phase AI Agent workflow and key integration pitfalls.
 Tutorials
Building an AI Software Factory from Scratch: A Cursor Engineer's Hands-On Experience with Multi-Agent Collaboration
Cursor engineer Eric shares practical insights on building an AI software factory: automation levels, guardrail design, parallel Agent management, and scaling to 1000+ Agents for 24/7 development.