Codex Setup Guide for China: Complete Tutorial from Registration to Running

A full tutorial on using OpenAI Codex in China via third-party API relays and CC Switch.
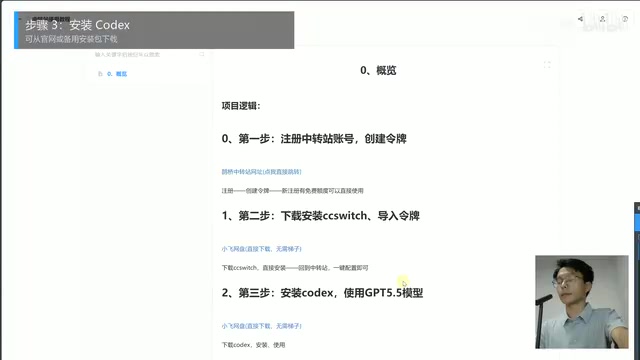
This article provides a complete solution for users in China to run the OpenAI Codex client. It covers obtaining low-cost API keys through third-party relay platforms, using the open-source CC Switch tool to bridge tokens to the local Codex client for request redirection, and key installation steps including running as Administrator, sandbox configuration, and dependency installation. A white screen on first launch lasting about one minute is normal behavior.
Introduction
OpenAI's Codex client is a powerful AI programming tool, but due to network restrictions, users in China face certain barriers to direct access. Based on a hands-on tutorial by Bilibili creator Xiaofei, this article compiles a complete solution for using Codex in China, covering everything from registration and configuration to successful execution.
What Is the Codex Client?
The OpenAI Codex client is a localized AI programming environment. Unlike regular ChatGPT conversations, it combines sandbox execution capabilities with the code generation power of large language models. A sandbox is a security isolation mechanism that allows programs to run in a restricted environment without affecting the host system. Codex leverages this feature to safely generate, run, and test code locally, enabling a complete workflow from requirement understanding to code delivery. This also explains why administrator privileges are required during installation — creating the sandbox environment demands elevated system permissions to configure the isolated space.
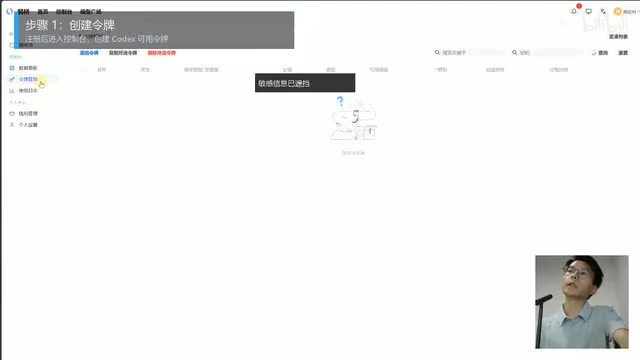
Registering on an API Platform to Obtain a Key
Since OpenAI's official API is not directly accessible in China, you'll need to obtain a usable key through a third-party API relay platform (such as "Kongcai" and similar services).
These API relay platforms work by deploying proxy servers overseas that forward users' API requests to OpenAI's official endpoints and return the responses, thereby bypassing network access restrictions. Platforms typically use a "rate multiplier" billing model — for example, a 0.1x rate means the cost is roughly one-tenth of OpenAI's official pricing, since the platform secures lower costs through bulk purchasing or special channels.
Here's what to do:
- Go to the platform's registration page and fill in a username and password (use a strong password)
- After successful registration, log in — the platform will provide a ¥0.5 credit for testing
- Navigate to "Token Management" and click "Add Token"
- Enter any name you like, and select the 0.1x rate group (suitable for GPT 5.5)
- Submit to complete the creation
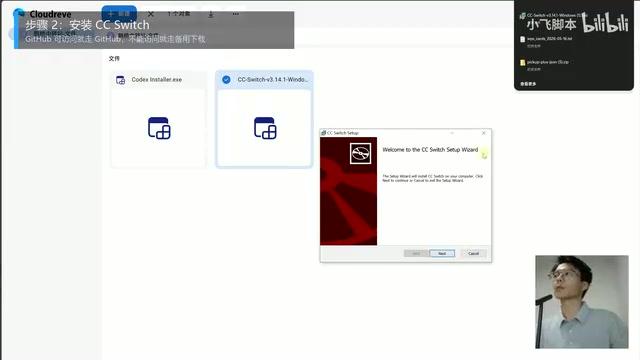
Installing and Configuring CC Switch
CC Switch is an open-source tool on GitHub that bridges third-party API keys to local clients — a critical component for using Codex in China.
Its core mechanism works by launching a local proxy service that intercepts requests from the Codex client destined for OpenAI's official API (api.openai.com), redirecting them to the third-party API platform's endpoint while replacing the API Key in the authentication header with the token created on the third-party platform. This "man-in-the-middle" style request rewriting is completely transparent to the Codex client — it believes it's communicating with OpenAI's official servers, while the traffic is actually being forwarded to the relay server.
Download and Installation
- Download the latest version directly from GitHub (version 3.1/4.1 at the time of the tutorial)
- Users who can't access GitHub can obtain it via cloud storage links (identical to the GitHub version)
- Install with default options
Importing the Token
- Return to the Token Management page on the API platform
- Find the token you created and click the downward triangle icon
- Select the "CC Switch" option
- Choose "Codex" as the import target
- Select GPT 5.5 (or your preferred primary model)
- Click "Open CC Switch" to confirm the import
After a successful import, click "Test Model" on the right side to verify. Under normal conditions, latency should be around 1–2 seconds (normal range for overseas models). This latency accounts for the round-trip time from your local machine to the relay server and then to OpenAI's servers. Compared to a direct connection, it adds one extra network hop, but this has minimal impact on programming assistance scenarios.
Installing the Codex Client
The Codex client can be downloaded from OpenAI's official website. Users in China can also obtain the installer via cloud storage links.
Installation Notes
- During installation, you may be prompted about missing dependencies that need to be searched for and installed from the Microsoft Store (typically WebView2 Runtime or Visual C++ Redistributable — common dependencies for modern desktop applications)
- After installation, no desktop shortcut will be created. Search for "Codex" using the search bar in the bottom-left corner
- You must run it as Administrator
First Launch Configuration
- The first time you open it, you may see a white screen — wait patiently for about 1 minute (it's connecting to overseas servers)
- When the sandbox permission prompt appears, click "Allow"
- Click "Setup" to complete the sandbox configuration (if it fails, confirm you're running as Administrator)

Getting Started
Once successfully launched:
- Click "New Chat" in the upper-left corner
- Use the folder icon in the lower-left to add your project directory
- Select the model (GPT 5.5) and thinking depth on the right side
- Start chatting and working on programming tasks
Thinking Depth is a parameter that controls the length of the model's reasoning chain. Higher depth means the model spends more time "thinking" through complex problems, making it suitable for high-difficulty tasks like architecture design. Lower depth provides faster responses, ideal for simple code completion.
FAQ
| Issue | Solution |
|---|---|
| White screen on launch | Wait patiently for about 1 minute |
| Setup failure | Run as Administrator |
| Login prompt appears | Check CC Switch configuration, re-import the token, and restart Codex |
| Installation error | Install required dependencies from the Microsoft Store |
Key Takeaways
- Bypass China's network restrictions by obtaining API keys through third-party relay platforms
- Use the CC Switch tool to bridge API tokens to the Codex client
- Codex must be run as Administrator with sandbox configuration completed
- A white screen on first launch is normal — just wait about 1 minute
Related articles
 Tutorials
Cursor + Codex Dual-IDE Collaboration: A Practical Methodology for Open-Source Project Customization
A complete methodology for open-source project customization based on real-world experience, detailing the Cursor+Codex dual-IDE workflow, seven-stage process, MVP validation, and AI source code reading techniques.
 Tutorials
Cursor Multi-Agent in Practice: Building a Full-Stack Next.js Blog in 50 Minutes
Build a full-stack blog in 50 minutes using Cursor IDE's multi-Agent mode with Next.js, Clerk auth, and Supabase. Learn the 4-phase AI Agent workflow and key integration pitfalls.
 Tutorials
Building an AI Software Factory from Scratch: A Cursor Engineer's Hands-On Experience with Multi-Agent Collaboration
Cursor engineer Eric shares practical insights on building an AI software factory: automation levels, guardrail design, parallel Agent management, and scaling to 1000+ Agents for 24/7 development.