Complete Installation & Configuration Guide for VectCut AI Editing Agent: Windows & Mac

VectCut AI Agent enables automated video editing through natural language conversation
VectCut has launched the "Editing Crayfish" AI Agent, enabling users to complete video editing tasks like talking-head cuts, livestream clipping, and footage remixing through natural language conversation. This guide details the installation and configuration process for both Windows and Mac, including client installation, CapCut draft path configuration, and Git Bash setup, with a hands-on demo verifying the toolchain's functionality.
What is the VectCut Editing Agent?
VectCut has launched an AI Agent feature called "Editing Crayfish" (剪辑小龙虾), built around a core concept: completing video editing tasks through natural language conversation. You don't need to manually manipulate timelines — just tell the AI what you want to do — cut talking-head videos, add subtitles, remix footage, remove filler pauses — and it will automatically plan execution paths, invoke built-in skills, and generate editing drafts.
What is an AI Agent? An AI Agent is an AI system capable of perceiving its environment, autonomously planning, and executing multi-step tasks — distinct from traditional single-turn Q&A AI. Its core capability lies in "Tool Use" (Function Calling) — the Agent can autonomously decide which external tools or APIs to invoke based on task requirements, and dynamically adjust its next steps based on execution results. This architecture operates with a Large Language Model (LLM) as the "brain," working in conjunction with a set of predefined skill libraries. "Editing Crayfish" is precisely this architecture applied to video editing: the LLM understands your editing intent, while the skill library handles the actual manipulation of CapCut (剪映) draft files.
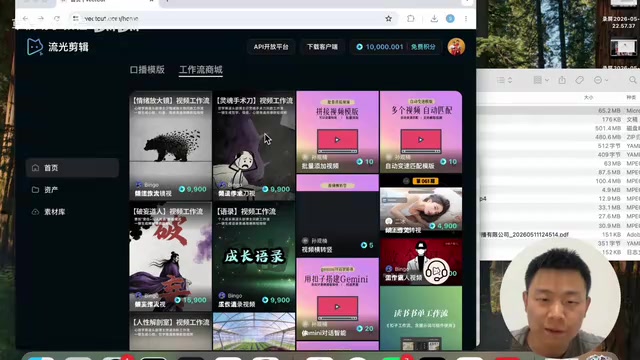
Generated drafts can be used in two ways: rendered directly in the cloud into finished videos, or downloaded to the local CapCut app for further editing. Currently supported scenarios include:
- Talking-head video editing: Automatically add titles, subtitles, and animated text effects
- Livestream highlight clipping: Extract highlight segments from one or two-hour livestream recordings
- B-roll footage remixing: Splice multiple clips together with AI voiceover and subtitles
- Entertainment/viral content: Stickman cards, book list videos, quote videos, etc.
- Digital avatar talking-head: Generate talking-head content combined with digital human technology
More importantly, the ultimate goal of this tool isn't simple template application — it's enabling users to orchestrate their own editing workflows through no-code conversation.
Windows Installation & Configuration
Downloading and Installing the Client
First, visit the official website www.vectcut.com, click "Download Client," and select the Windows version to automatically download the installer. Double-click the installer and the software will complete installation automatically, creating a desktop shortcut. First launch requires scanning a QR code to log in, with support for WeChat and phone number login.
Configuring the CapCut Draft Path
After logging in, you'll enter the settings page where two key configurations need to be completed:
First, set the CapCut draft location. Open the CapCut client, click "Global Settings" in the upper right corner, find the draft save path and copy it. Return to VectCut's settings page, paste the path into the "Draft Location" input field, and click the arrow to select the folder. If the path is set correctly, the system will prompt that existing draft projects have been detected.
Technical Principle Behind Draft Interoperability: The draft interoperability between VectCut and CapCut relies on CapCut's local file format (typically JSON-structured project files). After VectCut's AI generates an editing plan in the cloud, it serializes it into a draft format recognizable by CapCut and writes it to the local draft directory. CapCut automatically scans this directory on startup and loads the drafts, enabling an "AI generates, human refines" collaborative workflow. This design avoids the cost of redeveloping a player and rendering engine while letting users retain complete control over the final output.
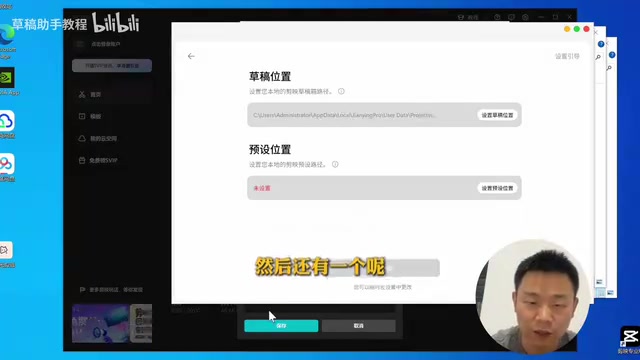
Second, set the preset location. Similarly, find "Preset Save Location" in CapCut's global settings page, copy the path, and paste it into the corresponding setting in VectCut. Once the preset is selected, there won't be additional prompts — the default is correct.
Installing Git Bash
This step is unique to Windows. Git Bash serves as the bridge for AI to operate on your local computer — unlike humans who click with a mouse, AI executes tasks through command-line tools.
Why Does Windows Need Git Bash? Git Bash is a tool that emulates a Unix/Linux command-line environment on Windows, originally designed for Git version control operations. In the AI Agent workflow, it plays the role of the "execution layer" — operation instructions generated by the LLM (such as file read/write, script execution, API calls) need a command-line environment to be executed. Mac systems natively include Bash/Zsh terminals, so no additional installation is needed. Windows' default Command Prompt (CMD) has poor compatibility with Unix commands, and Git Bash fills this gap, allowing AI to execute cross-platform script instructions in a consistent manner on Windows.
Installation is straightforward: click the link provided on the settings page, or directly click "Click here to download" to get the installer. During installation, keep all options at their defaults and click Next throughout. It installs to the C drive by default and doesn't take up much space.
After installation, you need to set the Git Bash path in VectCut. If installed to the default location, the path is typically C:\Program Files\Git\bin — select it as prompted.
Mac Installation & Configuration
Downloading and Installing
The Mac installation process is more streamlined. Visit the official website to download the Mac installer, double-click to open it after downloading, and drag the application into the Applications folder. Once installed, find "VectCut" in Launchpad or the Applications folder and double-click to launch.
First launch also requires login, supporting Google, WeChat, and phone number as three login methods.
Configuring Draft and Preset Paths
The configuration logic on Mac is identical to Windows:
- Open CapCut → Global Settings → Copy the draft save path
- Paste the draft path in VectCut's settings (right-click "Show in Finder" for easy access to the full path)
- Set the preset save path the same way
You may not have noticed, but Mac does not require installing Git Bash — this is the main difference in configuration between the two platforms. Mac's built-in terminal environment already meets the AI Agent's needs for executing local commands.
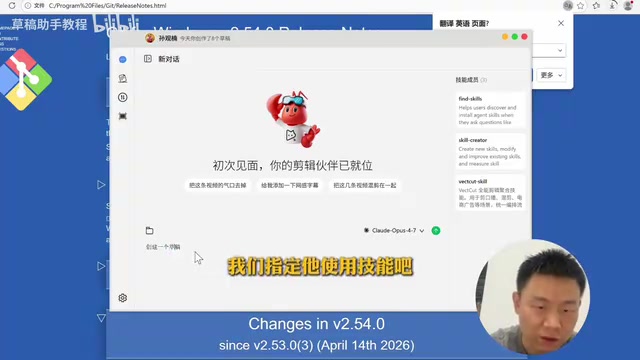
Client Interface & Basic Operations
Interface Layout Overview
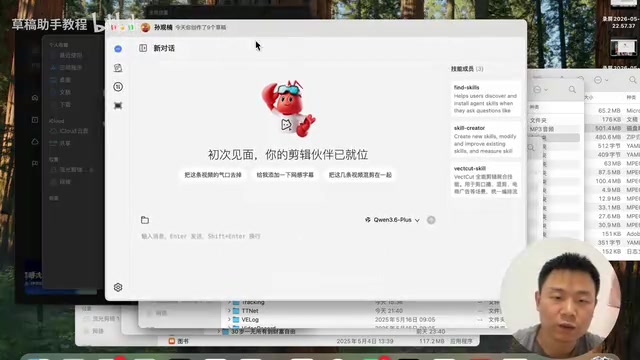
After entering the client, the left toolbar from top to bottom includes:
- Chat Assistant: The core interface for interacting with AI — send editing instructions here
- Draft List: View all cloud-generated drafts, with support for downloading to local
- Download Manager: Shows draft download progress
- Preset Manager: Create and manage editing templates (advanced feature)
- Settings: Adjust previous configurations at any time
Model Switching & Multiple Sessions
VectCut supports switching between different AI models (such as GPT, Claude, etc.) within a single session, and also supports opening multiple independent conversations simultaneously. Each conversation is completely isolated and doesn't affect the others. This means you can execute multiple editing tasks in parallel across different conversations, easily achieving batch processing.
Different AI models perform differently when understanding complex editing instructions and handling multi-step tasks. The GPT series excels at structured task decomposition, while the Claude series stands out in understanding long-text context. In practice, you can flexibly switch based on task type to find the model combination that best suits your workflow.
Hands-On: Creating Your First Editing Draft
Let's verify that the installation and configuration are successful through the most basic task — having AI create a new draft. After sending the instruction, you can clearly see AI's complete thinking and execution process:
- Task Understanding: AI analyzes the instruction and confirms the need to create a new draft
- Skill Search: Searches the built-in VectCut Skills for the draft creation API
- Environment Check: Verifies that the execution environment is ready
- Self-Correction: When a Chinese encoding issue causes execution failure, AI automatically searches for the error cause and attempts a new solution
- Task Completion: Successfully calls the
create_draftinterface and generates a draft ID
How Self-Correction Works: AI's self-correction capability is an important feature of modern Agent architectures, typically implemented through the "ReAct" (Reasoning + Acting) framework. When a tool call returns an error message, the Agent feeds the error content back to the LLM for analysis. The LLM generates a new solution based on the error type (such as encoding issues, insufficient permissions, path errors) and attempts execution again. This "think → act → observe → rethink" loop can continue for multiple rounds until the task succeeds or reaches the maximum retry count. This is why in the execution process above, even when encountering a Chinese encoding error, the AI can self-diagnose and switch solutions without requiring manual user intervention.
This process fully demonstrates the architectural characteristics of "Editing Crayfish" — every step of AI's thinking and execution is transparent and visible, with autonomous self-correction capabilities. Even if a tool call fails, it will try other methods to complete the task.
Once the draft is created, you can find it in the draft list and double-click to download it locally. After downloading, open CapCut and you'll see this new draft in the draft box, ready for adding content or further editing.
Summary & Outlook
This tutorial covers the complete installation and configuration process for VectCut Agent on both Windows and Mac platforms, and verifies the entire toolchain's usability through a minimal "create draft" task. From this simple example, you can already see the potential of AI Agents in video editing: it's not a simple template tool, but an intelligent editing assistant capable of understanding natural language, autonomously planning execution paths, and self-correcting errors.
This "conversation as workflow" paradigm represents an important evolutionary direction for creative tools — professional capabilities are no longer locked behind complex operation interfaces, but opened to everyone through natural language conversation. As Agent technology continues to mature, the barrier to video editing will further decrease, allowing creators to focus more energy on the content itself rather than the learning cost of tools.
Subsequent tutorials will progressively dive into more complex scenarios — removing filler pauses, adding subtitles, remixing, livestream clipping, and more — with the ultimate goal of enabling every user to define their own editing workflow through conversation.
Related articles
 Tutorials
Cursor + Codex Dual-IDE Collaboration: A Practical Methodology for Open-Source Project Customization
A complete methodology for open-source project customization based on real-world experience, detailing the Cursor+Codex dual-IDE workflow, seven-stage process, MVP validation, and AI source code reading techniques.
 Tutorials
Cursor Multi-Agent in Practice: Building a Full-Stack Next.js Blog in 50 Minutes
Build a full-stack blog in 50 minutes using Cursor IDE's multi-Agent mode with Next.js, Clerk auth, and Supabase. Learn the 4-phase AI Agent workflow and key integration pitfalls.
 Tutorials
Building an AI Software Factory from Scratch: A Cursor Engineer's Hands-On Experience with Multi-Agent Collaboration
Cursor engineer Eric shares practical insights on building an AI software factory: automation levels, guardrail design, parallel Agent management, and scaling to 1000+ Agents for 24/7 development.