Complete Workflow for AI First-Person Emotional Short Films: From Script to Final Cut in Four Steps

Complete four-step workflow breakdown for creating first-person AI emotional short films
This article systematically breaks down the four-step production workflow for first-person AI realistic farewell short films: generating original scripts with AI, constructing precise text-to-video prompts (especially global constraints), AI video generation and troubleshooting, and editing in CapCut (with the blink transition as the core technique). It emphasizes that prompt precision and global constraints are key to visual quality, while choosing the right story, writing good prompts, and mastering editing techniques form the core competitive advantage.
Why First-Person AI Short Films Go Viral
The first-person AI realistic farewell short films flooding social media recently have moved countless viewers to tears, thanks to their powerful immersion and emotional intensity. The core advantage of this format lies in the first-person perspective naturally closing the distance with viewers. Combined with AI-generated realistic visuals and carefully designed blink transitions, it creates a sense of fate — "one blink, one lifetime."
But many creators get stuck at the starting line — unsure how to write the script, construct prompts, or edit the generated videos into a finished piece. Today we'll break down the entire production workflow into four core steps: script creation, text-to-video prompt writing, AI video generation, and post-production editing. Beginners can follow along and produce a complete work.
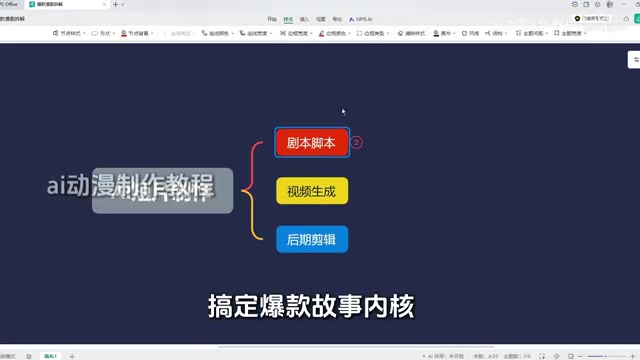
Step One: Generate an Original Script with AI
Two Ways to Get a Script
There are two paths to obtaining a script: First, adapting existing stories from web novel platforms like Tomato Novel — the advantage is mature storylines with rich emotions, but there are copyright risks, so beginners shouldn't use them directly. Second, using AI large language models to generate original scripts — zero cost and completely copyright-free.
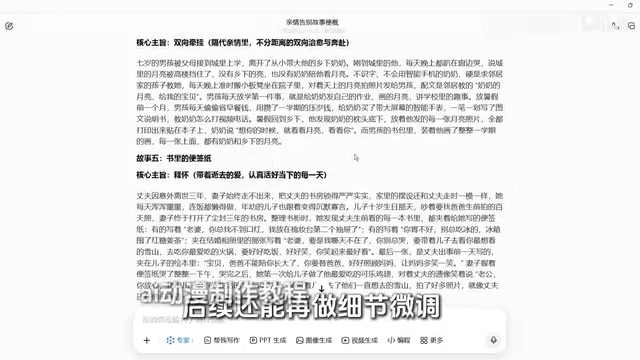
Ready-to-Use Prompt Template
Here's the recommended prompt framework (swap keywords based on your theme):
You are an award-winning emotional short video director with tens of millions of followers, and also a director specializing in realistic AI video visual logic. Please write 5 different story scripts centered on the theme of "family farewell." Only story synopses are needed — no storyboards. Each story must have strong everyday-life authenticity and emotional tension, with detailed plot points that hit viewers emotionally and trigger deep resonance.
Two key details here:
- The identity setup at the beginning sets the tone for the AI. For ancient Chinese-style short films, change it to "award-winning ancient-style screenwriter"; for suspense, switch to the corresponding identity
- The ending note "only story synopses, no storyboards" prevents the AI from outputting irrelevant content — at this stage, you only need creative ideas and storylines
If you're not satisfied with the results, add optimization instructions like "use different emotional cores covering family love, growth, regret, reconciliation, etc." until you find the story with the strongest visual potential.
Step Two: Construct Precise Text-to-Video Prompts
90% of beginners encounter issues with off-target visuals, confused perspectives, and inconsistent styles during AI video generation — the root cause is almost always the prompts. Prompt construction consists of two essential parts, both indispensable.
Individual Scene Prompts
Fit each segment from your script into a template so the AI generates the corresponding visuals precisely. Each prompt should include: duration, visual description, dialogue content, and emotional atmosphere. The more precise the prompt, the better the output.
Interestingly, since we're working in first-person perspective, each segment features different scenes and characters, so there's no need to pre-generate character reference images. Using text prompts directly actually better ensures that the age appearance and scene setting match the story at each stage. Another practical reason: generated character design images have a high probability of failing platform content reviews.
Global Constraint Prompt (Most Critical)
This is the core element ensuring unified perspective and consistent style across all segments. It must be pasted at the end of every single prompt:
Full first-person perspective throughout, natural slight head movement, single continuous shot with no close-up cuts, no push/pull camera movements; consistent rough digital camcorder feel throughout, with natural image noise, slightly imprecise focus, naturally messy ambient lighting; no background music throughout, no subtitles, no watermarks, preserving authentic ambient sound and character dialogue.
Many people report that their generated videos switch to third-person, look too polished to feel immersive, or appear "too AI" — all because this global constraint is missing. Treat this paragraph as an "insurance clause" — attach it to the end of every prompt.
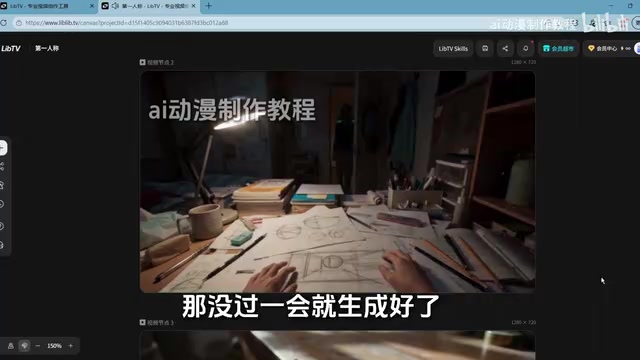
Step Three: AI Video Generation and Troubleshooting
Once prompts are ready, send them to your AI video generation tool (such as CDES 2.0), making sure to select 16:9 landscape format. After generation, check each segment individually. Common issues and solutions:
| Issue Type | Solution |
|---|---|
| Dialogue errors/missing or extra words | Modify the dialogue in the prompt, precise to every single word, and regenerate |
| Actions don't match expectations | Refine action descriptions, e.g., change "female lead turns head" to "female lead slowly turns head looking to the left" |
| Perspective switches to third-person | Check if the global constraint prompt is pasted completely, confirm it's intact, then regenerate |
| Visual clipping/distorted scenes | Add "visual distortion, spatial disorder" to negative prompts while refining scene descriptions |
Iterate each segment using this method until you're satisfied with the results, then download and save them one by one.
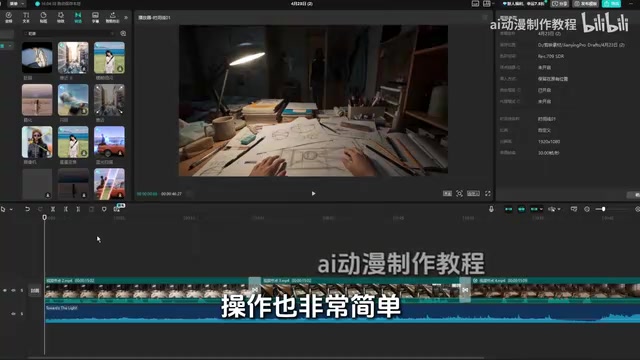
Step Four: Five Key Elements of Editing in CapCut
For editing, CapCut is recommended (desktop and mobile versions share the same logic). The entire post-production workflow has five components:
1. Import and Arrange Materials
Import all generated segment files into CapCut and drag them onto the timeline in story order.
2. Add the Signature Transition — Blink Effect
This is the most critical editing technique for the entire short film. Click "Transitions" in the upper left, search for "blink," and drag the transition effect to the junction between two segments. Recommended duration: 0.8-1 second — this matches the natural rhythm of human blinking and perfectly achieves seamless switching between ages and scenes, creating the "one blink, one lifetime" effect.
3. Add Subtitles
Click "Text" → "Default Text" and drag it onto the timeline aligned with the character's speaking duration. Choose a clean, quality font like bold or rounded sans-serif — avoid flashy fonts that steal attention. Add slight shadow to subtitles and reduce opacity slightly to ensure readability on any background. Once you've formatted the first subtitle, simply copy and paste it — afterward you only need to change the text content to maintain consistent formatting throughout.
4. Music Selection
Music is the second soul of an emotional short film. Search the CapCut music library for instrumental music that matches your story's emotion (avoid songs with lyrics that compete with dialogue), drag it to the music track, and trim it to match the video length. Key detail: turn down the background music volume to ensure character dialogue remains clear as the priority, with music serving only as emotional support.
5. Preview and Export
After all adjustments are complete, preview the entire piece to confirm pacing, subtitles, and audio-visual sync are correct, then click export in the upper right corner.
Summary: Standardizing the Workflow Is Key to Lowering the Barrier
From this complete workflow, it's clear that producing AI emotional short films doesn't require a complex technical background. The real core competencies come down to three things: choosing a story with emotional tension, writing precise prompts (especially the global constraints), and mastering editing techniques like the blink transition.
As major companies continue releasing more powerful AI video generation tools, the operational barrier will only keep dropping. But as tools become easier to use, content quality and creative differentiation will become the true moat. Rather than worrying about tool iterations, focus on completing your first work with the tools available now — shipping something matters more than anything else.
Related articles
 Tutorials
Cursor + Codex Dual-IDE Collaboration: A Practical Methodology for Open-Source Project Customization
A complete methodology for open-source project customization based on real-world experience, detailing the Cursor+Codex dual-IDE workflow, seven-stage process, MVP validation, and AI source code reading techniques.
 Tutorials
Cursor Multi-Agent in Practice: Building a Full-Stack Next.js Blog in 50 Minutes
Build a full-stack blog in 50 minutes using Cursor IDE's multi-Agent mode with Next.js, Clerk auth, and Supabase. Learn the 4-phase AI Agent workflow and key integration pitfalls.
 Tutorials
Building an AI Software Factory from Scratch: A Cursor Engineer's Hands-On Experience with Multi-Agent Collaboration
Cursor engineer Eric shares practical insights on building an AI software factory: automation levels, guardrail design, parallel Agent management, and scaling to 1000+ Agents for 24/7 development.