Cursor Installation & Core Features Explained: A Zero-Experience Guide to AI Programming
A beginner's guide to installing Cursor and using its Ask, Agent, and Plan modes for natural language programming.
This guide walks complete beginners through installing Cursor AI code editor and understanding its three core feature modes. Ask mode explains code in plain language, Agent mode generates entire projects from a single sentence, and Plan mode breaks complex projects into manageable steps. No programming experience required — just describe what you want in natural language.
What is Cursor?
Cursor is an intelligent code editor with integrated AI capabilities. Think of it as a 24/7 programmer assistant — you describe what you need, it writes the code; you point out a problem, it fixes it; you share an idea, it brings it to life.
For people with no programming background, Cursor completely breaks down the traditional barriers to coding. You don't need to learn any programming language — just describe your requirements in natural language, and the AI generates a complete code project for you. This approach is known as "Natural Language Programming," a long-pursued goal in software engineering. Traditional programming requires developers to master strict syntax rules, where a single misplaced bracket or semicolon can crash a program. Natural language programming allows users to describe their intent in everyday language, with the AI system handling the conversion from natural language to executable code. This paradigm relies on the "code comprehension" capabilities of large language models — models that can not only parse the semantics of human language but also map them to specific programming structures, algorithm choices, and architectural designs.

Cursor's Three Core Advantages
-
Built on VS Code: VS Code (Visual Studio Code) is an open-source code editor released by Microsoft in 2015. It currently has over 14 million active users worldwide and has consistently ranked as the most popular editor in Stack Overflow's developer surveys for multiple years. Its success lies in balancing a lightweight architecture with powerful extensibility — the core editor is only a few dozen MB, but with over 40,000 community plugins, it supports virtually every programming language and development scenario. By building on VS Code, Cursor gives users direct access to this massive plugin ecosystem — including themes, code formatting, version control visualization, and more — while enjoying an AI-enhanced programming experience.
-
Integrated Top-Tier AI Models: Built-in Claude (developed by Anthropic) and the GPT series (developed by OpenAI), these models represent the current state-of-the-art in large language models (LLMs). Trained on massive codebases and technical documentation, they understand programming logic, design patterns, and best practices. Notably, Cursor doesn't simply call a single API — it intelligently selects the most suitable model for different task scenarios. For example, Claude excels at long-context understanding and code generation, while GPT has unique strengths in creative tasks. This multi-model collaboration strategy ensures consistent output quality.
-
Designed for Natural Language Development: No need to learn a programming language — just describe your requirements in everyday language. This lowers the barrier to software development, enabling non-technical roles like product managers, designers, and entrepreneurs to independently build prototypes or even complete products.
How to Install Cursor
The installation process is very simple — just two steps:
- Visit the official website cursor.com
- Download the version for your operating system and double-click to install
It supports Windows, macOS, and Linux. The entire installation process is no different from any regular software — no additional development environment configuration needed. Traditional programming environment setup often requires installing language runtimes, package managers, build tools, and a series of other dependencies, which is a huge hurdle for beginners. Cursor encapsulates all this complexity internally, giving users an out-of-the-box experience.
Cursor Interface Layout Explained
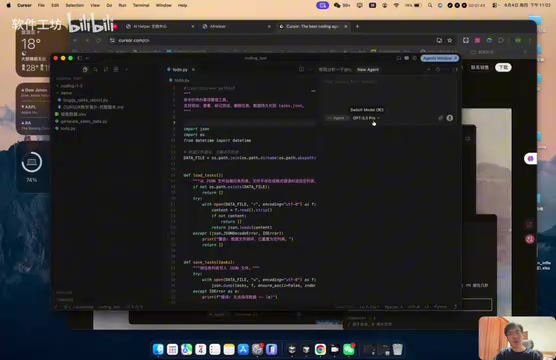
After installation, Cursor's interface is divided into three main areas:
Left Side: File Management Area
This displays the entire file structure of your project, where you can see which files the AI has generated. Click on any file to view its contents in the middle area. For beginners, this area is primarily used for browsing and confirming AI output. The file structure follows software engineering best practices — for example, frontend projects typically separate HTML, CSS, and JavaScript into different files, while backend projects organize directories by functional modules. Even if you don't fully understand what each file does, a clear directory structure helps you build an overall understanding of the project.
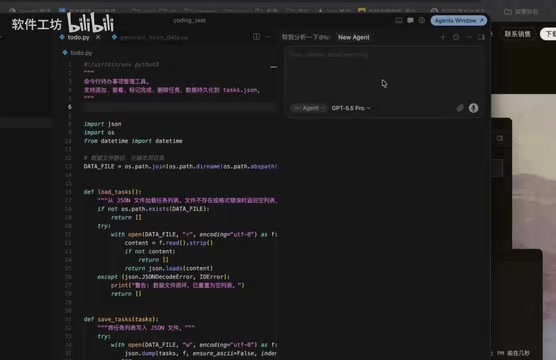
Middle: Code Editing Area
This is the traditional code editing area. While you can manually modify code here, in AI programming mode, you basically don't need to write code — just review what the AI has generated. The editor provides syntax highlighting, code folding, error indicators, and other assistive features. Even if you're not writing code, these visual cues help you quickly locate key parts of the AI-generated content.
Right Side: AI Chat Area (Core Workspace)
This is where you should spend 90% of your time. You describe your requirements here, and the AI responds and generates code here. This design philosophy is quite clever — it lets you focus on "what to do" rather than "how to do it," leaving all technical details to the AI.
This interaction method is essentially a "Conversational Programming" paradigm. Unlike traditional command-line or graphical interfaces, conversational interaction allows for ambiguous expressions, progressive refinement, and contextual continuity. You can start with a general direction and gradually refine the details through multiple rounds of conversation, just like collaborating with an experienced programmer.
Cursor's Three Core Feature Modes
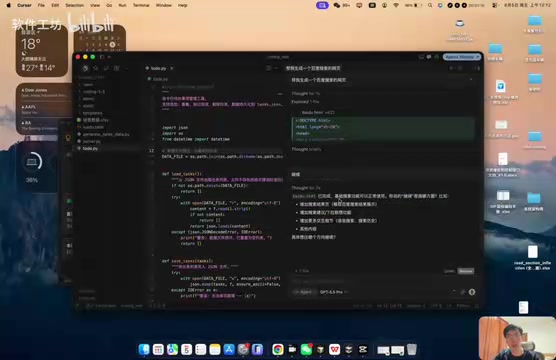
Ask Mode: Intelligent Q&A and Code Analysis
Ask mode is ideal when you want to understand code functionality, seek explanations, or get suggestions.
For example, you can ask the AI: "Help me analyze what this file's code does." The AI will explain in natural language what the code accomplishes and what modules it contains. Even if you don't understand code at all, you can grasp a project's logical structure through Ask mode.
The value of Ask mode goes beyond explaining code — it helps you build programming intuition. As you repeatedly ask about different code functions, you'll gradually understand common programming patterns — for instance, "loops" repeat an operation, "conditional statements" execute different logic based on different situations, and "functions" package a set of operations for reuse. This progressive learning approach is more efficient and intuitive than traditional textbook-style learning.
Agent Mode: Generate Complete Projects with a Single Sentence
Agent mode is Cursor's most powerful feature, built on AI Agent (intelligent agent) architecture. Unlike simple Q&A, an Agent has the ability to autonomously plan, call tools, and interact with the environment. When you give an instruction, the Agent automatically breaks down the task, creates files, writes code, checks for errors, and makes corrections — this is a complete "perceive-decide-execute" loop. Technically, the Agent interacts with the file system, terminal commands, and other tools through a Function Calling mechanism, capable of reading existing code context, creating new files, modifying existing files, and even running commands to verify results.
Agent mode can:
- Generate complete project files
- Perform multi-file collaborative development
- Implement complex feature development
- Refactor entire project structures
- Add new functional modules
In practice, with a simple instruction like "Build me a Baidu search webpage," the Agent automatically generates a complete HTML file that, when opened in a browser, closely replicates the original. You don't need to understand the code logic — just check whether the final result meets your expectations. This autonomy enables complex multi-file projects to be completed with a single sentence, dramatically improving development efficiency.
Plan Mode: Step-by-Step Planning for Complex Projects
Plan mode's design philosophy combines elements from traditional software engineering's "waterfall model" and "agile development." In large software projects, jumping straight into coding often leads to architectural chaos and high rework costs, which is why professional teams typically conduct requirements analysis, architecture design, and technology selection before entering the coding phase. Plan mode automates this professional workflow — the AI plays the role of an architect, first understanding the overall requirements, then breaking them down into manageable subtasks, and finally implementing them step by step.
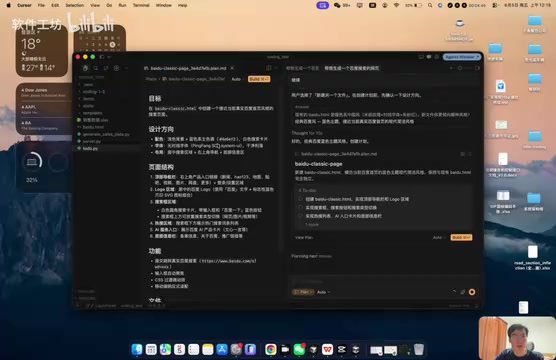
Its workflow is:
- You describe a relatively complex requirement
- The AI generates an execution plan and proactively asks about your preferences (style, structure, etc.)
- After you confirm the direction, the AI provides a detailed design proposal (layout structure, feature planning, file organization)
- Click the "Build" button, and the AI implements the plan step by step
Compared to Agent mode's "one-shot" approach, Plan mode is better suited for complex projects requiring fine-grained control, giving you decision-making power at every key checkpoint. This "plan first, execute later" approach is particularly suitable for projects involving multiple pages, complex interaction logic, or database design, effectively avoiding the risk of large-scale refactoring later on.
How to Choose Between the Three Modes
| Mode | Use Case | Core Capability |
|---|---|---|
| Ask | Understanding code, seeking explanations | Analysis & answering |
| Agent | Quickly generating projects, modifying files | Autonomous execution |
| Plan | Complex projects, step-by-step control needed | Planning & negotiation |
Simple decision rule: Use Agent for small tasks to get things done quickly, use Plan for large projects to progress step by step, and when in doubt, use Ask to clarify first.
In real-world development, the three modes are often used in combination. A typical workflow might be: first use Ask mode to understand the existing project structure, then use Plan mode to design the implementation approach for new features, and finally use Agent mode to execute specific coding tasks step by step. As you become more familiar with Cursor, you'll naturally develop your own mode-switching habits.
Summary
As a gateway tool for AI programming, Cursor's core philosophy is to let users focus on "what to do" rather than "how to do it." Remember these key points:
- The AI chat panel on the right is your core workspace — the left and middle areas are just for viewing results
- Each of the three modes has its strengths — choose flexibly based on task complexity
- No programming background needed — just describe your requirements in natural language
For beginners looking to enter the world of AI programming, Cursor is undoubtedly the most friendly starting point available today. Once you've mastered these basic operations, you can start building your first project using natural language. It's worth noting that while Cursor significantly lowers the programming barrier, as your projects grow more complex, gradually learning some basic programming concepts (such as variables, functions, and data structures) will help you describe requirements to the AI more precisely, resulting in better output. AI programming doesn't replace learning — it makes learning more efficient and purposeful.
Related articles
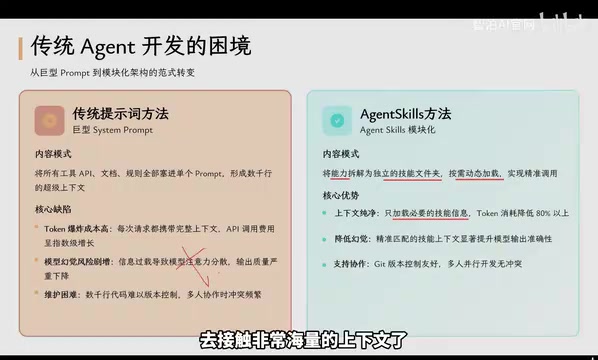
Agent Skills: Folders as Skills — Making AI Produce Precise, Template-Based Output
Agent Skills splits AI capabilities into independent skill folders with on-demand loading and progressive disclosure, cutting token costs by 80% and reducing hallucinations for template-based output.

Five Common Claude Code Mistakes — How Many Are You Making?
Five common Claude Code mistakes developers make: copy-pasting code, skipping CLAUDE.md, inefficient prompting, ignoring docs, and poor context management — with fixes.

Andrew Ng's New Course Explained: A Practical Guide to Using OpenAI's O1 Reasoning Model
Deep dive into Andrew Ng and OpenAI's Reasoning with O1 course covering test-time scaling, new prompting paradigms, multi-model orchestration, and practical applications for developers.