Red Alert Biochem Desert Map Guide: Bunker Rush Mining & Economic Suppression Tactics
Red Alert Biochem Desert Map Guide: Bu…
Red Alert Biochem Desert map breakdown: Bunker Rush opening and economic suppression tactics
This article provides a detailed breakdown of a complete Red Alert 2 Biochem Desert match. The opening features a Bunker Rush that destroys the neighbor's barracks for a quick elimination, followed by flexible base relocation to secure gem deposits and establish economic advantage. Terror Drone harassment is countered with repair vehicles, harvesters are systematically hunted to cripple opponents' economies, and the late game involves controlling half the map's resources, precisely striking purple's high-tech buildings, and defeating remaining opponents one by one.
Map Overview: The Special Mechanics of Biochem Desert
Biochem Desert is a distinctive small map in Red Alert where all players' bases start in the central area of the map. The map features a desert theme with radioactive puddles scattered throughout the middle, creating a biochemical variant of desert terrain. Multiple colored ore deposits are spread across the map, making resource control the core gameplay element.
The radioactive puddles in Biochem Desert aren't merely decorative elements—they're terrain obstacles with actual gameplay effects. In Red Alert 2: Yuri's Revenge, radioactive terrain deals continuous damage to infantry units passing through, meaning pure infantry rushes on this map require careful route planning to avoid irradiated zones. Colored ore deposits (gem mines) yield far more than standard yellow ore—roughly twice the income per unit—which explains why controlling gem deposits carries decisive importance on this map.
Due to the small map size and close player proximity, early territorial control and economic suppression are critically important. This article provides a detailed breakdown of a complete Biochem Desert match, analyzing the tactical thinking from early-game mining to final victory.
Opening Strategy: Nearby Deployment & Bunker Suppression
Base Placement & Rapid Deployment
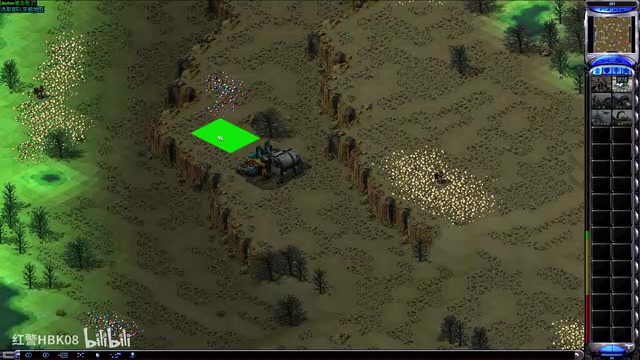
At the start, upon spotting nearby colored ore deposits, the decision was made to deploy the base close by. The core logic behind this decision: on small maps, the location of colored ore determines economic advantage—the sooner you secure ore deposits, the sooner you establish a lead.
However, the neighbor (Chenghuang) also chose a nearby position, placing both players in very close proximity with inevitable territorial conflict.
Bunker Rush Tactics Explained
Facing a close-range opponent, the classic Bunker Rush tactic was employed:
- Build a dog to scout, confirming the opponent's position
- Deploy the first bunker, suppressing the opponent's barracks direction
- Upon discovering the opponent forgot to build a defensive bunker, immediately deploy a second bunker
- Two bunkers' combined firepower directly covers the opponent's barracks
A bunker (Battle Bunker) in Red Alert 2 costs 500 and can garrison 5 infantry. Combined with conscripts (100 each), the total investment is approximately 1000. In comparison, a barracks costs 500—once destroyed, the opponent must rebuild before producing infantry or bunkers. The core economic logic of the Bunker Rush: spend roughly 1000 to destroy 500+ worth of enemy buildings while simultaneously stripping their defensive capability and infantry production, creating an asymmetric advantage. On small maps, the bunker's build-range limitation can be bypassed through forward building placement—constructing a forward structure to extend your build radius.
Once the opponent's barracks was destroyed, they could no longer build bunkers for defense, creating a dead-end situation. A fully-loaded IFV (6-man transport) was then sent to finish off the opponent's base, forcing a surrender. The fully-loaded transport in Red Alert 2 is a highly efficient early assault tool—loaded with infantry, it can rapidly deliver firepower to the enemy base. The timing of deploying the transport after the opponent's barracks was destroyed was precise—at that point, the opponent couldn't produce any infantry to fill defensive structures or counterattack, allowing the transport to push forward with virtually no losses.
Key Lesson: In close-range confrontations on small maps, forgetting to build a defensive bunker is essentially an instant elimination. Bunkers are the most cost-effective defensive structure in the early game.
Mid-Game Development: Base Mobility & Economic Expansion
Flexible Base Relocation
After eliminating the neighbor, two bases were acquired, but keeping the extra base provides little value. The correct approach:
- Drag the base toward colored ore deposits
- Place ore refineries near mining sites
- Decisively sell surplus bases for immediate cash flow
An important characteristic of this map is that the overall economy is resource-poor. While the opening Bunker Rush successfully eliminated the opponent, it also consumed significant resources (bunkers, infantry, dogs), creating mid-game economic pressure.
Dealing with Terror Drone Harassment
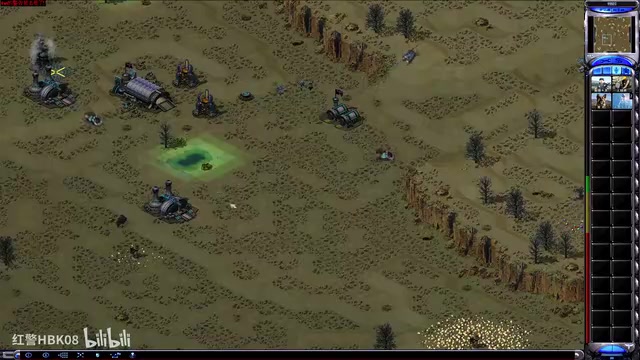
The pink player attempted an Engineer + Terror Drone base-stealing tactic. The counter is straightforward:
- Use tanks to draw the Terror Drone's attention
- Pack up the base to dodge
- Even if a drone burrows into the base, simply build a repair vehicle to fix it
Terror Drones (commonly called "spiders") are a Soviet faction specialty unit costing 500 that can burrow into enemy vehicles to deal continuous internal damage. Infected units will be slowly destroyed if not treated promptly. The repair vehicle (Service Depot/Repair Drone) is the only field unit capable of extracting a Terror Drone from a vehicle; a Service Depot building can also accomplish this. While the Terror Drone base-stealing tactic has high theoretical damage potential (bases are worth thousands), in practice, the opponent only needs to keep one repair vehicle near their base to completely neutralize it. The drone itself costs 500 plus the engineer (500) for a combined cost of 1000, making the risk-reward ratio unfavorable.
An important insight here: Terror Drone base harassment has poor cost-effectiveness because the opponent can easily counter it with a repair vehicle, while you lose the drone's cost for nothing.
Economic Suppression: The Core Tactic of Destroying Harvesters
Economic Warfare Against Pink
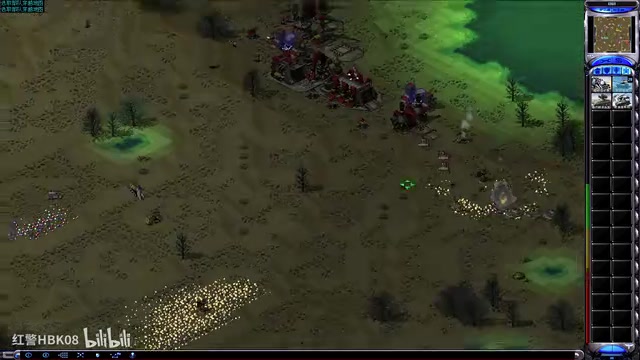
After pink provoked us, they became the primary target. The tactical core is destroy harvesters to cut off income:
- When pushing with tanks, don't rush to destroy the War Factory (the opponent can easily hide behind surface structures)
- Prioritize harvesters—no harvesters means no income
- If the opponent sends units to rescue, kite with tanks using mobility advantage
- After clearing harvesters, circle back to destroy the War Factory, cutting off spider and tank production
Harvesters (ore trucks/miners) are the only resource-gathering unit in Red Alert 2, costing 1400 (Allied) or 1500 (Soviet) each. Harvesters shuttle between refineries and ore fields, earning approximately 700-1000 per full load (depending on ore type). Destroying one harvester means the opponent loses not only the 1400+ construction cost but also their continuous income source. On resource-poor small maps, the time window needed to rebuild after losing a harvester is enough for the opponent to establish an irreversible economic gap. This is the fundamental reason why targeting harvesters is more effective than targeting buildings in economic warfare.
After destroying the War Factory, the opponent loses all heavy unit production capability, leaving only the barracks. At this point, Rocketeers can be used to farm experience—with no anti-air available, Rocketeers can safely deal damage.
All combat units in Red Alert 2 have an experience system with three levels from rookie to elite. Rocketeers gain significantly increased attack power and fire rate upon promotion—elite Rocketeers deal nearly double the DPS of rookies. When the opponent lacks anti-air units (such as flak troopers, flak tracks, or AA guns), Rocketeers can attack ground targets with zero losses while rapidly accumulating experience. A group of elite Rocketeers can deliver devastating strikes against any opponent lacking anti-air in the late game—this is the tactical value of choosing to level up Rocketeers after confirming the opponent has no AA.
Late-Game Operations: Controlling Half the Map & Defeating Opponents One by One
Strategic Situation Assessment
Using the spy satellite to observe the overall situation:
- Yellow and blue are fighting each other in the upper right
- Purple and red are fighting each other
- We control the entire left half of the map with all ore deposits secured
Precision Strike Against Purple
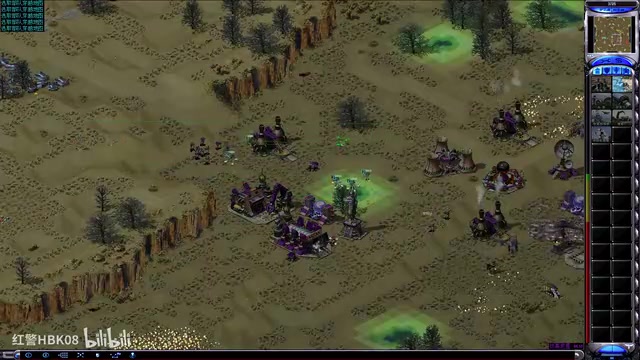
Purple built high-tech and was preparing Iron Curtain tanks, posing the greatest threat. Tactical response:
- Rocketeers + tanks assault purple's high-tech buildings
- Although the Iron Curtain was already built, destroying the base prevents power plant reconstruction
- Without power support, the Iron Curtain cannot be activated and must be sold
The Iron Curtain is the Soviet faction's superweapon, costing 2500 with approximately 5 minutes of charge time. Once activated, it grants vehicles in the selected area roughly 45 seconds of invulnerability. Iron Curtain tanks (typically Apocalypse Tanks with Iron Curtain) are one of the most threatening late-game push strategies. However, the Iron Curtain has a critical weakness: it requires sufficient power to function. When power is insufficient (power bar turns red), all superweapon charging pauses, and fully-charged superweapons cannot be activated. Therefore, destroying the opponent's nuclear power plants or MCV (which provides partial power) can indirectly disable the Iron Curtain—this is more efficient than directly attacking the Iron Curtain building itself.
Simultaneously, red's opportunity to steal purple's nuclear power plant from behind created a pincer attack. When fighting in chaotic multi-player battles, you must eliminate neighbors quickly—delays invite third-party ambushes.
Final Cleanup Phase
After purple and red were successively eliminated, only yellow remained. Although yellow managed to steal our base, this didn't affect the overall situation—having a War Factory and Rocketeers was sufficient, with economic advantage crushing the opponent. All tanks charged into yellow's base, and after destroying their anti-air, Rocketeers followed up. Yellow surrendered.
Core Tactical Summary
Small Map Survival Rules
- Always build bunkers at the start: On small maps with close distances, not building bunkers is suicide
- Grab nearby colored ore: Economy is the foundation of everything
- Relocate bases flexibly: Follow the ore, decisively sell surplus bases
- Prioritize economic warfare: Destroying harvesters is more effective than destroying buildings
- Exploit chaotic battles: Observe the big picture, let opponents exhaust each other, then defeat them one by one
The Versatility of Repair Vehicles
Repair vehicles played an important role in this match: repairing bases infected by Terror Drones, repairing damaged tanks and AA vehicles. On resource-poor small maps, repairing is more cost-effective than rebuilding.
The core philosophy of the Biochem Desert map is: expand quickly, seize economic advantage, and crush opponents with economic superiority. Whoever controls the colored ore deposits faster will hold absolute initiative in the mid-to-late game.
Related articles
 Tutorials
Cursor + Codex Dual-IDE Collaboration: A Practical Methodology for Open-Source Project Customization
A complete methodology for open-source project customization based on real-world experience, detailing the Cursor+Codex dual-IDE workflow, seven-stage process, MVP validation, and AI source code reading techniques.
 Tutorials
Cursor Multi-Agent in Practice: Building a Full-Stack Next.js Blog in 50 Minutes
Build a full-stack blog in 50 minutes using Cursor IDE's multi-Agent mode with Next.js, Clerk auth, and Supabase. Learn the 4-phase AI Agent workflow and key integration pitfalls.
 Tutorials
Building an AI Software Factory from Scratch: A Cursor Engineer's Hands-On Experience with Multi-Agent Collaboration
Cursor engineer Eric shares practical insights on building an AI software factory: automation levels, guardrail design, parallel Agent management, and scaling to 1000+ Agents for 24/7 development.