Red Alert 2 King of the Hill Strategy Guide: Carrier Sea Control & Economic Blockade Tactics
Red Alert 2 King of the Hill Strategy …
Red Alert 2 King of the Hill strategy: economic blockade, naval dominance, and carrier tactics.
This article analyzes Red Alert 2's King of the Hill map strategy. The opening focuses on seizing airports and oil derricks for economic advantage, mid-game employs economic blockade tactics (capturing War Factory, blocking ore fields) to collapse neighbors, and late-game secures naval dominance through dolphin blockades and carrier focus-fire bombing, ultimately winning through sea superiority and flexible unit synergy. Core principles: economic blockade beats frontal assault, and naval control decides the endgame.
Map Overview: The Unique Design of King of the Hill
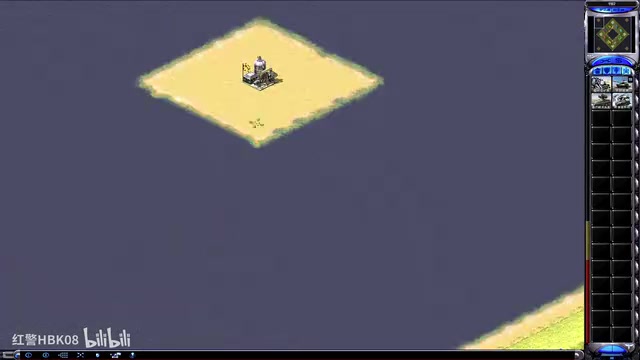
"King of the Hill" is an elegantly designed symmetrical map in Red Alert. Command & Conquer: Red Alert 2, developed by Westwood Studios and released in 2000, is a classic in real-time strategy gaming history. Its map design follows the principle of "asymmetric balance" — beneath the seemingly symmetrical terrain, the distribution of resource points, elevation differences, and water divisions create a complex strategic space. Each player's MCV starts on an independent hilltop, separated by sea zones that form natural geographic barriers. Airports and oil derricks are scattered across the center of the map, while each of the four corner islands also has oil derricks, meaning air superiority and naval dominance become the decisive factors.
The core strategic tension of this map lies in the fact that players are paired adjacently and must eliminate nearby threats before pursuing broader objectives. Maps like King of the Hill particularly test a player's situational awareness: finding the balance between eliminating neighbors and defending against distant enemies is what makes multiplayer distinct from 1v1. The map's symmetry makes each confrontation feel like a miniature war, and the ultimate survivor enters a larger three-way conflict.
Opening Strategy: Resource Competition & Economic Blockade
Seizing Airports and Oil Derricks
The top priority at the start is capturing the central airport. Build an engineer before dogs, quickly capture the airport for additional unit production. Then, use satellite reconnaissance to discover hidden oil derricks in the corners and immediately send engineers to capture them.
You might not have noticed that the island oil derricks require helicopter transport for engineers — a natural advantage for the Allies. Red Alert 2's faction design embodies clear Cold War ideological metaphors: the Allied Forces emphasize technology and mobility, with helicopters, carriers, and snipers reflecting a "precision strike" doctrine; the Soviet Forces center on heavy armor and suppressive weapons, with Kirov Airships, Iron Curtain, and Desolators representing "steel flood" tactical thinking. This design difference directly affects map suitability, giving the Allies stronger resource expansion capability on water-rich, terrain-complex maps like King of the Hill.
Economic Blockade Tactics
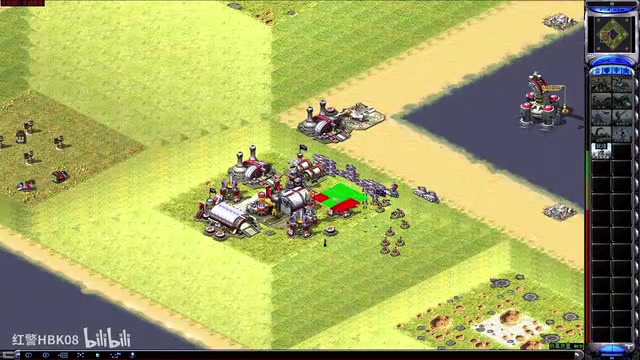
In the confrontation with the purple player, a sophisticated economic blockade was employed. Purple held the high ground with pillboxes that could directly hit the ore field — a frontal assault would be unwise. Instead, the approach shifted: send an engineer to capture purple's War Factory, denying tank production.
This type of economic blockade corresponds to "chain-breaking strategy" in game theory — winning by disrupting the opponent's production chain rather than directly destroying their military forces. In Red Alert 2, the Ore Refinery and War Factory form the Soviet core economic-military loop: no refinery income means no unit production, no War Factory means no tanks. Three tanks were then positioned to block the mining area entrance — no attack needed, just preventing purple from harvesting ore. This strategy trades minimal force commitment for complete paralysis of the opponent's war machine, a textbook example of achieving maximum effect with minimum investment. The essence of this strategy is — sometimes not attacking is more effective than attacking. Purple ultimately ran out of funds, was forced to sell their base in a desperate gamble, but it was too late.
Mid-Game: Three-Way Standoff and Situational Awareness
Post-Elimination Power Dynamics
After purple's elimination, a three-way standoff formed: our side (Britain), yellow (Soviet), and green. Each survivor had proven themselves by defeating their respective neighbor.
Yellow had built high-tech structures but was equally strapped for resources. The key insight: even with all four outer oil derricks secured, the economy remained tight, indicating the map's resource design is intentionally compact, forcing players to actively engage rather than turtle.

Preemptive War Factory Destruction
Facing the threat of yellow potentially building Kirovs, GIs were sent to decisively destroy their War Factory. The Kirov Airship is the Soviet ultimate air unit — expensive but with enormous strategic deterrence through its ultra-high HP and sustained bombing capability, nearly impossible for standard anti-air to shoot down quickly once airborne. However, the Kirov's fatal weakness is extremely slow movement speed and heavy resource requirements. This is precisely why destroying the War Factory before Kirov completion is the most economical countermeasure, demonstrating the importance of "preemptive strikes" in RTS games — eliminating threats before they materialize. Snipers simultaneously suppressed enemy infantry production, further weakening combat capability.
Naval Dominance: The Strategic Value of Aircraft Carriers
Dolphin Blockade and Carrier Accumulation
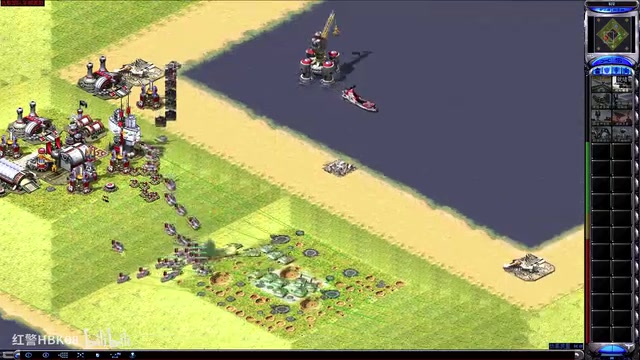
In the late game, strategic focus shifted to the central sea zone. Seven to eight dolphins were built first to blockade the waters, preventing enemies from constructing shipyards to contest naval control. Dolphins' piercing attacks easily destroy enemy vessels, buying time for safe carrier accumulation.
The map's terrain dictates the carrier's immense value: each player's base sits on a hilltop with limited space, forcing the Iron Curtain to be placed at the edge — precisely within carrier strike range.
Carrier Focus-Fire Tactics Explained
The Aircraft Carrier is the Allies' most strategically valuable naval unit, with its aircraft launch mechanic closely mirroring real-world carrier operations. There's a crucial technique for carrier usage: don't let aircraft launch one by one — wait until all three carriers are fully loaded, then launch simultaneously. This essentially exploits game mechanics to achieve "saturation attack" — delivering firepower exceeding the target's interception capacity within its defense response window, maximizing theoretical damage output. Concentrated fire can destroy high-value targets like the Iron Curtain in a single volley. This micro technique is a key differentiator between high-level and average players.
Green and blue both built Iron Curtains, attempting Iron Curtain tank rushes. But the carriers created a dilemma: if they don't use the Iron Curtain, it gets destroyed; if they use it prematurely, it doesn't achieve optimal effect.
Endgame: Victory Through Sea-to-Land Control
Countering Iron Curtain Rushes
The Iron Curtain is the Soviet superweapon that grants designated units temporary invincibility — the cornerstone of decisive Soviet charges. However, it has clear tactical limitations: limited invincibility duration (~15 seconds), extremely long cooldown, and the device itself is expensive and large. On hilltop terrain, limited base space forces the Iron Curtain to be exposed at the edge, falling within carrier strike range — revealing a universal RTS principle: superweapon value is highly terrain-dependent, and without favorable circumstances, superweapons often become high-value targets rather than game-winners.
When blue launched their Iron Curtain rush, the counter-strategy was "avoid the edge" — instead of engaging head-on, flank around to hit green's tanks. If blue pursues, they can't reach the base; if they don't pursue, the invincibility timer is wasted.
This maneuver was masterful: exploiting the Iron Curtain's time limit by counter-attacking in the opposite direction during the enemy's advance, avoiding losses while eliminating another opponent's main force.
Sniper and Carrier Endgame Synergy
In the final phase, a three-star sniper became the ultimate defensive tool. Against blue's Desolators and paratroopers, the sniper picked them off one by one, completely neutralizing infantry threats. Carriers continuously bombed enemy anti-air defenses and base structures, creating a perfect synergy: "defend against carriers and I push with tanks; chase my tanks and I bomb your base."
Ultimately, leveraging the four outer island oil derrick advantage and absolute naval supremacy, blue was forced to surrender under dual economic and military pressure.
Tactical Summary
This King of the Hill match demonstrated several core tactical principles:
- Economic blockade over frontal assault: Against terrain disadvantage, blocking ore fields is more efficient than storming hilltops — "chain-breaking strategy" dismantles the enemy war machine at minimal cost
- Naval dominance determines late-game outcome: On this water-heavy map, whoever controls the sea controls the initiative
- Carrier focus-fire over scattered damage: Wait for full loads then launch simultaneously for "saturation attacks," maximizing single-volley damage
- Exploit terrain to limit enemy deployment: Limited hilltop base space exposes high-value buildings to carrier range; superweapon value is highly situational
- Flexible unit composition: Snipers counter infantry, dolphins blockade waters, carriers provide long-range strikes — each unit fulfills its role
Key Takeaways
- King of the Hill features symmetrical design with each player starting on an independent hilltop; contesting the central sea and resource points is core
- Economic blockade tactics (stealing War Factory + blocking ore fields) are more efficient than frontal assault, winning without fighting
- Naval dominance is the late-game decisive factor; dolphin blockade + carrier focus-fire forms a complete naval strike system
- Carrier technique: wait for all three carriers to fully load then launch simultaneously, destroying high-value targets like Iron Curtain in one volley
- Counter Iron Curtain rushes by avoiding direct engagement and flanking, exploiting the time limit to neutralize the threat
Related articles
 Tutorials
Cursor + Codex Dual-IDE Collaboration: A Practical Methodology for Open-Source Project Customization
A complete methodology for open-source project customization based on real-world experience, detailing the Cursor+Codex dual-IDE workflow, seven-stage process, MVP validation, and AI source code reading techniques.
 Tutorials
Cursor Multi-Agent in Practice: Building a Full-Stack Next.js Blog in 50 Minutes
Build a full-stack blog in 50 minutes using Cursor IDE's multi-Agent mode with Next.js, Clerk auth, and Supabase. Learn the 4-phase AI Agent workflow and key integration pitfalls.
 Tutorials
Building an AI Software Factory from Scratch: A Cursor Engineer's Hands-On Experience with Multi-Agent Collaboration
Cursor engineer Eric shares practical insights on building an AI software factory: automation levels, guardrail design, parallel Agent management, and scaling to 1000+ Agents for 24/7 development.