Ship a Full-Stack Next.js Website in 15 Minutes with AI Coding: A Hands-On Tutorial with DeepSeek API

Build and deploy a full-stack website with DeepSeek API in 15 minutes using AI coding tools.
This hands-on tutorial walks through using AI editors like Windsurf/Cursor with the Next.js framework to build an "AI Business Canvas Generator" full-stack website from scratch. It covers environment setup, DeepSeek API Key acquisition and configuration, generating front-end and back-end code in one go via natural language prompts, debugging, and deploying to production via Vercel — all in about 15 minutes.
Overview
With AI coding tools, you can develop and deploy a full-stack website integrated with the DeepSeek API in an incredibly short time. Based on a hands-on tutorial by Bilibili creator Jackie, this article breaks down how to use Windsurf (or Cursor) with the Next.js framework to build an "AI Business Canvas Generator" from scratch and deploy it live.
The entire workflow covers: environment setup, API Key acquisition, AI-assisted coding, debugging, and Vercel deployment — all completed in about 15 minutes.
Project Preparation: Templates and Tool Selection
Code Template and AI Editor
The project is based on a Next.js code template with built-in front-end and back-end scaffolding and a UI component library. After downloading the template, open it in an AI editor:
- Windsurf: Select the chat window in the top-right corner and switch to Write mode
- Cursor: Click the icon in the top-right corner and select Composer mode
The two tools are functionally similar at this point — both achieve the goal of AI-assisted coding. The key is letting the AI understand your project structure, then generating code by describing your requirements in natural language.
Node.js Environment Setup
Running a Next.js project requires a Node.js environment — this is a prerequisite. Once installed, you can use npm commands to manage dependencies and run the project.
DeepSeek API Key Acquisition and Environment Variable Configuration
Choosing an API Provider
There are several ways to obtain an LLM API Key:
- DeepSeek official website: Register directly to get one
- Tongyi Qianwen: A service under Alibaba Cloud
- OpenAI official website: Requires a VPN for access
- Aggregation platforms like Sealos: Integrate multiple domestic models
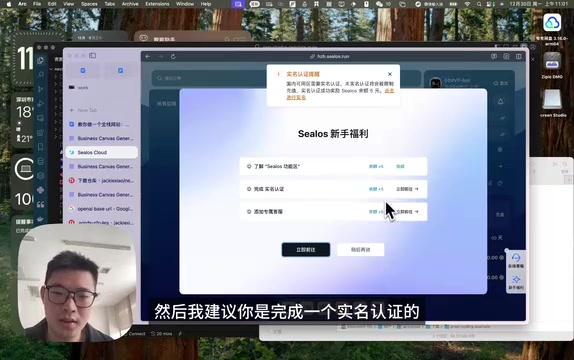
The tutorial uses the Sealos platform because it integrates various domestic models (including DeepSeek V3), and subsequent courses will use its object storage, database, and other services. After registration and identity verification, you get a free ¥5 credit — more than enough for learning projects.
How to Configure Environment Variables
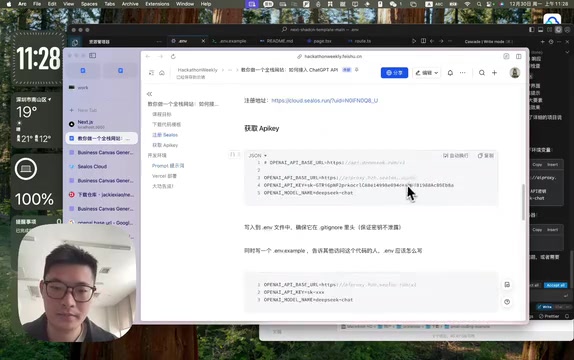
After obtaining your API Key, create a .env file in the project root directory and configure three key variables:
- API Key: The secret key copied from the platform
- OpenAI Base URL: Since you're using a third-party API, change this to the corresponding platform's endpoint address (append
/v1at the end) - Model name: e.g.,
deepseek-chat(DeepSeek V3)
Also create a .env.example file as a template reference — this is a development best practice, since .env files are not committed to the code repository, and other collaborators need to know how to configure their own.

AI-Assisted Coding: Generating Full-Stack Code in a Single Conversation
Key Points for Prompt Design
The prompt sent to the AI editor should include the following key information:
- Tech stack specification: Clearly state you're using the Next.js full-stack framework
- Feature description: User inputs a startup idea → calls the API → returns a business canvas
- Custom configuration: Specify using the project's model and URL to avoid defaulting to the OpenAI official website
- Prompt template: Request generation of the nine key elements of a business canvas
- Output format: Return results in JSON format, rendered as a table on the front end
- UI style: Define the visual style
Paste this prompt into the AI chat box, and the AI will automatically generate front-end and back-end code and install dependencies.
Next.js Full-Stack Code Architecture Breakdown
The generated code structure is clean and clear:
- Back end (
app/api/route): Receives front-end requests, constructs a prompt using the API key, sends it to the LLM, and returns JSON results - Front end (
app/page): Provides an input field, calls the back-end API, and renders the returned JSON as a business canvas table
This is the advantage of the Next.js full-stack framework — front-end and back-end code live in the same project, and API routes serve as back-end endpoints.
Debugging and Troubleshooting Tips
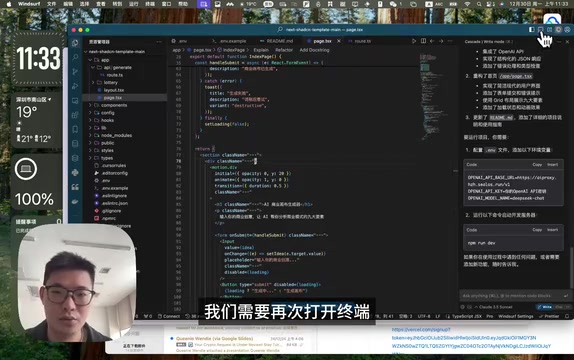
After manually running npm run dev to start the development server, you may encounter errors on the first test. In the tutorial, the error was token verification failed — caused by an incorrectly copied API key.
Common debugging methods:
- Copy the error message and send it to the AI: Simply say "Please fix this error"
- Quick action: Select the error code, press
Ctrl+L, and type "Fix Bug" - Manually check environment variables: Verify that the Key and URL in the
.envfile are correct
In most cases, the AI editor can automatically locate and fix issues based on the error message.
Full Vercel Deployment Workflow
Build and Deploy Steps
Once development is complete, the deployment process is as follows:
- Run
npm run buildto check for build errors - Run
npm run deploy(or use the Vercel CLI) - Follow the prompts to select configurations and wait for deployment to finish
Setting Production Environment Variables
After deployment, you need to configure production environment variables in the Vercel dashboard:
- Go to project Settings → Environment Variables
- Select the Production environment
- Add each variable from your
.envfile and save
Once deployment is complete, Vercel assigns a domain name, and your AI application is accessible via that URL.
Deployment Considerations
- Vercel's default domain may require a VPN to access from within China
- For domestic access, you'll need to bind a custom domain and complete ICP filing
- The Hobby (free) tier is sufficient for personal projects
Summary and Takeaways
This case study demonstrates the core AI coding workflow: Define requirements → Write a prompt → AI generates code → Debug and fix → Deploy and go live. Throughout the process, the developer's role shifts from "writing code" to "describing requirements and reviewing code."
Key takeaways:
- The Next.js full-stack framework significantly reduces the complexity of separating front-end and back-end concerns
- AI editors (Windsurf/Cursor) enable non-professional developers to rapidly build applications
- Domestic API aggregation platforms solve network access issues for foreign models
- Environment variable management is a fundamental security practice —
.envfiles should never be committed to the code repository
For entrepreneurs looking to quickly validate AI product ideas, this toolchain is more than capable of shipping an MVP in 15 minutes.
Related articles
 Tutorials
Cursor + Codex Dual-IDE Collaboration: A Practical Methodology for Open-Source Project Customization
A complete methodology for open-source project customization based on real-world experience, detailing the Cursor+Codex dual-IDE workflow, seven-stage process, MVP validation, and AI source code reading techniques.
 Tutorials
Cursor Multi-Agent in Practice: Building a Full-Stack Next.js Blog in 50 Minutes
Build a full-stack blog in 50 minutes using Cursor IDE's multi-Agent mode with Next.js, Clerk auth, and Supabase. Learn the 4-phase AI Agent workflow and key integration pitfalls.
 Tutorials
Building an AI Software Factory from Scratch: A Cursor Engineer's Hands-On Experience with Multi-Agent Collaboration
Cursor engineer Eric shares practical insights on building an AI software factory: automation levels, guardrail design, parallel Agent management, and scaling to 1000+ Agents for 24/7 development.