The Complete Guide to CLAUDE.md: Three-Tier Loading Mechanism & Best Writing Practices

A deep dive into CLAUDE.md's loading mechanism, tier structure, and writing best practices
This article systematically explains how CLAUDE.md works in Claude Code. The core mechanism traverses upward from the current directory at startup, concatenating all CLAUDE.md files across tiers into the context, with instructions closer to the working directory taking higher priority. Files are organized into three tiers: user global, project, and project local, with support for @import and .claude/rules for conditional path-based loading. Key writing principles include being specific and verifiable, keeping files under 200 lines, and using HTML comments to add notes without consuming Tokens.
Many people create a CLAUDE.md file when using Claude Code, but from what I've observed, 90% of users don't actually understand how this file's loading mechanism works. Based on official documentation and hands-on verification, this article will help you thoroughly understand CLAUDE.md's hierarchical structure, loading rules, and writing techniques.
What Exactly Is CLAUDE.md
CLAUDE.md is essentially a plain text file — the instructions you write in it are automatically read by Claude at the start of every conversation. Its core value lies in: writing down things you don't want to repeat every time.
But there's a very important misconception to correct: CLAUDE.md is not a System Prompt — it's injected as a user message. Don't treat it as a mandatory configuration either — Claude will do its best to follow the instructions, but there's no guarantee of 100% compliance.
So when should you add content to it? The official documentation provides four trigger scenarios:
- When Claude makes the same mistake a second time
- Recurring issues from Code Reviews
- Rules that only apply to specific parts of the codebase — put them in the corresponding Skill or Rules
- Team-shared architectural standards and workflows
Core Mechanism: Upward Traversal and Full Concatenation
When Claude Code starts up, it performs two key operations: upward traversal and full concatenation.

Upward traversal means starting from your current working directory and searching upward level by level for CLAUDE.md and CLAUDE.local.md files. Full concatenation means all found file contents are concatenated into the context — note: concatenated, not overridden.
As a practical example, suppose you're working in a directory called 131-SQL-Evolution. When Claude starts, it searches from bottom to top:
CLAUDE.mdin the current directoryCLAUDE.mdin the parent directory130-Evolution-LabCLAUDE.mdin the personal repo one level up- Finally,
CLAUDE.mdin the global user directory
A total of 4 files are loaded and concatenated together into the context.
Conflict Resolution: Later Overrides Earlier
When instructions across multiple levels conflict, the later-overrides-earlier principle applies. Deeper levels (closer to the current working directory) are placed later in the sequence. Due to the nature of LLMs — later input carries more weight than earlier input — instructions closer to your working directory have higher priority.
Within the same level, CLAUDE.local.md is appended after CLAUDE.md, so your personal notes have the highest priority at that level.
Lazy Loading of Subdirectories
There's an elegant design detail: CLAUDE.md files in subdirectories are not loaded at startup — they're only triggered when Claude actually reads files from that subdirectory. This is a smart design that effectively conserves context space.
Three Tiers: Where Should Files Go
Now that you understand the loading mechanism, let's look at where files should be placed. CLAUDE.md has three tiers, each with different scopes and use cases.
Tier 1: User Global Level
Location: ~/.claude/CLAUDE.md
Applies to all your projects. Ideal for personal preferences and tool configurations, such as your preferred code style, commonly used development tool settings, etc.
Tier 2: Project Level
Location: CLAUDE.md or .claude/CLAUDE.md in the project root
These two locations are equivalent — just pick one. Shared with the team via Git, suitable for architecture documentation, workflow definitions, naming conventions, and other team agreements.
Tier 3: Project Local Level
Location: CLAUDE.local.md
Only applies to you, only for the current project, and should be added to .gitignore. Ideal for API endpoints, test data, and other personal configurations you don't want committed to Git.
Two Advanced Features
@import Mechanism
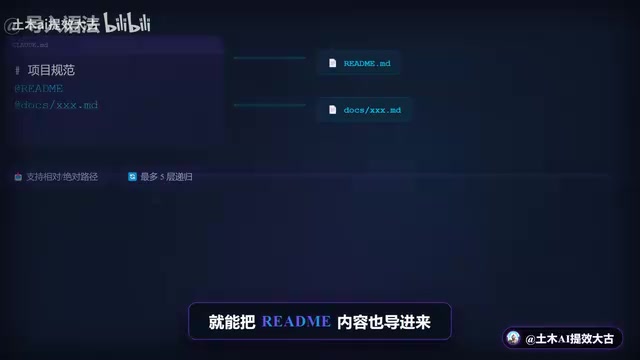
Write @import followed by a file path in CLAUDE.md to import the contents of other files. Both relative and absolute paths are supported, with up to 5 levels of nested recursion.
But note: imported files are also loaded at startup, so this can't be used to save Tokens — it's purely an organizational tool.
.claude/rules Rule System
Large projects can split instructions into multiple files under the .claude/rules directory:
- Rules without Path configuration: Loaded unconditionally
- Rules with Path configuration: Only loaded when operating on matching files
For example, you can set up a rule that only loads API specifications when editing TypeScript files — very flexible.
How to Write Good CLAUDE.md: Specific and Verifiable
The core principle for writing CLAUDE.md is specific and verifiable — avoid vague descriptions:
| ❌ Don't write this | ✅ Write this instead |
|---|---|
| Format the code | Use 2-space indentation |
| Test your changes | Run npm test before committing |
| Keep files organized | APIs go in src/api/handlers |
Key Limitation
Keep each file under 200 lines. Beyond this length, Claude's compliance drops noticeably.
Hidden Trick: HTML Comments Don't Consume Tokens
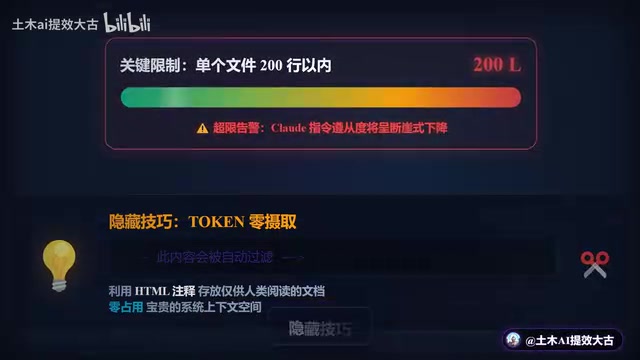
HTML comments (<!-- -->) are automatically filtered out and don't consume Tokens. You can use this feature to add human-readable notes in CLAUDE.md without affecting Claude's context window.
Common Issues and Solutions
What If CLAUDE.md Isn't Taking Effect
- Run the
/memorycommand to confirm whether the file was loaded - Check if the file location is correct
- Check if the instructions are specific enough
- Investigate potential tier conflicts
Instructions Lost After /compact
This is a common pitfall:
- Root directory
CLAUDE.mdsurvives after Compact because Claude re-reads it from disk - Subdirectory
CLAUDE.mdfiles are not automatically re-injected - Temporary instructions from the conversation are cleared
So important instructions must be written in CLAUDE.md — don't just mention them verbally in the conversation.
Quick Start
The simplest approach: create a CLAUDE.md in your project root and write in your build commands and basic conventions.
Or even easier — just run the /init command, and Claude will automatically analyze your codebase and generate a configuration file. If you want an interactive configuration experience, set the environment variable CLAUDE_CODE_NEW_INIT=1 before running /init.
Once you've mastered these mechanisms and techniques, your CLAUDE.md is no longer a haphazardly assembled text file — it's a carefully designed AI collaboration configuration system.
Related articles
 Tutorials
Cursor + Codex Dual-IDE Collaboration: A Practical Methodology for Open-Source Project Customization
A complete methodology for open-source project customization based on real-world experience, detailing the Cursor+Codex dual-IDE workflow, seven-stage process, MVP validation, and AI source code reading techniques.
 Tutorials
Cursor Multi-Agent in Practice: Building a Full-Stack Next.js Blog in 50 Minutes
Build a full-stack blog in 50 minutes using Cursor IDE's multi-Agent mode with Next.js, Clerk auth, and Supabase. Learn the 4-phase AI Agent workflow and key integration pitfalls.
 Tutorials
Building an AI Software Factory from Scratch: A Cursor Engineer's Hands-On Experience with Multi-Agent Collaboration
Cursor engineer Eric shares practical insights on building an AI software factory: automation levels, guardrail design, parallel Agent management, and scaling to 1000+ Agents for 24/7 development.