The Complete Vibe Coding Workflow: A Step-by-Step Guide for Non-Developers to Build and Ship Products Independently
The Complete Vibe Coding Workflow: A S…
Complete Vibe Coding workflow breakdown: a 7-step methodology from requirements to deployment
This article uses a Pomodoro Timer as an example to break down the complete Vibe Coding workflow: Requirements Gathering → PRD Document → Static Demo → UI Specification → Development Plan → Step-by-Step Development → Deployment. The core insight is that Vibe Coding isn't about writing code — it's about communicating efficiently with AI. Investing more time upfront in documentation and demos dramatically reduces rework costs during development. The recommended toolset is VS Code + Claude Code, with GitHub + Vercel for deployment.
What Is Vibe Coding?
Vibe Coding is a programming paradigm coined by renowned AI researcher Andrej Karpathy in early 2025. The core idea is "coding by vibes" — instead of writing code line by line, developers describe their intent in natural language and let AI generate and maintain the code. This concept quickly resonated with indie developers and non-technical founders because it dramatically lowers the barrier to software development. However, Vibe Coding isn't "magic." At its core, it's a human-AI collaborative workflow that requires clear product thinking and structured communication skills, rather than blind reliance on AI's auto-generation capabilities.
Many people have watched countless Vibe Coding tutorials and installed a pile of tools, yet never successfully shipped a complete project. The problem usually isn't the tools — it's the process. Getting from a vague idea to a shippable product requires multiple stages: requirements gathering, product documentation, demo validation, step-by-step development, and deployment.
This article uses a "Pomodoro Timer" product as an example to break down the complete Vibe Coding workflow, helping people with zero coding experience master the methodology for building products independently.
Tool Setup: Choose the Most Versatile Combination
You don't need many tools — just stable, reliable ones. The recommended combination is VS Code + Claude Code, which is currently the most versatile and highest-ceiling AI programming setup. Both tools are completely free, installation is straightforward, and you can start working as soon as you configure the model.
VS Code (Visual Studio Code) is an open-source code editor developed by Microsoft. Thanks to its rich plugin ecosystem and lightweight architecture, it has become one of the most popular development tools worldwide. Claude Code is an AI programming assistant from Anthropic, built on the Claude large language model. It can directly read, modify, and execute code files in the terminal environment. Compared to web-based chat interfaces, it has significantly stronger engineering capabilities — it can understand an entire project's file structure, make cross-file modifications, and directly run commands to verify results. This "agentic" working mode makes it far superior to ordinary chat-based AI tools for complex project development.
Many beginners fall into "tool anxiety," constantly jumping between various AI coding tools. In reality, committing to one toolset and deeply mastering its workflow is far more valuable than frequently switching tools.
Step 1: Requirements Gathering — Turning Vague Ideas into Actionable Direction
The first step in programming is absolutely not telling AI "I want a product that does X." Instead, start by organizing your requirements. This step should cover four key dimensions:
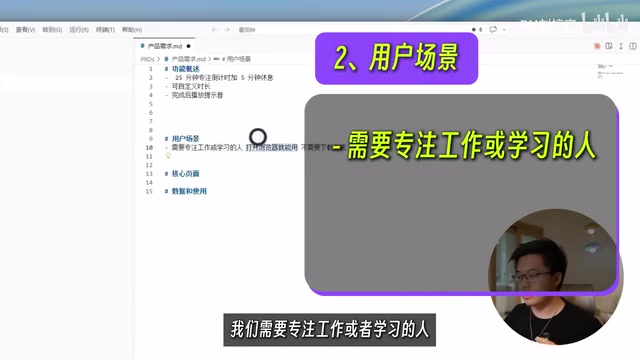
- Feature Overview: 25-minute focus countdown + 5-minute break, customizable durations, plays a notification sound on completion
- User Scenario: People focusing on work or study who want to open a browser and use it immediately, no download or installation needed
- Core Pages: Main page (countdown display + control buttons), Settings page (adjust duration parameters)
- Data Usage: Data stored locally in the browser, supports import/export
There's a core principle here: If you can't think it through clearly yourself, AI certainly can't think it through for you. Never expect AI to produce a product that perfectly matches your expectations when your requirements are still fuzzy.
Step 2: Writing the Product Document (PRD) — Locking Down Direction at Minimal Cost
A PRD (Product Requirements Document) is a standard deliverable in internet product development, originating from product management practices at Silicon Valley tech companies. The P0/P1/P2 priority classification system is widely adopted in the industry: P0 represents "must-have" core features — without them, the product can't function; P1 represents "important but deferrable" features that affect user experience but don't block the core flow; P2 represents "nice-to-have" features to consider when resources are abundant. This system is especially important in Vibe Coding — it helps developers and AI define the boundaries of each iteration, preventing attempts to implement everything in one go, which leads to project chaos.
After requirements gathering, the next step is to have AI generate a structured product document. Use the @ command to reference your requirements file, then tell AI:
Please create a product document PRD.md in the PRDS folder, including: product overview, target users, core feature list (sorted by P0/P1/P2 priority), page structure, and use Markdown to draw a wireframe.
If you have your own ideas about page layout, you can sketch a rough draft using a simple drawing tool (like Excalidraw). For example, the Pomodoro Timer could use a four-quadrant layout: timer card in the upper left, time-segmented statistics chart in the lower left, and today's and this week's focus records on the right.
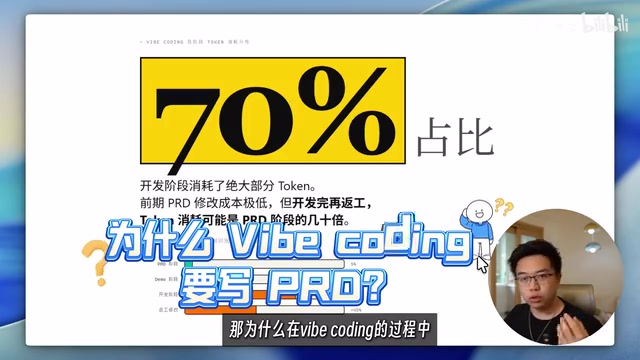
Why Is the PRD the Most Worthwhile Investment in Vibe Coding?
Tokens are the basic units that large language models use to process text, roughly corresponding to half a word in English or one character in Chinese. AI coding tools charge based on token consumption, and code generation, debugging, and refactoring are the most token-intensive operations — a single complex feature refactor might consume tens of thousands of tokens, while writing a document of equivalent length only consumes a few thousand. Throughout the entire Vibe Coding process, the most token-intensive stage is programming, while the PRD stage consumes minimal resources. Iterating and confirming everything at this stage costs very little. But if you discover design problems during the development stage, the same modifications will cost significantly more.
Put simply: Spending 10 extra minutes writing documentation upfront saves 2 hours of code changes later.
Step 3: Building a Static Demo — Low-Cost Validation of Product Form
Once the PRD is finalized, don't rush into writing code. A Static Demo (Static Prototype) corresponds to the "high-fidelity prototype" concept in traditional software engineering. Its core value lies in completing visual validation at extremely low cost, avoiding the discovery of fundamental layout or interaction design problems only after feature development is complete. By creating a static Demo with no functionality but high visual fidelity, you can preview the product's feature layout and design effects in advance.
This step also doubles as completing the UI design scheme. The method is simple: find a color scheme and style that matches your aesthetic on design reference websites, take a screenshot and send it to AI, then tell it:
Please combine the design style and color scheme from this reference image with the PRD and sketch from earlier to create a static Demo of the product. Show the main pages and core states, but don't write any actual logic.

Efficient Feedback Tips During the Demo Stage
When communicating issues about the Demo with AI, there's an efficient feedback structure:
- Take a screenshot and use a selection tool to highlight the problem area
- Explain "what problem was found on which page"
- Describe "how I want it fixed" or "what my expected result is"
After a few rounds of corrections, the Demo should basically meet expectations. Next, have AI compile a UI Design Specification Document based on the Demo (including color scheme, typography rules, card styles, button components, etc.).
A UI Design Specification Document (Design System) is standard practice at major tech companies (such as Google's Material Design and Apple's Human Interface Guidelines). It codifies design decisions like colors, fonts, spacing, and component styles into documentation, ensuring visual consistency across multi-person collaboration or multiple iterations. In the Vibe Coding context, since every new AI conversation window means a "memory-wiped" new session, the design specification document serves as "visual memory" — a critical engineering tool for maintaining consistent product styling. In subsequent development sessions with new conversation windows, each new AI session can work according to the unified design specification, ensuring visual consistency.
Step 4: Step-by-Step Development — Letting AI Advance Features Methodically
Once you enter the development phase, never let AI start writing code immediately. Instead, first have it create a detailed development plan. Many Vibe Coding projects become increasingly chaotic and eventually collapse — the core reason is skipping this step.
The development plan should meet these requirements:
- Break the entire task into independent steps, each completing a verifiable functional module
- Annotate each step with the features to implement, files involved, and completion criteria
- Sort by dependency: basic features first, then advanced features
- Each step's description should be complete enough for a new AI session to understand independently
- Include a project tech stack overview (framework, deployment method, etc.)
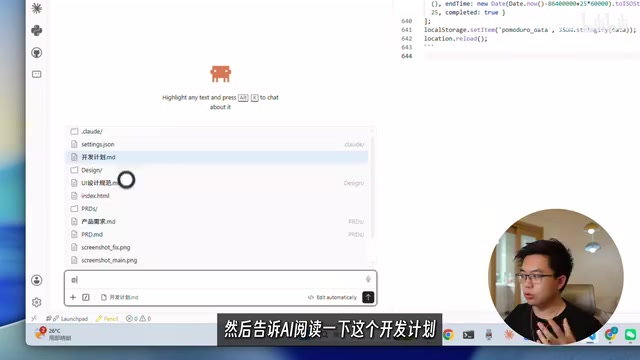
During development, open a new conversation window, use @ to reference the development plan, then advance step by step — don't let AI develop all features at once. After completing all development tasks, enter the startup command as prompted and test locally whether the product meets expectations.
Step 5: Deployment — Getting Your Product to Real Users
Once local testing passes and you're satisfied with how the product works, consider deploying it online. The recommended approach is GitHub + Vercel:
- Use VS Code to push code to GitHub
- Link your GitHub repository on the Vercel website
- Pull the code to Vercel and execute deployment
GitHub is the world's largest code hosting platform, built on the Git version control system. It provides not only code storage but also serves as core infrastructure for modern software development collaboration. Vercel is a cloud deployment platform designed specifically for frontend applications, created by the founding team of the Next.js framework. Its core advantage is "zero-configuration deployment" — just link a GitHub repository, and every code push automatically triggers the build and deployment process, with no need to manually configure servers, DNS resolution, or SSL certificates. For purely frontend applications like a Pomodoro Timer, Vercel's free tier is more than sufficient, and it provides global CDN acceleration to ensure fast user access. This combination has become the de facto standard for indie hackers to quickly ship products. The entire process requires no server configuration, can be completed in minutes, and your product becomes accessible via the public internet.
Core Insight: The Essence of Vibe Coding Is Efficient Communication
Although Vibe Coding has "Coding" in its name, the core skill isn't writing code — it's communicating efficiently with AI. Don't believe claims like "you can build software with a single sentence." There's a massive information gap between you and AI, which means it's impossible to produce a satisfying product in one shot.
The entire workflow can be summarized as a universal structure:
Requirements Gathering → PRD Document → Static Demo → UI Specification → Development Plan → Step-by-Step Development → Deployment
Each step narrows the information gap between you and AI, and each step reduces the probability of errors in subsequent stages. Once you master this workflow, even with zero coding knowledge, you can independently take a product from idea to launch.
Key Takeaways
- The complete Vibe Coding workflow includes seven stages: requirements gathering, PRD document, static Demo, UI specification, development plan, step-by-step development, and deployment
- Iterating during the PRD and Demo stages costs very little but dramatically reduces rework and token consumption during development
- Before development, you must have AI create a detailed step-by-step development plan to prevent the project from spiraling into chaos
- When opening new AI conversation windows, reference the design specification and development plan to ensure consistency across sessions
- The core skill of Vibe Coding isn't writing code — it's communicating efficiently with AI through continuous input and feedback
Related articles
 Tutorials
Cursor + Codex Dual-IDE Collaboration: A Practical Methodology for Open-Source Project Customization
A complete methodology for open-source project customization based on real-world experience, detailing the Cursor+Codex dual-IDE workflow, seven-stage process, MVP validation, and AI source code reading techniques.
 Tutorials
Cursor Multi-Agent in Practice: Building a Full-Stack Next.js Blog in 50 Minutes
Build a full-stack blog in 50 minutes using Cursor IDE's multi-Agent mode with Next.js, Clerk auth, and Supabase. Learn the 4-phase AI Agent workflow and key integration pitfalls.
 Tutorials
Building an AI Software Factory from Scratch: A Cursor Engineer's Hands-On Experience with Multi-Agent Collaboration
Cursor engineer Eric shares practical insights on building an AI software factory: automation levels, guardrail design, parallel Agent management, and scaling to 1000+ Agents for 24/7 development.