The Right Way for Beginners to Build Products with AI: The Iterative Build Loop Explained
The Right Way for Beginners to Build P…
The right approach to Vibe Coding: a four-step Iterative Build Loop for AI-assisted development
Vibe Coding isn't about casually talking to AI and expecting a working product — it requires a structured workflow. This article presents the "Iterative Build Loop": first set up a workspace with VS Code + Claude Code (containing documentation, assets, notes, code, and configuration modules), then iterate through four steps — Discuss and write PRD → Build demo to validate → Complete logic and create plan → Develop, test, and accumulate knowledge — advancing the project with each cycle in an upward spiral for sustainable, beginner-friendly AI-assisted development.
Many people have been misled by the concept of "Vibe Coding" — thinking that casually chatting with AI will automatically produce working code. The reality is: you toss out a sentence, and what AI writes probably won't run; ask it to fix a bug, and the features that were working before collapse too; after two days of struggling, your folder is packed with dozens or even hundreds of files, you have no idea what they do, no clue how to deploy or iterate, and the project dies right there.
Vibe Coding was coined by OpenAI co-founder Andrej Karpathy in early 2025, originally describing an AI-assisted programming style where you "completely immerse yourself in the vibe, forgetting whether the code itself exists." The concept went viral but was widely misinterpreted as "you don't need any methodology — just talk and products appear," causing countless beginners to fall into an "AI hallucination loop" — AI outputs code that looks reasonable but won't run, and fixing one bug introduces three new ones.
The core reason is: although Vibe Coding sounds casual, there's a clearly defined workflow behind it. This article introduces a method that is sustainable, has an extremely low error rate, and is beginner-friendly — the Iterative Build Loop. You don't need to know how to code; you just need to manage folders and know how to chat with AI.
Tool Setup: VS Code + Claude Code Extension
This entire method requires only two free tools: VS Code and the Claude Code extension.
VS Code is a free visual code editor — just download the installer from the official website and click "Next" all the way through. Once installed, the interface is clean and simple: the activity bar on the left, the file editing area in the center, and the file directory on the right.
Many people think Claude Code is paid, but it's actually just an AI runtime framework and is free. You can connect it to domestic models to write code. Installation is straightforward: click the extensions icon on the left side of VS Code, search for "Claude Code," find the official one from Anthropic, and click install.
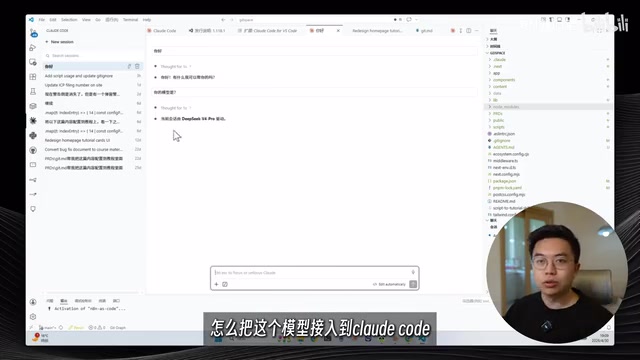
Once installed, a Claude Code icon appears on the left. If you have a Claude Pro account, you can log in directly; otherwise, you can use CC Switch to connect to domestic models — refer to the official documentation for specific tutorials.
Three reasons to recommend this combination:
- Full extension coverage: Formatting, debugging, AI calls, backups — basically everything you need is available
- Visual operation: The file tree is clear at a glance; even without coding knowledge, you can edit any file through the graphical interface
- Zero command-line barrier: You don't need to learn Git, GitHub, or other commands — just tell AI what to do, and it knows how to handle it
Workspace Setup: Plan Before You Build
Many people's first instinct after installing tools is to immediately tell AI "build me an XX app," then AI frantically outputs code, and halfway through, the folder already has dozens of files you have no idea about. You can't direct AI because you don't know where to start.
The core reason is that you haven't planned your workspace.
Using a real project "KaiTalk" (a cat vocalization recording tool, already on the App Store) as an example, the root directory actually only has these folders:
Five Core Directories
- DOCS (Product Documentation): Stores core documents created before development. A single sentence won't cut it — as the product designer, you need to feed AI substantial content
- Assets (Visual Assets): Contains three subdirectories — Design for mockups, Bug for error screenshots, and Reference for design references. When giving AI feedback on issues, place relevant images here and reference them
- Nodes (Learning Notes): Notes from the development process, such as how to package and publish iOS apps from a Windows computer, review steps, how to reply to review emails, etc.
- Code folder: All AI-written code goes in a dedicated folder — pure code, not mixed with other content
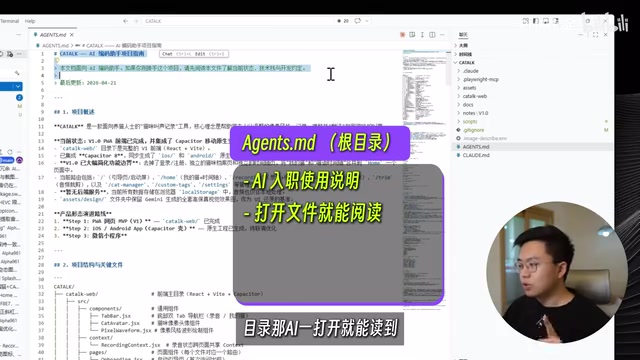
- Root configuration files:
agents.mdis AI's "onboarding manual" — no need to re-explain everything in each new conversation;claude.mddefines project rules, specifying programming languages and development approaches
agents.md and claude.md are essentially "System Prompt Files." Claude Code automatically reads these configuration files from the project root when starting a new conversation, injecting them into the context of every session. This solves an inherent limitation of large language models: statelessness — each new conversation doesn't remember previous agreements by default. By writing tech stack choices, code style conventions, and project boundaries into configuration files, developers effectively create persistent "working memory" for AI, avoiding the need to repeat background information at the start of every conversation while also reducing the probability of AI deviating from the established technical roadmap.
One-Click Workspace Creation
You don't need to create these folders manually — just give AI a prompt:
Please create the following development workspace in the current project root directory: DOCS (product documentation), Assets (with three subdirectories: Design, Bug, Reference), Nodes (learning notes), and a dedicated code folder. All documents go in DOCS, new knowledge gets recorded in Nodes, and design icons and visual assets go into Assets.
AI will create the file structure for you. The two root configuration files can be written by AI during subsequent development.
The Iterative Build Loop: Four Steps Driving Product Iteration
With the workspace set up, here comes the core method — the Iterative Build Loop, consisting of four steps: Discuss → Document → Develop → Learn. After completing one cycle, the project advances one step, then you return to discussion with new questions and start the next loop.
Step 1: Turn Ideas into a PRD in DOCS
When you have an idea, don't rush to have AI write code. Open the DOCS folder, create a new file, and discuss your idea with AI. It will ask questions, offer suggestions, and help you transform a vague idea into a clear product document.

A PRD (Product Requirements Document) is the most critical communication vehicle between product managers and development teams in the software industry, containing product goals, user stories, feature lists, interaction logic, boundary conditions, and more. In AI-assisted development scenarios, the role of PRD is further amplified — it's essentially a "context anchor" for AI. The generation quality of large language models is highly dependent on the information density and structural clarity of the input: vague input leads to vague output, while a clear PRD enables AI to generate usable code within the correct constraints.
A PRD needs to clearly state: what the app does, what features it has, and what the pages look like. You don't need technical knowledge — just clearly explain "what I want to build," and AI will translate it into a product document.
This step is the one beginners most often skip, and it's the most fundamental reason projects die. AI can't read your mind. If the ideas in your head don't become written words, it can only guess randomly.
Step 2: Build a Demo to Validate Direction
After the PRD is confirmed, don't rush into feature development — have AI create a page demo that just needs to look right. If you're not satisfied, continue discussing until it meets expectations.
"Validating direction with a demo first" corresponds to "Rapid Prototyping" in software engineering and the "Minimum Viable Product" (MVP) concept in lean startup methodology. The core logic is: humans have severe biases when understanding abstract descriptions, but judgment of visual presentations is nearly instantaneous. In AI programming scenarios, AI tends to "complete tasks" rather than "validate direction." If you skip the demo and jump straight into full-feature development, the cost of starting over when the direction is wrong is extremely high. Locking in the visual direction with minimal cost before investing full development resources is the key leverage point for controlling AI collaboration risk.
You can also use other AI tools (like Gemini) to generate page reference images, place them in Assets/Design, and AI can follow those styles without going off track.
Step 3: Complete the Logic and Create a Development Plan
After the demo is approved, have AI do two things:
- Complete the product functionality logic based on the PRD: When drafting the PRD, you might only think of the main flow, but branch flows (CRUD operations, page navigation logic, etc.) need AI to fill in, preventing omissions during development
- Create a development plan: Break it into step-by-step tasks, clearly defining what each step does and what it produces
Step 4: Develop + Test + Knowledge Accumulation
AI progresses through development step by step. When you encounter unfamiliar technical issues, have AI explain them. Once you understand, summarize everything and put it in the Nodes folder.
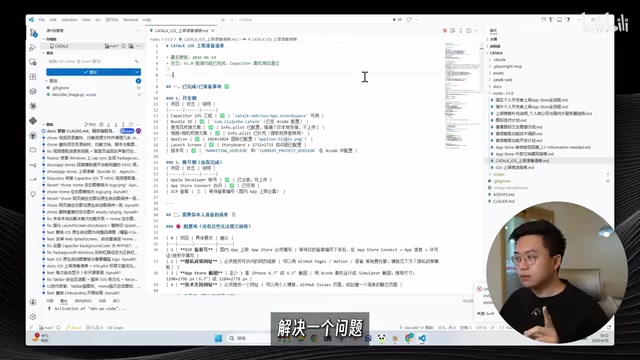
Using KaiTalk as an example, iOS packaging, publishing, and review — every pitfall encountered is recorded in Nodes. Solving one problem means accumulating one piece of knowledge; pitfalls you've stepped on won't catch you a second time. These notes are the knowledge assets accumulated in your project, and they're your core competitive advantage for working efficiently in the future.
Continuous Cycling, Spiraling Upward
After completing one cycle, continue developing, continue looping: create PRD 2.0, direct AI to build a new demo, learn new things during development, accumulate knowledge, publish a new version — continuously spiraling upward. This is the correct approach to Vibe Coding.
There are some useful Vibe Coding techniques out there (like Superpowers) that can help accelerate development. But techniques are just accelerators — the Discuss → Document → Develop → Learn loop is the foundation. Techniques make you run faster, but this method makes you run more steadily.
The "Vibe" in Vibe Coding doesn't mean building blindly by feel. Set up your workbench, get the loop running, and AI can help you build what you want in the right direction.
Key Takeaways
- Vibe Coding isn't about letting AI write code based on gut feeling — it requires a clearly defined workflow: the Iterative Build Loop
- Workspace planning is critical: DOCS (product documentation), Assets (visual assets), Nodes (learning notes), code folder, and root configuration files — all five modules are indispensable
- The Iterative Build Loop in four steps: Discuss and write PRD → Build demo to validate → Complete logic and create plan → Develop, test, and accumulate knowledge — each cycle advances the project one step
- VS Code + Claude Code has the lowest barrier and highest ceiling: full extension coverage, visual operation, zero command-line barrier
- Knowledge accumulation is your core competitive advantage: every pitfall recorded in Nodes means experience compounds, making subsequent development increasingly efficient
Related articles
 Tutorials
Cursor + Codex Dual-IDE Collaboration: A Practical Methodology for Open-Source Project Customization
A complete methodology for open-source project customization based on real-world experience, detailing the Cursor+Codex dual-IDE workflow, seven-stage process, MVP validation, and AI source code reading techniques.
 Tutorials
Cursor Multi-Agent in Practice: Building a Full-Stack Next.js Blog in 50 Minutes
Build a full-stack blog in 50 minutes using Cursor IDE's multi-Agent mode with Next.js, Clerk auth, and Supabase. Learn the 4-phase AI Agent workflow and key integration pitfalls.
 Tutorials
Building an AI Software Factory from Scratch: A Cursor Engineer's Hands-On Experience with Multi-Agent Collaboration
Cursor engineer Eric shares practical insights on building an AI software factory: automation levels, guardrail design, parallel Agent management, and scaling to 1000+ Agents for 24/7 development.