Trae Third-Party API Integration Tutorial: Configure GPT and Claude Models in Three Steps
Trae Third-Party API Integration Tutor…
A tutorial on configuring GPT-4 and Claude models in Trae via API proxy platforms
This article explains how to integrate third-party models like GPT-4 and Claude into ByteDance's free AI coding assistant Trae using proxy platforms such as DeepRouter. The core steps are: disable Auto Mode, obtain an API token, and configure models (note that OpenAI requires a /v1 suffix while Claude requires switching to Anthropic format).
Trae is a free AI coding assistant launched by ByteDance that has attracted a large number of developers with its zero-barrier approach. However, in practice, many users encounter a pain point: the default model options are relatively limited. Even after switching to the international version, there are still issues like fewer model choices and high costs for frequent use.
Fortunately, Trae supports third-party API integration, allowing us to use mainstream large models like GPT-4 and Claude through proxy platforms. This article will walk you through the configuration step by step — the entire process takes just three steps.
What is an API Proxy Platform? There are two ways to access large language model APIs: direct connection and proxy. Direct connection requires an overseas credit card, a stable network environment, and official APIs charge per token, making costs relatively high. Proxy platforms (API Proxies) aggregate multiple model services with unified interface formats, lowering the barrier for regular developers. Platforms like DeepRouter are essentially forwarding layers for OpenAI/Anthropic services — they wrap the original APIs and provide them to users in a more accessible way, often offering free credits for new users to try out.
Step 1: Download and Install Trae, Then Disable Auto Mode
First, go to the Trae official website and download the version corresponding to your operating system:
- Mac users: Download the Mac version
- Windows users: Download the Windows version

After installation, open Trae and log in to your account. Click "Continue" through the onboarding pages to reach the main interface.
Once you're in the interface, there's a critical step: find Auto in the bottom-right corner and disable Auto Mode. This is very important — Trae's Auto Mode is an automatic routing mechanism where the system automatically assigns built-in models based on task type (code completion, conversation, code generation, etc.), requiring no manual selection from the user. While this design is convenient, the trade-off is sacrificed customization: when Auto Mode is enabled, the system only calls from the built-in model pool and cannot recognize third-party models manually added by the user. After disabling Auto Mode, you gain full model selection control, allowing you to freely switch between built-in models and custom third-party models. Then click the "Add Model" button at the bottom to proceed to the model configuration step.
Step 2: Obtain a Third-Party API Token
Here we'll use the DeepRouter platform as an example to show how to obtain your dedicated API token.
Create an API Token
After registering and logging into DeepRouter, follow these steps:
- Click "Console" at the top
- Find "Token Management" in the left menu
- Click "Add Token"

On the token configuration page:
- Name: Enter anything you like for easy identification
- Expiration: Recommended to set as "Never expires"
- Quota: Enable the "Unlimited quota" option
- Leave other options at their defaults
Click "Submit" and you'll receive your dedicated API token. It's worth mentioning that the platform currently offers free trial credits that can be used without any top-up, which is very friendly for users who want to try it out.
Copy the Required Information
After creation, you need to prepare three things:
- API Key: Copy the token key you just created
- Request URL: Go back to the platform homepage and copy the API base address with one click
- Model ID: Go to the Model Marketplace, find your target model, and click the copy button in the upper-right corner to copy the model ID

Step 3: Complete Model Configuration in Trae
With the information above, return to Trae's model configuration interface and fill in the corresponding fields. Pay special attention to the configuration differences between OpenAI models and Claude models.
Configuring OpenAI Models (GPT Series)
If you want to use GPT-4, GPT-4o, or other OpenAI models:
- Paste the API key in the corresponding field
- Append
/v1to the request URL (this is the standard path for OpenAI-compatible format) - Paste the model ID copied from the Model Marketplace
- Click "Add Model" to complete the configuration
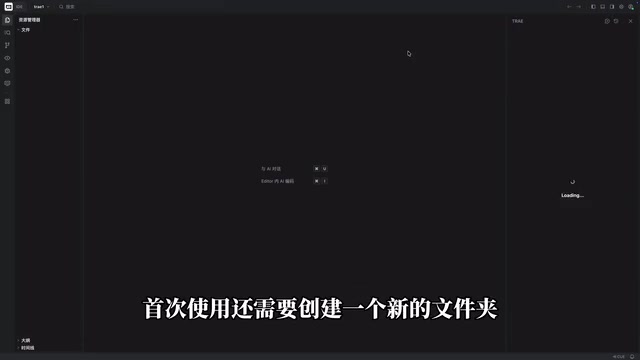
After configuration, remember to switch to your newly configured custom model in the chat interface, then type "Hello" to test. On first use, Trae will prompt you to create a new folder as your working directory.
Configuring Claude Models (Anthropic Series)
If you want to use Claude 3.5 Sonnet, Claude 3 Opus, or other Anthropic models, the configuration process is slightly different:
- In the API Format option, switch to Anthropic format (instead of the default OpenAI format)
- The request URL does not need
/v1appended - Only Anthropic models can be selected
- The remaining steps are the same as OpenAI model configuration
This difference exists because the API interface specifications of OpenAI and Anthropic are fundamentally different. OpenAI established a widely adopted REST API specification with the core endpoint at /v1/chat/completions, using standard Bearer Token authentication. Many third-party service providers also choose to be compatible with this format, making it a de facto industry standard. Anthropic, on the other hand, designed its own API specification with the endpoint at /v1/messages, using the x-api-key request header for authentication, and the system field in the message structure is separate from the messages array. These underlying differences mean the two API systems cannot be directly interchanged. Trae has adapted to both formats separately — simply selecting the correct format type during configuration will prevent authentication failures or response parsing errors.
Configuration Summary and Common Issues
| Configuration Item | OpenAI Models | Claude Models |
|---|---|---|
| API Format | OpenAI (default) | Anthropic |
| Request URL | Append /v1 | Do not append /v1 |
| Available Models | GPT series | Claude series |
After completing these three steps, you can freely call powerful models like GPT-4 and Claude within Trae. Compared to using official APIs directly, proxy platforms not only simplify configuration but also offer free credits, significantly lowering the barrier to using AI coding assistants.
If you encounter issues during configuration, troubleshoot from these angles:
- Check the API URL: Pay special attention to whether the
/v1suffix is correctly added - Confirm the API format: Use OpenAI format for OpenAI models, Anthropic format for Claude models
- Verify token quota: Ensure the token has sufficient available credits
Following these steps will resolve the vast majority of configuration issues.
Related articles
 Tutorials
Cursor + Codex Dual-IDE Collaboration: A Practical Methodology for Open-Source Project Customization
A complete methodology for open-source project customization based on real-world experience, detailing the Cursor+Codex dual-IDE workflow, seven-stage process, MVP validation, and AI source code reading techniques.
 Tutorials
Cursor Multi-Agent in Practice: Building a Full-Stack Next.js Blog in 50 Minutes
Build a full-stack blog in 50 minutes using Cursor IDE's multi-Agent mode with Next.js, Clerk auth, and Supabase. Learn the 4-phase AI Agent workflow and key integration pitfalls.
 Tutorials
Building an AI Software Factory from Scratch: A Cursor Engineer's Hands-On Experience with Multi-Agent Collaboration
Cursor engineer Eric shares practical insights on building an AI software factory: automation levels, guardrail design, parallel Agent management, and scaling to 1000+ Agents for 24/7 development.