Zero-Code Website Building: Crafting a Professional Personal Website with Claude Code
Zero-Code Website Building: Crafting a…
Build a design-forward personal website with zero code using Claude Code, Skills, and style-content separation.
This article introduces a Vibe Coding zero-code website building workflow: install UI/UX Design and Frontend Design Skills to inject professional design specifications into AI, apply a "style and content separation" prompt strategy that merges professional template visuals with personal Markdown document content, and use Claude Code to generate an HTML + Tailwind CSS single-file website — producing a distinctive, polished personal brand website in 10 minutes that breaks free from AI's template trap.
The Template Trap of AI Website Building
Using AI to generate websites is nothing new, but a common pain point remains — AI-generated web pages tend to look cookie-cutter, with an unmistakable template feel that screams "this was made by AI." So how do you make AI-built websites both fast and distinctive, with real visual quality?
This article shares a practical Vibe Coding workflow: using Claude Code paired with professional UI design specifications (Skills) to build a visually impressive personal brand website in under 10 minutes. The entire process requires zero programming knowledge, making it especially suitable for teachers, freelancers, and others who need a personal brand presence.
What is Vibe Coding? Vibe Coding is a new programming paradigm proposed by OpenAI co-founder Andrej Karpathy in early 2025. The core idea is to "fully immerse yourself in AI assistance, describe your intent in natural language, and let AI handle the actual coding." Unlike traditional programming, Vibe Coding practitioners don't need to review code line by line — instead, they drive AI output through continuous dialogue and iterative feedback. This concept quickly resonated with both developers and non-technical audiences because it lowers the barrier to programming from "knowing how to write code" to "knowing how to describe requirements."
Environment Setup: Three Steps to Your Workstation
Step 1: Install a Code Editor
I recommend Trae CN (free domestic version). It's a code editor whose biggest advantage is letting you view code changes in real-time through the directory structure while Claude Code writes code, giving you an intuitive view of the AI's coding process.
Installation is straightforward: visit the Trae CN official website, download the version for your operating system, and install it like any regular software.
Step 2: Create a Project Folder
Create a project folder on your local drive, for example D:/webcodingdemo/t-shirt-demo, then inside it:
- Create an
index.htmlfile — this is the website's source code file - Create a
docsfolder and place your personal bio.mddocument inside
You can write the personal bio document yourself, or send your existing bio to any AI tool and have it generate a Markdown-formatted document. The document should include: personal photo, contact information, areas of expertise, education background, skills, honors and awards, etc.
Step 3: Install Two Key Skills
This step is what transforms your website from "AI-flavored" to "design-forward" — it's the most critical part of the entire zero-code website building workflow. You need to install two Skills:
The Nature of the Skills Mechanism Skills are essentially collections of structured system prompts injected into an AI agent's context through standardized interfaces. When an AI coding tool loads a Skill, it automatically receives the design principles, code standards, and best practice constraints defined by that Skill before each conversation. This is like "pre-installing a professional consultant" for the AI — the UI/UX Design Skill is equivalent to having a senior visual designer participate throughout, while the Frontend Design Skill ensures code structure meets engineering standards. The reusability of Skills (Global scope) makes them "accumulative assets" in your personal AI workflow.
1. UI/UX Design Skill
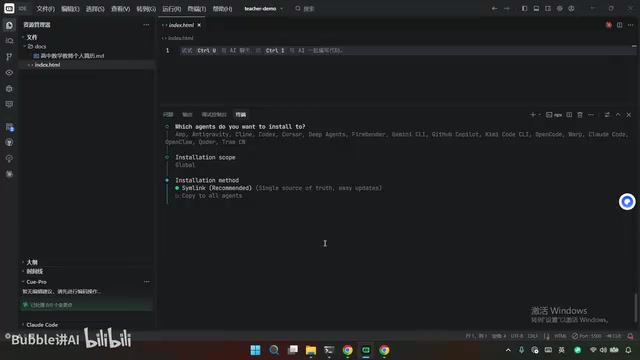
Go to the skills.sh website, search for uiux.comax, and click to copy the installation command. Open the terminal in Trae CN, paste the command, and press Enter. During installation, you can choose the associated Agent tool (such as Claude Code, Open Code, etc.). For scope, I recommend selecting Global so it can be reused across other projects later.
2. Frontend Design Skill
Similarly, search for frontend-design on skills.sh and follow the same installation steps.
These two Skills provide Claude Code with professional UI/UX design specifications and frontend development best practices, ensuring the generated code reaches professional visual standards.
Core Operation: Driving High-Quality Web Page Generation with Prompts
Choose a Design Reference Template
After installing the UI/UX Skill, navigate to its showcase page, which features numerous design examples in different styles. For this article, I chose the EDU Platform style, which is perfect for teacher-type personal websites.
Click "Show Prompt" to get the design prompt corresponding to that style. This prompt contains color schemes, layout structures, interaction details, and other design specifications.
Write the Complete Prompt
Combine the following elements into a single complete prompt to send to Claude Code:
- Specify Skills: Require the use of both UI/UX Design and Frontend Design Skills
- Design reference: Paste the EDU Platform style prompt, explicitly stating "reference the style only, don't copy the content"
- Content source: Point to the personal bio .md document in the docs directory
- Tech stack: Specify pure HTML + Tailwind CSS (the current mainstream AI coding approach)
- Icon library: Use the Bootstrap Icons online icon library
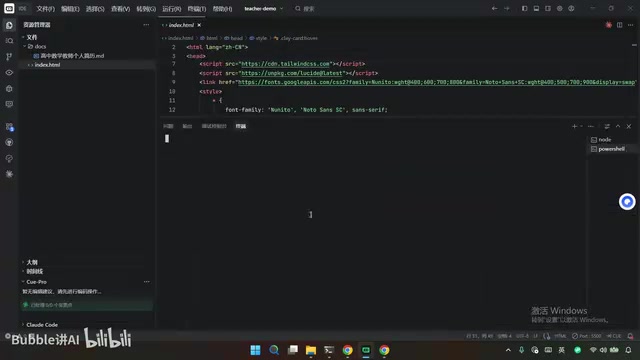
- Output requirements: Generate a single file, writing code to index.html

The design logic behind this prompt is worth noting: separation of style and content.
Why "Separate Style from Content"? This is an important design principle in Prompt Engineering, borrowed from the "separation of concerns" concept in traditional software architecture. In website generation scenarios, visual style (color palette, typography, layout rhythm, interaction details) and page content (text, data, personal information) are two independent dimensions. Mixing both into a single prompt often causes the AI to compromise between two objectives, producing mediocre results. By explicitly splitting them — pointing the style source to a professional design template and the content source to a structured document — you allow the AI to fully excel in each dimension, achieving higher quality when they're finally merged. This is the fundamental reason why this workflow can break through the "AI template" trap.
Style comes from professional design templates, content comes from personal bio documents, and the two are merged through Claude Code — ensuring both visual quality and content personalization. This is the key differentiator between Vibe Coding and ordinary AI website building.
What is Claude Code? Claude Code is a command-line AI programming tool from Anthropic. Unlike code completion tools like GitHub Copilot, it can understand entire project contexts, read and write local files, execute terminal commands, and complete the full development pipeline from requirements analysis to code generation. Its underlying models Claude 3.5/3.7 Sonnet perform exceptionally well in code generation benchmarks, particularly excelling at frontend HTML/CSS generation and multi-file project coordination. It's currently one of the most widely adopted AI coding agents in Vibe Coding workflows.
Wait for AI Coding to Complete
Type code in the terminal to enter Claude Code, paste the prompt, and press Enter. The AI will go through the following process:
- Read the local personal bio document
- Plan the page structure based on design specifications
- Generate complete HTML code and write it to index.html
The entire process takes approximately a few minutes. Permission requests (such as file read/write) may pop up during the process — simply select "Yes."
Preview and Optimization: Making Your Website Perfect
Install the Live Server Plugin
After generation is complete, I recommend previewing the website through the Live Server plugin rather than double-clicking the HTML file directly. Two reasons:
- More convenient operation with live refresh support
- More accurate file path handling for images and other resources
Installation method: Search for "Live Server" in the Trae CN extension store and install the first result. After installation, right-click index.html and select "Open with Live Server" to preview in your browser.
Iterative Optimization Tips
The first-generation personal website already includes complete modules: profile photo area, contact information, areas of expertise, education background, skills showcase, honors and awards, contact methods, etc. However, the layout may vary slightly each time. If you're unsatisfied with certain details, you can optimize through:
- Follow-up conversations: Simply tell Claude Code what you want to change, such as "change the primary color to dark blue" or "switch the skills module to a card-based layout"
- Provide reference screenshots: Find screenshots of websites you like and have the AI mimic their layout and styling
- Replace content: Swap placeholder information in the MD document with your real personal details and photos
The Right Way to Do Vibe Coding
The core philosophy of this zero-code website building workflow can be summarized in three key points:
- Use Skills to elevate AI's design literacy — Don't let Claude Code freestyle; give it professional design specifications as constraints
- Separate style from content — Choose visual style from professional template libraries, provide content material from personal documents
- Single-file output — The HTML + Tailwind CSS combination makes deployment incredibly simple; one file is a complete website
Why HTML + Tailwind CSS? Tailwind CSS is an "atomic CSS framework" that doesn't provide preset UI components. Instead, it offers hundreds of fine-grained utility classes that developers combine directly on HTML tags to achieve styling. For example,
class="bg-blue-500 text-white rounded-lg p-4"creates a blue rounded card. This approach is extremely AI-friendly: the AI doesn't need to maintain a separate CSS file, all styles are inline in the HTML, and a single file runs completely on its own. This dramatically reduces file management complexity and is the mainstream frontend technology choice in the current AI coding landscape.
For teachers, consultants, designers, and other professionals who need personal brand presence, this approach offers exceptional value: zero coding knowledge required, completed in 10 minutes, with visual results rivaling professional design. More importantly, it breaks the stereotype that "AI-generated = template-looking," proving that with proper prompt engineering and Vibe Coding methodology, AI can absolutely produce personal websites with personality and quality.
Key Takeaways
- Installing UI/UX Design and Frontend Design Skills provides AI with professional design specifications, avoiding template-looking web pages
- The "style and content separation" strategy selects visual style from professional template libraries while sourcing content from personal Markdown documents
- The HTML + Tailwind CSS single-file tech stack enables quick deployment of personal brand websites with zero coding knowledge
- Continuously optimize website details through follow-up conversations or reference screenshots for personalized customization
- Using Trae CN editor with the Live Server plugin enables real-time code preview and convenient debugging
Related articles
 Tutorials
Cursor + Codex Dual-IDE Collaboration: A Practical Methodology for Open-Source Project Customization
A complete methodology for open-source project customization based on real-world experience, detailing the Cursor+Codex dual-IDE workflow, seven-stage process, MVP validation, and AI source code reading techniques.
 Tutorials
Cursor Multi-Agent in Practice: Building a Full-Stack Next.js Blog in 50 Minutes
Build a full-stack blog in 50 minutes using Cursor IDE's multi-Agent mode with Next.js, Clerk auth, and Supabase. Learn the 4-phase AI Agent workflow and key integration pitfalls.
 Tutorials
Building an AI Software Factory from Scratch: A Cursor Engineer's Hands-On Experience with Multi-Agent Collaboration
Cursor engineer Eric shares practical insights on building an AI software factory: automation levels, guardrail design, parallel Agent management, and scaling to 1000+ Agents for 24/7 development.