AI Coding Deployment Guide: A Complete Hands-On Workflow from Local Demo to Live Website
A complete guide to deploying AI-coded projects from local demo to live website in 8 steps.
Most AI Coding tutorials only teach building local demos but skip deployment. This article uses a real-world AI 3D figurine website as an example, walking through the full workflow from coding with Codex to server deployment. It covers the 8 essential steps — port configuration, SSH access, environment setup, code upload, dependency installation, PM2 process management, Nginx reverse proxy, and domain/HTTPS setup — helping you bridge the gap from toy project to live product.
Running Locally Doesn't Mean Ready to Ship: The Biggest Blind Spot in AI Coding
An interesting trend has emerged in the AI Coding community recently: many people praise Claude Code's power, yet quietly switch back to Codex. The reason isn't complicated — for Chinese users especially, the bottleneck often isn't an AI's theoretical ceiling, but whether you can use it reliably. A tool that opens consistently, supports continuous iteration, and genuinely fits into your workflow may matter more than one that's "the best" on paper.
But there's a deeper problem: most AI Coding tutorials only teach you how to get AI to write a local demo. Very few explain how to turn that demo into a live product that other people can actually visit. This is the biggest pitfall in AI Coding — you've built a website, but it only lives on your own computer.
In this article, I'll walk through a real-world case — building an "AI-Generated 3D Figurine Website" — and break down the entire process from coding with Codex to deploying on a server.

Hands-On Case Study: Building an AI 3D Figurine Website from Scratch with Codex
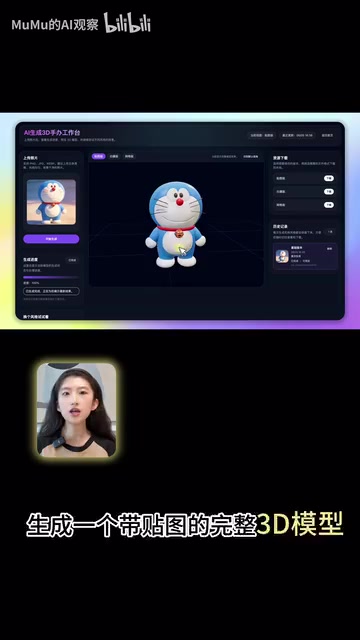
Product Feature Overview
The website is called AI Smart. Its core function lets users upload a photo and generate a fully textured 3D model via AI. Specifically, it supports:
- 3D Model Generation: Upload a photo, wait a few minutes, and get a complete 3D model
- Online Preview: Rotate and inspect the model directly in the browser, with support for viewing wireframes and mesh structures
- Model Download: Download the model file for further editing in professional 3D software
- Texture Remixing: Two approaches — AI auto-generates textures, or you describe a style in text (e.g., cyberpunk, clay toy, metal mech) and AI regenerates the texture based on your prompt
The same 3D model can be re-skinned, re-styled, and re-textured endlessly. Once downloaded, it can be used in 3D printing or modeling tools — turning a single photo into your very own 3D figurine.
The Core Web Coding Workflow
The key to web coding with Codex isn't getting a perfect website from a single prompt — it's an iterative process.
Step 1: Clearly communicate your requirements. Give Codex the full context — project background, goals, core business logic, API integration requirements, etc. Codex will automatically break down the requirements into technical tasks and start writing code.
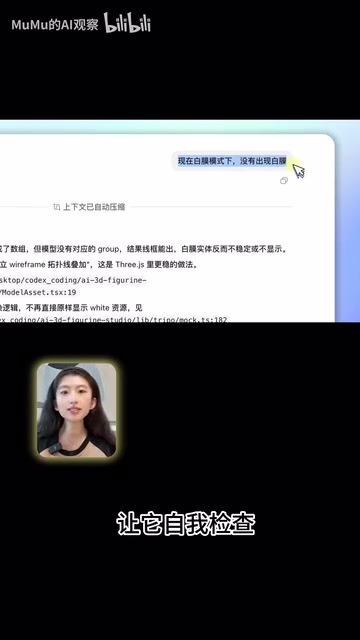
Step 2: Continuously iterate with feedback. As a non-professional developer, your job is to keep giving the AI natural-language feedback — send it screenshots of error pages, tell it the 3D model isn't rendering and ask it to debug, adjust UI styling, and so on.
Step 3: Integrate APIs to complete the feature loop. For AI-powered websites, you typically need to connect to model APIs. Think of an API as a pre-built interface to someone else's AI capabilities. Send the official API documentation to Codex so it understands the integration, then apply for your own API Key and configure it in your local terminal. Once configured, the interaction chain looks like: user input → backend calls the API → waits for the task to complete → returns results and displays them on the frontend.
Pro Tip: Dual-AI Collaboration for Better Efficiency
You can combine Codex and ChatGPT: when you encounter unfamiliar concepts or terminal commands, ask ChatGPT first to get the correct command, then hand it off to Codex or execute it in the terminal yourself. This "dual-AI collaboration" approach is more efficient and much friendlier for coding beginners.
From Local to Live: The Overlooked Deployment Steps
Why Running Locally Is Far from Enough
This is the blind spot in most AI Coding tutorials. When you've written a website locally with Codex and it runs successfully, it's only accessible on your own machine. If you want others to visit it via a proper domain name, you must deploy the code to a server.
This step seems simple, but it actually involves server procurement, environment setup, port configuration, reverse proxying, domain resolution, HTTPS setup, and a whole series of operations. For people without ops experience, this is often the biggest barrier between a "toy" and a "product."
Server Selection: Lightweight Application Servers Are Best for Quick Launches
For individuals and small teams looking to launch quickly, lightweight application servers are a solid choice. Most cloud providers — domestic and international — offer this type of product with simple configuration and friendly pricing.
A practical tip: For early-stage validation products, consider choosing a Hong Kong region. This way you don't need to deal with ICP filing (备案) right away and can get online quickly to validate your idea. Once the product is proven and you have real users, you can migrate to a mainland node and complete the filing process.
8 Key Steps to Deploy Your Website
Here's the complete workflow for deploying a local project to a server:
- Open firewall ports: Allow ports 22, 80, and 443 through the firewall (for SSH login, HTTP access, and HTTPS access, respectively)
- SSH into the server: Connect to the server via SSH using your username, password, and public IP
- Install the runtime environment: Install Node.js, NPM, PM2, and other necessary runtime dependencies
- Upload your project code: Run commands in your local terminal to transfer the code to a designated directory on the server
- Install project dependencies: Run
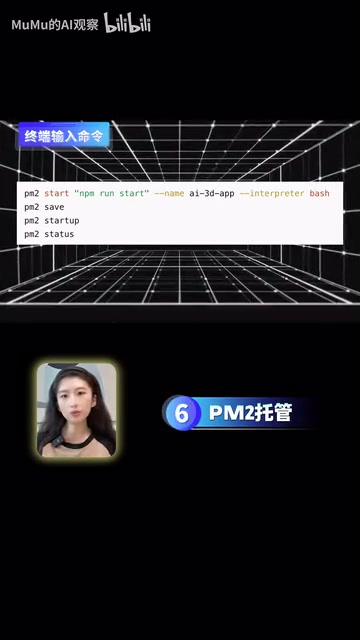
npm installon the server to install all required packages - PM2 process management: Use the PM2 process manager to keep your application running persistently, so it won't stop when you close the terminal
- Configure Nginx reverse proxy: Route external HTTP/HTTPS requests to your application's port correctly
- Domain resolution and HTTPS setup: Purchase a domain, configure DNS to point to your server's IP, and set up an SSL certificate to enable HTTPS
Only after completing all 8 steps does a locally vibe-coded website truly become a live product that others can open and use.
Don't Let Technical Jargon Scare You Off
You'll encounter plenty of unfamiliar terms along the way — Nginx, PM2, reverse proxy, DNS resolution, SSL certificates… Don't be intimidated. Leverage your AI assistant to explain concepts and write the correct configuration commands for you. You don't need to fully understand every technical detail — as long as each step executes correctly, you're well on your way to a successful deployment.
The True Value of AI Coding: A Complete Loop from Idea to Product
The greatest value AI Coding offers ordinary people isn't skipping all the learning — it's enabling you to learn by doing. Through a real project, you connect product design, code development, API integration, and server deployment into one cohesive workflow.
Before, you might have only had an idea. Now you can actually turn it into a website that others can visit. But the prerequisite is — you can't stop at the local demo.
Going from idea to demo is the first step. Going from demo to live deployment is the real closed loop. AI has lowered the barrier to coding, but execution and the mindset of complete delivery remain the dividing line between "just playing around" and "actually shipping a product."
In this AI era, what matters most isn't how many technical details you've mastered, but whether you have the drive to see something through from start to finish.
Related articles

Claude Code for Test Development in Practice: An AI Programming Workflow That Doubles Your Efficiency
A practical guide to Claude Code for test development: auto-generating test scripts, Plan Mode workflows, MCP + Playwright integration, and Subagent parallel tasks to build systematic AI-assisted workflows.
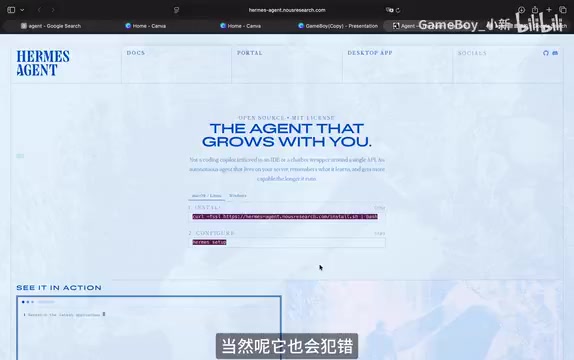
Hermes Agent Hands-On Review: An AI Efficiency Revolution for Indie Game Developers
Indie game developer reviews Hermes Agent vs OpenClaude: intelligent context compression, real-time Memory, remote control via Telegram, and practical use cases in game dev, social media, and email.
Vibe Coding Beginner's Guide: Tool Selection Across Three Categories with Practical Examples
A comprehensive guide to Vibe Coding's three tool categories: Agent frameworks, CLI Coding, and IDE tools, with practical examples including Snake game and data analysis workbench.