AI-Powered Chrome Extension Development: A Complete Methodology from UI Design to Debugging

A three-step methodology for building Chrome extensions with AI: design UI, generate code, and debug via console.
This article presents a proven methodology for developing Chrome extensions using AI tools. The approach consists of three core steps: first, use AI to generate UI panel designs for clear visual planning; second, feed those designs back to AI to generate complete extension code with higher fidelity; third, leverage the extension's dedicated debug console to efficiently fix errors through an iterative AI feedback loop.
Introduction: Why Use AI to Develop Chrome Extensions
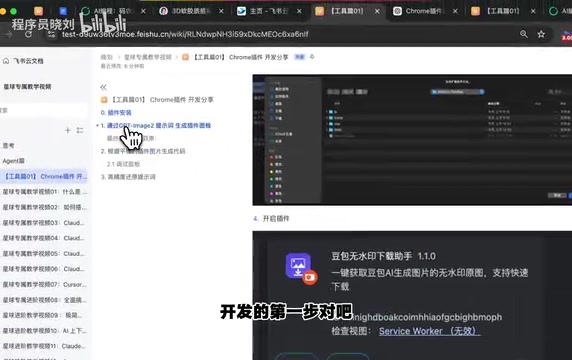
In our daily work, we frequently encounter repetitive pain points. For example, when using AI tools like Doubao to generate images, downloaded images always come with a watermark in the bottom-right corner. If it's just one or two images, manual cropping works fine. But when you need to batch-process hundreds of cover images, this problem becomes extremely frustrating.
This is where developing a Chrome extension to automate such tasks becomes the optimal solution. With AI programming tools, even if you're not a professional front-end developer, you can quickly build a fully functional browser extension. This article shares a battle-tested methodology for AI-powered Chrome extension development, helping you go from zero to one.
Chrome Extension Architecture Basics
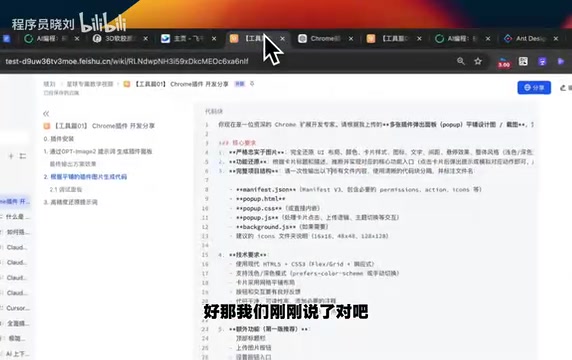
Chrome Extensions are browser extensions built on web technologies using the Manifest V3 architecture. A standard Chrome extension typically consists of: manifest.json (the configuration manifest that defines permissions, entry files, etc.), popup.html (the panel interface that appears when clicking the extension icon), background.js (the background service script that handles event listeners), and content scripts (scripts injected into web pages for execution). Understanding this basic structure is crucial for giving AI accurate instructions when generating code later.
Step 1: Use AI to Generate the Extension UI Panel Design
Why Design the Panel First Instead of Writing Code Directly
Many people jump straight into describing functional requirements and asking AI to generate code when developing extensions. The problem with this approach is that AI-generated interfaces tend to be rough, and you yourself don't have a clear expectation of the final product, making subsequent adjustments highly inefficient.
The correct approach is to have AI help you design the extension's UI panel first, displaying each page's functionality and layout in a flat, spread-out format. This way you'll clearly know:
- How many pages the extension has
- What function each page serves
- What the user's workflow looks like
Technical Principles Behind AI-Assisted UI Design
When we ask AI to generate UI panel designs, we're leveraging the image generation capabilities of multimodal large language models. Models like GPT-4o and Claude can generate wireframes or high-fidelity mockups based on text descriptions. The advantage of this approach is that it compresses design work that traditionally requires professional tools like Figma or Sketch into natural language conversations. While the generated designs aren't as refined as those from professional designers, they're clear enough to serve as development references.
Specific Prompting Techniques
You can describe your requirements like this: "I want to design a Chrome extension for removing image watermarks. Please help me design the extension interface, displaying all pages in a flat panel format." The AI will generate a design with multiple page cards, giving you a clear overview of the entire extension's structure.
If the first version isn't satisfactory, continue the conversation with AI to fine-tune it. The key is to iterate through multiple rounds — don't expect perfect results on the first try. After several rounds of adjustments, you'll arrive at a satisfactory UI solution.
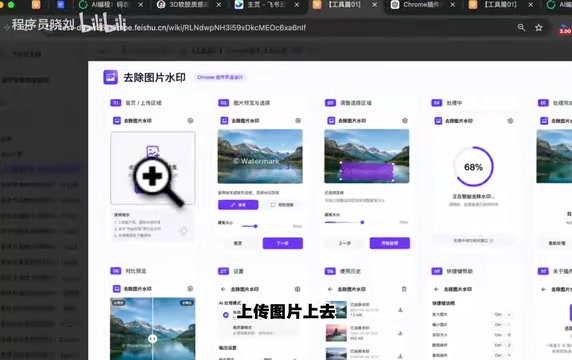
Using the watermark removal extension as an example, the finalized workflow is: Upload image → Remove watermark → Click next → Loading/processing → Display watermark-free version upon completion. The entire flow is clear and smooth.
Step 2: Generate Complete Extension Code Based on the Design
Once the UI design is finalized, the next step is converting the design into runnable code. You can provide the final version of the extension design directly to AI and have it generate the complete Chrome extension code.
The Principle Behind Design-to-Code Conversion
The step of converting design mockups to code essentially leverages AI's visual understanding capability (Vision). When you provide a UI design image to an AI model that supports image input, the model identifies visual elements such as layout structure, color schemes, and component types, then translates them into corresponding HTML structure, CSS styles, and JavaScript logic. This is significantly more accurate than pure text-based conversion because visual information eliminates the ambiguity inherent in language descriptions.
The key point here is: with a clear visual reference, the quality of AI-generated code improves significantly. The AI is no longer imagining an interface from scratch — it has a concrete target to replicate.
After generating the code, install the extension for testing by following these steps:
- Open Chrome browser and navigate to
chrome://extensions/ - Enable "Developer mode"
- Click "Load unpacked"
- Select your extension project folder
Step 3: Efficiently Debug Extensions Using the Console
Opening the Chrome Extension's Dedicated Debug Console
This is one of the most critical techniques in this article. Many people don't know that Chrome extensions have their own independent debug console. Here's how to access it:
- Click to open your extension panel
- Right-click on the extension panel
- Select "Inspect"
This opens a DevTools window dedicated to that extension, where you can see all error messages and log output in the Console panel.
Chrome DevTools Debugging Mechanism Explained
The Chrome extension's debug console is essentially an independent DevTools instance. Unlike regular web page debugging, an extension's popup page runs in an isolated context with its own DOM tree, JavaScript execution environment, and network requests. This is why you can't see extension logs in a regular web page's F12 console — you must open the extension's dedicated debug window via right-click inspect. Additionally, the background service worker has its own separate debug entry point, accessible by clicking the "Service Worker" link on the chrome://extensions page.
Feeding Error Messages Back to AI for Quick Fixes
When errors appear in the console, simply copy the error messages and hand them to AI for correction. This "run → error → fix" loop is the most efficient debugging approach in AI-assisted programming. AI can precisely locate problems and provide fix solutions based on specific error stack traces.
The Iterative AI Programming Workflow Paradigm
The "run → error → fix" loop introduced in this article is an AI-enhanced version of what's known as REPL-driven development (Read-Eval-Print Loop) in software engineering. In traditional development, developers need to understand error messages, consult documentation, and write fix code themselves. In AI-assisted mode, this loop is dramatically accelerated — AI serves as both the error interpreter and the fix generator. This pattern is particularly well-suited for development scenarios like Chrome extensions where API specifications are well-defined and error messages are standardized.
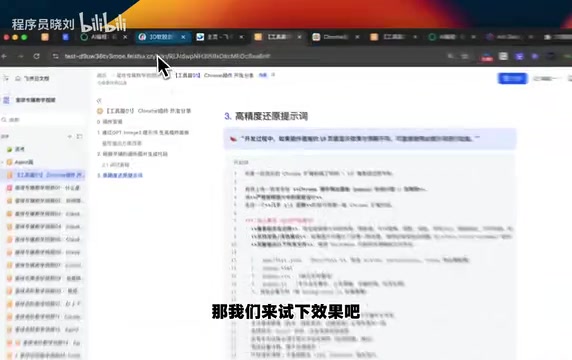
Solutions for Insufficient UI Fidelity
If you find that a page differs significantly from the design mockup, you can use specific prompts to have AI re-implement it. Provide both the design mockup and the current actual result to AI, clearly pointing out which areas need adjustment, and AI can make targeted fixes.
Practical Case: Web Page Color Palette Extraction Extension
Besides the watermark removal extension, here's another practical case — a web page color palette extraction extension. This extension can:
- Automatically analyze the color distribution of the current web page
- Extract the primary color scheme
- Generate reusable color prompts
- Help you quickly replicate similar web design styles
This case illustrates an important point: the development approach for Chrome extensions is universal. Whether it's removing watermarks, extracting color palettes, or other functions, the core methodology remains the same: design first → code second → debug last.
Summary: Three Key Principles for AI-Powered Chrome Extension Development
-
Visuals before code: Don't rush to have AI write code. First use AI to generate a clear UI design plan, ensuring you have a definite expectation of the final product.
-
Multiple iterations beat one-shot perfection: Whether it's UI design or code generation, don't expect perfection on the first attempt. Gradually optimizing through multiple rounds of conversation is the correct workflow.
-
Master console debugging: Learn the technique of right-click inspecting the extension, feed error messages directly back to AI, and form an efficient development feedback loop.
Once you've mastered this methodology, even programming beginners can develop fully functional, visually polished Chrome extensions in a short time. AI has lowered the barrier to programming, but a clear development mindset and methodology remain the key factors determining final product quality.
Related articles
WWDC 2026 Preview: Major Siri Overhaul and Comprehensive Apple Intelligence Upgrade
Deep analysis of WWDC 2026 Apple AI strategy: standalone Siri app, iOS 27 as an AI-native OS, and Apple Intelligence 2.0 rebuilt from the ground up.
NestJS + LangChain: A Practical Guide for Frontend Engineers Transitioning to AI Full-Stack Architecture
How can frontend engineers transition to AI full-stack? This guide covers NestJS + LangChain, TypeScript fundamentals, AI Agent development, local model deployment, and cross-language architecture skills.
Building a Complete Mini Program with Codex: A Full-Process Walkthrough from Zero to Launch
A detailed walkthrough of building a complete WeChat Mini Program from scratch using OpenAI Codex, covering seven image tool features, membership system, WeChat Pay integration, and AI-assisted development strategies.