Claude Code Tutorial: Complete Guide to Installation, Configuration, and Connecting Chinese LLMs
A complete guide to installing Claude Code and connecting it to Chinese LLMs like DeepSeek.
This guide walks you through installing Claude Code — Anthropic's AI coding agent — and configuring it with Chinese LLMs like DeepSeek for VPN-free usage in China. It covers the three-step installation process, three interaction modes (CLI, desktop, editor plugin), hands-on examples from webpage creation to spreadsheet generation, and advanced techniques including project memory files, MCP integrations, and cost control strategies.
What Is Claude Code?
Claude Code is an AI coding agent developed by Anthropic, and it's fundamentally different from regular AI chat tools. Traditional tools like ChatGPT or the web version of Claude can only give you code snippets in a chat window — you're on your own when it comes to copying, pasting, and actually using them. Claude Code, on the other hand, can directly read your local project files, autonomously modify code, execute commands, fix bugs, edit documents, and process spreadsheet data.
Think of it this way: you give it a goal, and it breaks down the steps and gets the work done on its own. It's more like a colleague who can work independently — reading, writing, and executing right inside your project.
Key Differences from Similar Tools
- Web-based Claude/ChatGPT: Chat-window mode with no access to your local files; all operations must be done manually
- Cursor: A code editor with integrated AI capabilities, but you still need to drive the workflow yourself
- Claude Code: An autonomous agent that reads and writes files directly in your project directory, runs commands, and completes entire workflows independently

Two Paths for Using Claude Code in China
Before installation, let's address three practical questions: Can it be used in China? How much does it cost? Do you need a VPN?
Officially, there are two payment options: subscription plans (Pro at $20/month, Max at $100/month) or pay-as-you-go API billing. However, users in China face two barriers — direct access may be restricted in some regions, and only international payment methods are supported.
Path A: Official Account + VPN
This gives you the most authentic experience, but requires a stable VPN and a foreign currency credit card, making the overall cost relatively high. Best suited for users with sufficient budget who can handle these two prerequisites.
Path B: Connect to Chinese LLMs (Recommended for Most Users)
No VPN needed — just point Claude Code's backend to a Chinese LLM. Models like DeepSeek, Kimi, and Zhipu GLM have already reached a mature level in code comprehension, code generation, debugging, and general development assistance. They all provide API interfaces compatible with Anthropic's format.
The configuration is straightforward: simply change the default API endpoint in Claude Code to the Chinese platform's address and enter the corresponding API Key. The advantages are clear — direct domestic connections are faster and more stable, and most platforms offer free credits for new users to try out.
Three Steps to Install Claude Code
The entire installation process boils down to three things: install the prerequisite tools (Node.js and Git), install Claude Code itself, and complete the login configuration.
Step 1: Install Node.js
Go to the Node.js official website, select the latest LTS (Long Term Support) version, and download the installer for your operating system. After installation, it's recommended to configure the Taobao mirror source for faster and more stable package downloads:
npm config set registry https://registry.npmmirror.com
Step 2: Install Git
Mac and Windows each have their own installation methods. Mac users can install via Homebrew, while Windows users can download the installer from the Git official website and follow the default options through the setup wizard.
Step 3: Install Claude Code
It all comes down to one command:
npm install -g @anthropic-ai/claude-code
After installation, type claude --version. If the terminal displays a version number, the installation was successful.
Configuring DeepSeek Integration
We recommend using the CC Switch tool to manage your local LLM API Keys in one place. Here are the steps:
- Download and install CC Switch from its official website
- Go to the DeepSeek Open Platform, register an account, and create an API Key
- In the CC Switch interface, add DeepSeek as a provider and paste your API Key
- Click Enable and restart your terminal
Once configured, Claude Code will use DeepSeek's model to respond to your instructions.
Three Ways to Use Claude Code
The terminal CLI, desktop client, and editor plugin are not three separate applications — they're three different interfaces for the same Claude Code. Choose whichever suits your workflow:
- CLI (Command Line): Navigate to your project directory and type
claudein the terminal to launch. The most basic, universal, and lightweight option - Desktop Client: Provides a standalone graphical interface — entirely mouse-driven with no command line required
- Editor Plugin: Install it in VSCode or JetBrains IDEs to use Claude Code directly within your editor, referencing project files with the
@symbol
Hands-On Demo: From Zero to Finished Product
Example 1: Creating a Personal Introduction Webpage with Claude Code
Create an empty folder on your desktop, navigate to it in the terminal, type claude to launch the chat interface, and describe what you need:
Create a personal introduction webpage in this folder with my name, a one-line bio, three hobbies, a clean color scheme, and make it openable directly in a browser.
Claude Code will scan the current folder and inform you that it needs to create an index.html file. After you confirm, the file is generated automatically. Double-click to open it in your browser and you'll see the finished page.
Subsequent modifications are just as easy — simply say "change the background to light gray and make the name bigger" or "switch it to dark mode," and the changes appear immediately. The entire process requires zero coding. The workflow is: State your requirements → Review the plan → Confirm → Get results.
Example 2: Creating an Income Tracking Spreadsheet with Claude Code
Claude Code's capabilities extend well beyond writing code — it's equally adept at file processing and data organization. For example, you could ask it to create a content creator income tracking spreadsheet:
Create an Excel spreadsheet to track my income across three platforms — Bilibili, Douyin, and Xiaohongshu — categorized by ads, brand deals, and affiliate commissions. Include a detail sheet with automatic calculations for monthly totals per platform and annual cumulative totals.
It will write a script to generate the spreadsheet file and automatically handle the required Python module dependencies (without affecting your system environment). After you confirm execution, a complete Excel file appears in your folder with multiple sheets containing both detailed data and summary statistics. You can then ask it to add test data, insert bar chart comparisons, and more.
Core Principles for Using Claude Code Effectively
How to Describe Tasks Clearly
Master these four points to ensure Claude Code accurately understands your intent:
- Be explicit about goals and requirements: Avoid vague descriptions; spell out the expected results in detail
- One task at a time: Don't cram multiple unrelated tasks into a single instruction
- Use
@to reference files: Have it read relevant files before taking action to reduce misunderstandings - Plan before executing complex tasks: For large tasks, ask it to outline an execution plan first, then confirm before proceeding
Quick Reference: Common Commands
| Command | Purpose |
|---|---|
/init | Generate a project description file |
/clear | Clear the current conversation to switch tasks |
/compact | Compress context to free up token space |
/model | Switch the active model |
/status | Check current status |
/exit | Exit Claude Code |
Three Safety Rules for Using Claude Code
Claude Code has permission to modify files and execute commands on your computer, so keep these three rules in mind:
- Always use Git for project management: Review change history at any time and roll back with one click if something goes wrong
- Restrict the working directory: Operate within a dedicated project folder — don't let it roam freely across your entire machine
- Safeguard your API keys: Never hardcode keys into your source code files
For beginners, it's recommended to keep the default step-by-step confirmation mode enabled. Review each operation before approving it to maintain safety and control.
Overview of Advanced Claude Code Techniques
Once you're comfortable with the basics, gradually explore these advanced features to boost your productivity:
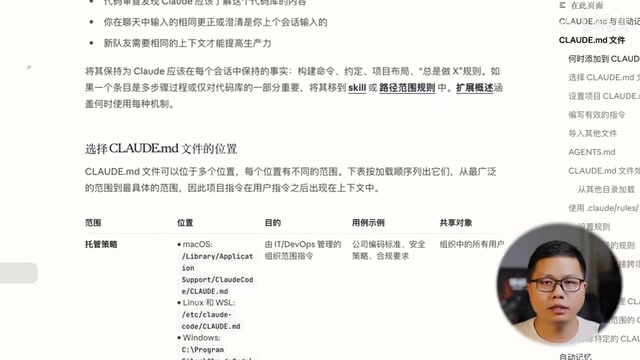
- CLAUDE.md Project Memory File: Document your project's tech stack, coding conventions, and common commands in this file. Claude Code automatically loads it on startup, saving you from repeating yourself
- Custom Slash Commands: Turn frequently used prompt templates into custom commands that trigger with a single slash
- MCP Tool Integration: Use the
claude mcp addcommand to let Claude Code directly interact with GitHub repositories, databases, browsers, and other external tools - Sub-agent Mode: Delegate independent tasks like code review and test execution to specialized sub-agents that run in parallel
- Hooks (Automation Triggers): Set up automatic trigger rules — for example, auto-format files after every modification, or automatically block risky commands
- Plan Mode: Have Claude Code create a plan without executing anything first. Once you've confirmed the approach is sound, switch to execution mode to minimize rework
- Deep Git Integration: Have it automatically commit after completing each small feature, and even create Pull Requests directly
- Cost Control Strategies: Use Claude Code Router to automatically route tasks to different models based on complexity — use more capable models for planning and cost-effective models for execution
Conclusion
Claude Code's core value lies in upgrading AI from a "chat assistant" to a "hands-on assistant." Whether you're writing code, organizing files, creating spreadsheets, or cleaning data, the workflow is always the same: Navigate to the folder → State your requirements → Confirm execution.
For users in China, connecting to Chinese LLMs like DeepSeek makes it entirely possible to use this tool with zero barriers and no VPN required. Start with simple, small tasks, keep the default step-by-step confirmation mode to familiarize yourself with the workflow, and gradually unlock more advanced features as you gain confidence.
Related articles

Claude Code for Test Development in Practice: An AI Programming Workflow That Doubles Your Efficiency
A practical guide to Claude Code for test development: auto-generating test scripts, Plan Mode workflows, MCP + Playwright integration, and Subagent parallel tasks to build systematic AI-assisted workflows.

Hermes Agent Hands-On Review: An AI Efficiency Revolution for Indie Game Developers
Indie game developer reviews Hermes Agent vs OpenClaude: intelligent context compression, real-time Memory, remote control via Telegram, and practical use cases in game dev, social media, and email.
Vibe Coding Beginner's Guide: Tool Selection Across Three Categories with Practical Examples
A comprehensive guide to Vibe Coding's three tool categories: Agent frameworks, CLI Coding, and IDE tools, with practical examples including Snake game and data analysis workbench.