Cursor Interface Fully Explained: Master the Four Core Workspaces from Scratch
Cursor Interface Fully Explained: Mast…
A complete walkthrough of Cursor editor's interface layout, core features, and key settings.
This is the second article in a beginner AI programming series. It systematically covers Cursor editor's four core areas (File Explorer, Code Editor, Terminal, AI Chat Panel), two AI conversation modes (Agent mode and Ask mode), three key settings (Docs, Models, Rules), and the importance of Git version control as an essential "undo button" in AI-powered programming.
Introduction
For beginners learning AI-powered programming, installing Cursor is just the first step. Before you can truly get started, you need to understand the interface layout and core functional areas. This is the second article in the "Learn AI Programming from Scratch in 15 Days" series, and it will walk you through Cursor's workspaces — taking you from "overwhelmed at first glance" to "confident and oriented."
First Time Opening Cursor: Starting with a New Project
Creating Your First Project Folder
After installing Cursor, you'll see a welcome screen with an "Open Project" button. If you're a developer, you can open an existing GitHub project directly. If you're a complete beginner, no worries — just create an empty folder on your computer (for example, a folder called "0312" on your D: drive), then open it with Cursor.
This folder becomes your "workspace" for storing code. Cursor loads all its contents into the left panel, mirroring the exact same structure you'd see in your system's file explorer.
First Things First: Install the Chinese Language Pack
Since we recommend downloading the international version of Cursor (which gives you access to more powerful models like ChatGPT and Claude), the interface defaults to English. Don't panic — every beginner runs into this.
The fix is simple: click the fourth icon on the left sidebar (the Extensions marketplace), search for "Chinese," find the Chinese language pack, install it, and restart. The interface will switch to Chinese. Make sure to do this first, or navigating the rest of the tool will be unnecessarily difficult.
The Four Core Areas of Cursor Explained
Cursor's interface can be clearly divided into four functional areas. Understanding what each one does is the foundation for using this tool efficiently.
Area 1: File Explorer (Left Panel)
The left panel is where you manage files and folders. Every code file you write is displayed here in a tree structure — for example, an app directory might contain css style files, components files, and so on.
This structure maps directly to the folder structure on your local machine. Click any file, and it opens in the central code editing area. The left sidebar also has several commonly used icon buttons:
- File Browser: View and manage project files
- Search: Search for keywords across your entire codebase to quickly locate where a property or function is used
- Git Version Control: Manage code versions (more on this below)
- Extensions Marketplace: Install useful plugins like the Chinese language pack, code formatters, Live Server, and more
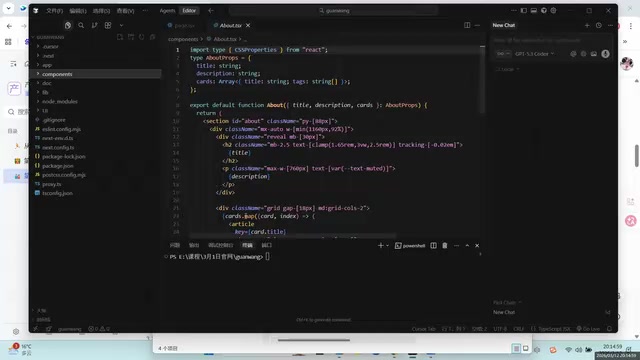
Area 2: Code Editor (Center Main Area)
The center area is your main battlefield for reading and writing code. It supports multiple tabs and split-screen views.
One incredibly useful feature here is code auto-completion (Tab completion). As you start typing, Cursor intelligently predicts what you're about to write based on context. For example, if you type background, it might suggest background-color along with a corresponding color value. If the suggestion is what you want, just press Tab to accept it — no need to type every character.
Technical Background: Cursor's code auto-completion is fundamentally different from traditional IDEs (like VS Code's IntelliSense). Traditional completion relies on syntax trees and API indexes, only matching known function names and properties. Cursor's AI completion, on the other hand, is powered by large language models specifically trained on code. It understands your programming intent and the context of your entire project, and can even predict and generate entire blocks of logic — not just individual keywords. This is why it's especially beginner-friendly: even if you're not yet familiar with code syntax, the AI can help "guess" what you should write next.
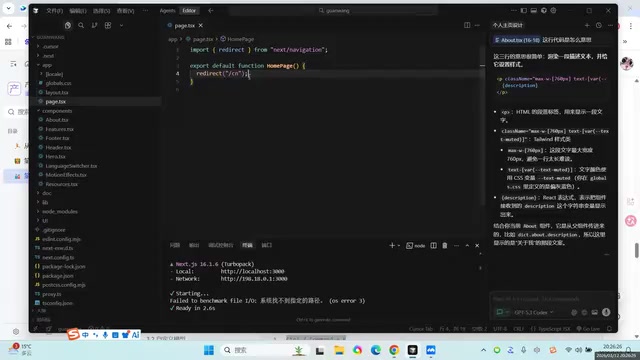
Area 3: Terminal (Bottom Command Line)
The terminal at the bottom is a command-line window where you interact with your code. Here's an analogy: if your code is a freshly cooked meal, the terminal is where you find the plates, set the table, and serve it.
The Terminal is a text-based interface provided by the operating system. Developers type commands to control the computer instead of clicking through a graphical interface. For web development, the tool you'll use most often is npm — the package manager for the JavaScript ecosystem. npm install reads the package.json file in your project's root directory and automatically downloads all dependencies. npm run dev starts a local development server, typically serving a live preview at localhost:3000, where any changes you make in your code are instantly reflected in the browser.
Key uses of the terminal include:
- Installing project dependencies: For example, running
npm installto install all the packages a front-end project needs - Starting your project: For example, running
npm run devto launch the project locally and preview it in your browser - Debugging and troubleshooting: Viewing error messages and pinpointing issues
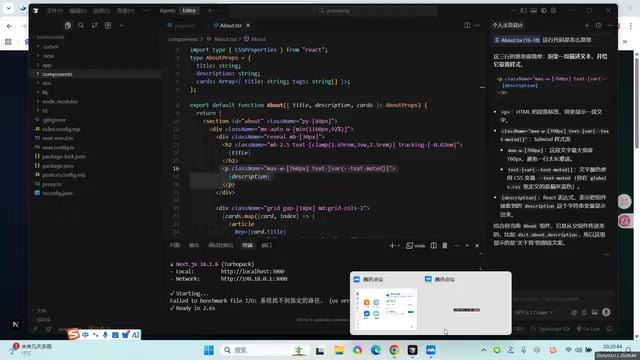
Area 4: AI Chat Panel (Right-Side Intelligent Assistant)
This is Cursor's most essential area and the key differentiator from ordinary code editors. Here, you can communicate with AI directly in natural language — asking it to write code, fix bugs, or explain logic.
Two modes beginners need to master:
| Mode | Function | Use Case |
|---|---|---|
| Agent Mode | AI directly modifies your code and executes commands | Have AI generate pages, fix bugs |
| Ask Mode | AI only answers questions without touching your code | Learn code logic, understand what a specific line does |
A very practical tip: you can open two chat windows simultaneously — one in Agent mode for AI to modify your code, and another in Ask mode to learn about code logic. Best of both worlds.
Three Essential Cursor Settings You Must Know
Open Cursor's settings menu, and you'll find three features critical to daily use:
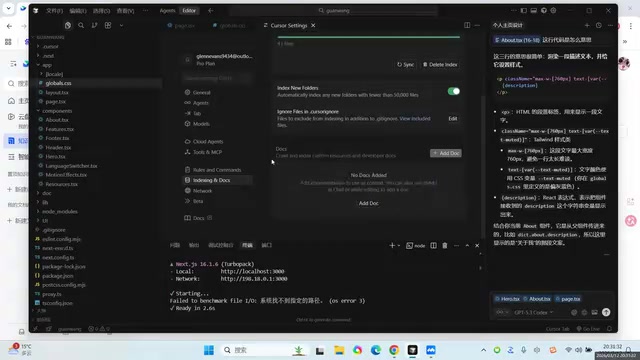
Docs (Document References)
You can add links to third-party API documentation, Feishu docs, and other references to the Docs section. When you reference these documents in a conversation, the AI can generate more accurate code based on their content. This is especially useful when integrating with third-party APIs.
Models (Model Selection)
Cursor comes with multiple built-in AI models, including GPT-4, Claude, and others. Choosing a model is like selecting the "education level of your advisory team" — the better the model, the higher the quality of generated code.
Understanding the differences between these models helps you make better choices: GPT-4 is OpenAI's flagship model, delivering stable performance across a wide range of programming languages and general-purpose code generation. Claude (by Anthropic) excels at handling long contexts (such as large codebases) and following complex multi-step instructions, making it ideal for scenarios where the AI needs to understand your entire project structure. DeepSeek is an open-source large model developed by the Chinese company DeepSeek. Its coding capabilities are approaching GPT-4 levels, and it supports access via OpenAI-compatible APIs, making it a practical alternative for users with network access restrictions.
A few things to keep in mind:
- During the free trial and on the Pro plan, go ahead and use the best models available — no need to hold back
- Auto mode selects models automatically to save costs, but the results aren't as good as manually choosing a top-tier model
- If you want to use domestic models like DeepSeek, you can connect them via OpenAI API-compatible interfaces
- Using overseas models like GPT and Claude requires appropriate network conditions
Rules (Rule Configuration)
Rules are like setting "company guidelines" for the AI. For example, if you're building a front-end with Next.js, you can define Next.js coding conventions; if you're writing a Python Flask backend, you set Flask-specific rules. With Rules in place, the AI generates code that better aligns with your project's tech stack and coding style. This feature will be covered in detail in a dedicated lesson later.
Git Version Control: The "Undo Button" of the AI Programming Era
The Git feature in the left sidebar deserves special attention. In AI-powered programming, you'll frequently ask the AI to make sweeping code changes, only to discover the result is worse than what you started with. Without version control, there's no going back.
Git is a distributed version control system created by Linus Torvalds (the creator of Linux) in 2005, and it's currently the world's most widely used code version management tool. It works by saving a series of "snapshots" (called commits) of your codebase, with each snapshot recording the complete state of all files at that point in time. You can freely switch between any two snapshots and compare differences between versions. In traditional software development, Git is primarily used for team collaboration. In AI programming scenarios, its value is amplified even further — AI might modify dozens of files in a single operation, and without version records, any mistake becomes an irreversible disaster.
Git's core value lies in saving version snapshots. Before asking the AI to make major changes, commit a version with Git first. If things go wrong, you can roll back to the previous version with one click. This is especially important in AI programming, because AI sometimes "means well but does harm" — you ask it to change a button color, and it might end up changing the entire background color too.
Summary
The key takeaways from this lesson can be summarized as follows:
- First-time setup: Create a new folder as your project directory and install the Chinese language pack
- Four core areas: File Explorer, Code Editor, Terminal, and AI Chat Panel — each serving its own purpose
- Two AI modes: Agent mode lets AI modify code directly; Ask mode lets AI serve as a teacher answering questions
- Three key settings: Docs for referencing documentation, Models for choosing AI models, Rules for defining conventions
- Git version control: The essential "undo button" of the AI programming era
With these fundamentals under your belt, you now have the prerequisites for AI programming with Cursor. The next lesson will dive deeper into the specific usage of Agent mode, Ask mode, and Rules.
Related articles
 Tutorials
Cursor + Codex Dual-IDE Collaboration: A Practical Methodology for Open-Source Project Customization
A complete methodology for open-source project customization based on real-world experience, detailing the Cursor+Codex dual-IDE workflow, seven-stage process, MVP validation, and AI source code reading techniques.
 Tutorials
Cursor Multi-Agent in Practice: Building a Full-Stack Next.js Blog in 50 Minutes
Build a full-stack blog in 50 minutes using Cursor IDE's multi-Agent mode with Next.js, Clerk auth, and Supabase. Learn the 4-phase AI Agent workflow and key integration pitfalls.
 Tutorials
Building an AI Software Factory from Scratch: A Cursor Engineer's Hands-On Experience with Multi-Agent Collaboration
Cursor engineer Eric shares practical insights on building an AI software factory: automation levels, guardrail design, parallel Agent management, and scaling to 1000+ Agents for 24/7 development.