Pre-Installation Setup for Codex: A Configuration Guide for Git, Node.js, and VS Code

Complete guide to setting up Git, Node.js, and VS Code before installing OpenAI Codex.
Before installing OpenAI Codex, you need three key tools in place: Git for version control and repository interaction, Node.js (with npm) for managing dependencies and installing the Codex CLI, and VS Code as your code editor. This guide walks through downloading, installing, and verifying each tool step by step, with practical tips on version selection, path configuration, and disk performance considerations.
Want to dive into AI-powered coding with OpenAI's Codex but don't know where to start? Many beginners get stuck at the environment setup stage when trying to install Codex. This article walks you through the three essential prerequisites you need to complete before installing Codex, helping you clear every hurdle in one go.
Why Codex Requires Pre-Installation Setup
Codex isn't a standalone, out-of-the-box application — it relies on a series of development tools to function properly. OpenAI Codex was originally a code generation system fine-tuned from the GPT series of large language models, trained extensively on massive open-source code repositories to understand natural language instructions and translate them into executable code. In 2025, OpenAI upgraded Codex into a cloud-based software engineering agent integrated within ChatGPT, capable of handling multiple programming tasks in parallel within a cloud sandbox environment — from writing feature modules and fixing bugs to submitting Pull Requests, covering nearly the entire software development workflow. Because Codex needs to interact with your local development environment (cloning repositories, managing dependency packages, previewing and editing code locally), you need to ensure the following three tools are in place before getting started:
- Git — The foundational tool for version control and collaborative development
- Node.js — The runtime environment responsible for installing dependency packages
- VS Code — A supporting tool for editing and viewing code
Each of these tools serves a distinct purpose, and all are essential (VS Code isn't strictly required, but it's highly recommended). Let's walk through how to install each one.
Installing and Configuring Git
Git is a foundational dependency for virtually all AI development tools. Whether you plan to use Codex, Claude Code, Hermes Agent, or any other AI coding tool down the line, Git is a must-have.
Git is a distributed version control system created by Linus Torvalds (the creator of Linux) in 2005. Unlike earlier centralized version control tools such as SVN, every local copy in Git is a complete code repository containing the project's full history. This distributed architecture allows developers to commit, branch, and merge even while offline, dramatically improving collaboration efficiency. In AI coding scenarios, Git plays an especially critical role: code generated by Codex typically needs to be pushed to remote repositories like GitHub for version management, and Codex itself uses Git to pull project code, create branches, and commit changes during task execution. In essence, Git is the bridge between AI coding tools and code repositories.
Git Installation Steps
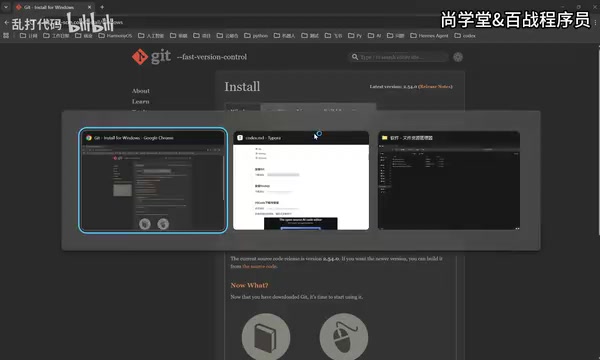
- Visit the Git official website (git-scm.com)
- Click the "Download for Windows" button on the page
- On the download page, click "Click here to download" to start the download
- Once downloaded, double-click the installer and click "Next" all the way through to finish
The Git installation process is completely straightforward — no additional configuration needed. The software is relatively small (around 50MB), so installation is quick. If your network connection is slow and the download takes a while, just be patient or look for a local mirror. After installation, Git automatically adds itself to your system's PATH environment variable, meaning you can use the git command directly in any command-line window without manually configuring the path.
Installing and Verifying Node.js
Node.js handles the management of various dependency packages that Codex needs to run. A quick note: Codex doesn't have strict Node.js version requirements — just install the latest stable version.
Node.js is a JavaScript runtime environment built on Chrome's V8 engine that frees JavaScript from the browser, allowing it to run on servers and in local command-line environments. The core reason Node.js is so important in the AI tool chain is its bundled npm (Node Package Manager). npm is the world's largest open-source software registry with over 2 million packages — virtually all modern frontend frameworks, CLI tools, and development utilities are distributed and installed through npm. When you install the Codex CLI (command-line version), you're essentially using the npm install command to pull Codex and all its dependencies from the npm registry. Additionally, Node.js's asynchronous, non-blocking I/O model makes it particularly well-suited for handling the frequent network requests and file operations common in AI tools, which is why an increasing number of AI coding tools are built on the Node.js ecosystem.
Node.js Installation Steps
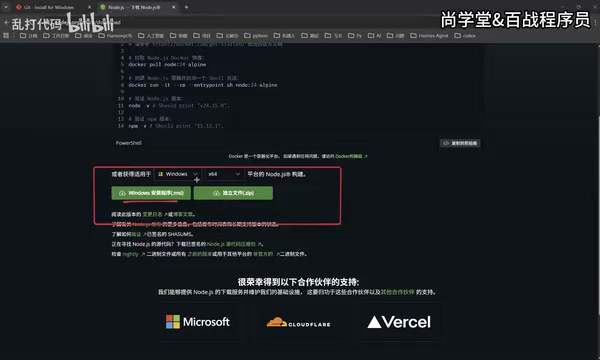
- Visit the Node.js official website (nodejs.org)
- Click the "Get Node.js" button
- Select the version corresponding to your operating system (Windows, macOS, and Linux are all supported)
- Download and double-click the installer, then follow the prompts to complete the setup
It's worth noting that the Node.js website typically offers two versions: LTS (Long Term Support) and Current (latest version). The LTS version undergoes more thorough testing, offers greater stability, and follows a major version release cycle of every two years. The Current version includes the newest features but may carry compatibility risks. For using Codex, the LTS version is the safest choice.
Verifying a Successful Node.js Installation
After installation, it's a good idea to verify that Node.js was installed correctly right away:
- Press
Win + Rto open the Run dialog - Type
cmdand press Enter to open the command prompt - Type
node -vand press Enter - If a version number appears (e.g., v24.15.0), the installation was successful
You can also type npm -v to verify that npm was installed alongside Node.js. npm is automatically installed with Node.js — no separate action needed. If both commands return version numbers correctly, your Node.js environment is fully ready.
Note: Different AI tools have different Node.js version requirements. For example, Crawl4AI requires version 22.x, but Codex has no such restrictions — just install the latest stable version. If you'll need to use multiple AI tools on the same machine in the future and they have conflicting Node.js version requirements, consider using nvm (Node Version Manager) to manage multiple Node.js versions and switch between them with a single command.
Installing VS Code and Configuring the Chinese Language Pack
Codex itself only generates code — it doesn't come with built-in code editing capabilities. When AI-generated code needs fine-tuning or minor adjustments, you still need a professional code editor to work with, and VS Code is currently the best choice.
VS Code (Visual Studio Code) is a free, open-source code editor released by Microsoft in 2015, built on the Electron framework (which also uses Node.js and Chromium under the hood). The reason it became the most widely used code editor among developers worldwide in just a few years (ranking #1 for multiple consecutive years in the Stack Overflow Developer Survey) comes down to three key advantages: it's lightweight yet powerful — it launches far faster than traditional IDEs like IntelliJ IDEA or Visual Studio, yet achieves near-IDE-level functionality through its plugin system; it has a rich extension ecosystem — the VS Code Marketplace hosts over 40,000 plugins covering virtually every programming language and development scenario; and it offers deep integration with AI tools — mainstream AI coding assistants like GitHub Copilot, Codeium, and Continue all deliver their services as VS Code plugins, and code generated by Codex can be opened, edited, and debugged directly in VS Code.
VS Code Installation Steps
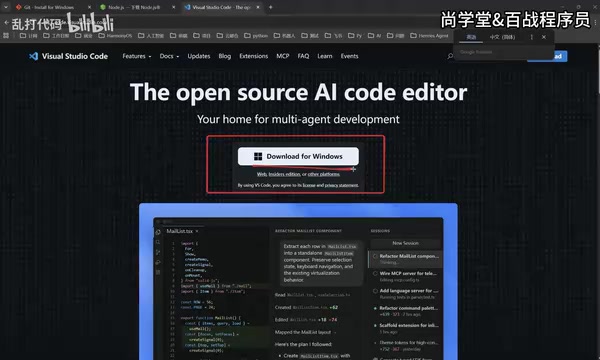
- Visit the VS Code official website (code.visualstudio.com)
- The website will automatically detect your operating system — click the corresponding download button
- Double-click the installer and install to the default C: drive location
- The installation path has no noticeable impact on performance — if you have enough space on C:, there's no need to change it
Configuring the Chinese Language Interface in VS Code
When you first open VS Code, the interface defaults to English. Here's how to switch it to Chinese:
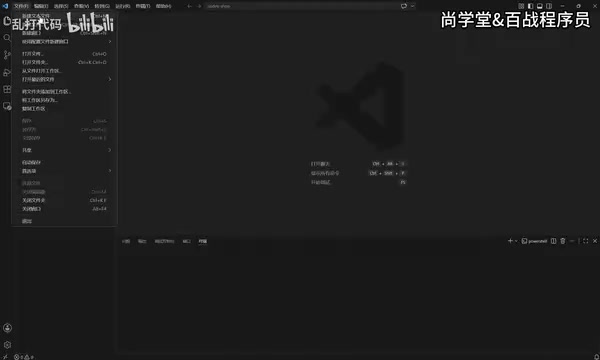
- Click the "Extensions" icon in the left sidebar (the icon with four small squares)
- Type
Chinesein the search box - Find the "Chinese (Simplified) Language Pack" plugin and click Install
- After installation, a restart prompt will appear in the bottom-right corner
- Click restart, and the interface will be in Chinese when it reopens
Beyond the Chinese language pack, beginners may also want to install a few useful plugins to enhance their development experience: Prettier (automatic code formatting), GitLens (enhanced Git functionality with intuitive code change history), and Error Lens (displays error messages directly inline with your code). These plugins are all free and can be installed the same way as the language pack.
Important Notes for Codex Environment Configuration
Regarding installation paths, here are some practical tips:
- If your C: drive has plenty of space (80GB+ remaining), install everything on C: to avoid path configuration hassles later
- If your C: drive is running low on space, you can install to another partition — it won't meaningfully affect program performance
- If you're concerned about C: drive capacity affecting system speed, consider allocating a larger partition to C: (300GB+) when setting up your disk
A technical note: the impact of installation path on software performance depends primarily on disk type, not partition location. If your computer uses an SSD (Solid State Drive), read/write speeds are essentially the same whether you install on C: or D:, since SSDs have no mechanical seek time and offer far superior random read/write performance compared to traditional HDDs (Hard Disk Drives). What truly affects the development experience is disk I/O performance — Node.js performs a large number of small file read/write operations when installing dependencies, and SSDs can be over 10x faster than HDDs in this scenario. So if your computer has both an SSD and an HDD, make sure to install your development environment on the SSD partition.
Additionally, there's one more prerequisite for using Codex: you need an OpenAI account with API access or a ChatGPT Pro/Team subscription. As an OpenAI product, Codex's cloud agent functionality is currently available to ChatGPT Pro, Team, and Enterprise users, while the CLI version requires an API key configuration. After completing the environment setup described in this article, you'll still need to configure your API key when installing Codex — this step will be covered in detail in a follow-up tutorial.
Summary
Once you've installed Git, Node.js, and VS Code, your prerequisite environment for Codex is fully ready. The entire process takes no more than 15 minutes, involves nothing but straightforward steps, and can be completed with zero prior experience. When you move on to actually installing and using Codex, each of these tools will play its respective role, and more detailed usage instructions will follow.
Here's a quick recap of how the three tools work together: Git handles code version management and interaction with remote repositories, serving as the channel through which Codex pulls and pushes code; Node.js and its npm package manager handle the installation of the Codex CLI itself and all its required dependencies; VS Code serves as your code workbench, allowing you to view, edit, and debug code generated by Codex. Together, they form a complete local development environment loop.
Environment setup may seem tedious, but it's the first step into AI-powered programming. Build a solid foundation now, and using Codex later will be twice as effective with half the effort.
Related articles

AI Agent Systematic Learning Path: From Zero to Independent Development
A systematic AI Agent learning path covering core principles, Prompt engineering, RAG, multi-Agent collaboration, and hands-on projects for beginners.

Kimi K2.7 + Hermes Agent Real-World Test: Generate Complete Applications with a Single Sentence
Hands-on test of Kimi K2.7 integrated with Hermes Agent: generate complete 3D games and web OS apps from a single sentence, with benchmark data vs Claude 3.5.

Build a Personal Website with One Prompt Using Lovable: A Zero-Code Free Deployment Guide
Learn how to use Lovable AI to generate a professional personal website with one prompt and deploy it for free. Complete walkthrough from writing prompts to one-click publishing — no coding required.