Advanced Codex Tips: Building a Cursor-Level Development Experience
Advanced Codex Tips: Building a Cursor…
Advanced OpenAI Codex tips for building a Cursor-like immersive development experience
This article covers five advanced techniques to transform OpenAI Codex into a Cursor-like development experience: summoning a sidebar panel via shortcuts for immersive coding, using the lightweight built-in editor over VS Code, batch-creating Agent sub-tasks for parallel efficiency, properly hard-deleting session data, and configuring environment scripts to ensure accurate Agent execution.
OpenAI Codex is a powerful AI programming tool, but many developers only scratch the surface of its capabilities. With some advanced techniques, you can transform Codex into an immersive development experience similar to Cursor. This article shares several practical yet rarely mentioned tips to significantly boost your development efficiency.
Background: Product Positioning Differences Between Cursor and Codex Cursor is an AI-native IDE deeply built on VS Code, developed by Anysphere. Its core strength lies in embedding AI assistance deeply into the editor workflow, supporting multi-file context awareness, inline code completion, and conversational programming. OpenAI Codex leans more toward being an independent AI programming Agent platform, powered by the GPT-4 model family, with stronger task planning and autonomous execution capabilities. Understanding these positioning differences helps developers choose the right tool combination for each scenario, rather than viewing them as simple substitutes.
Using Codex Sidebar Like Cursor
Many developers are accustomed to Cursor's approach of embedding the AI assistant in the editor sidebar. Codex can actually achieve a similar effect.
By default, Codex runs as a standalone window, requiring you to switch between windows. But with keyboard shortcuts, you can quickly summon Codex as a floating panel embedded alongside your current IDE:
- Windows users: Press
Win + Lto quickly summon it - Mac users: Press
Command + Lto quickly summon it
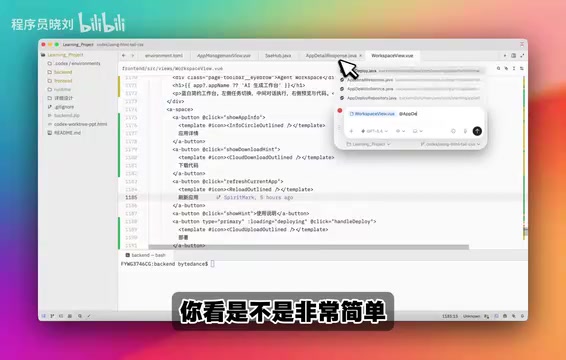
Once summoned, you can drag the panel to the left or right side based on your preference. Note that since the Codex panel is floating, you cannot directly drag files into it. Instead, use the @ symbol to reference files. For example, typing @walker quickly searches and associates the corresponding file.
Custom Shortcut Settings
Go to Codex → Settings → find the "Summon Shortcut" option, where you can customize your preferred key combination. Once set, you can summon the Codex panel anytime from any tool.
Additionally, within the panel you can use slash commands (/) to quickly switch models, projects, and branches — very flexible.
Why the Built-in Codex Editor Is Recommended Over VS Code
Here's a noteworthy recommendation: if you primarily use Codex for development, VS Code is not the best pairing — the built-in Codex editor is preferred. Here's why:
- Lightweight and efficient: Compared to VS Code, the built-in editor is much lighter, with near-instant startup and switching
- Feature-complete: It covers essentially all core VS Code features needed for daily development
- Zero lag experience: Virtually no stuttering during extended use, which is especially important for large projects
VS Code can serve as a backup, but for deep integration with Codex, the native editor delivers a noticeably better experience.
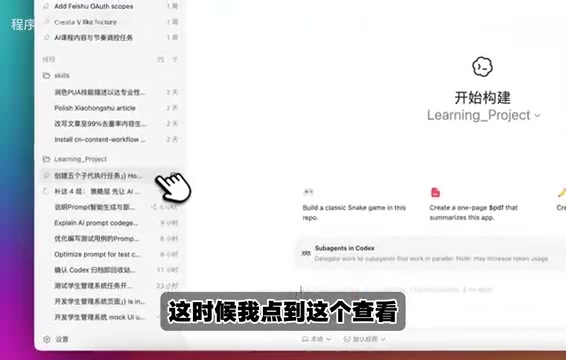
Batch-Creating Sub-tasks (Agents) for Parallel Efficiency
Regarding Codex's sub-task (Agent) feature, most tutorials teach you to create them one by one. A more efficient approach is to batch-create multiple sub-tasks at once, each with its own responsibility.
Technical Background: Agent Sub-task Parallel Mechanism Codex's sub-task (Agent) feature is essentially a multi-agent parallel execution architecture. Each sub-task corresponds to an independent AI Agent instance with its own context window and execution sandbox, operating without interference. This design borrows from the "Separation of Concerns" principle in software engineering, decomposing complex tasks into single-responsibility sub-tasks. This not only improves execution efficiency but also reduces the probability of hallucination from overly long contexts in a single Agent. Worth noting: MCP (Model Context Protocol) is an open protocol proposed by Anthropic to standardize interactions between AI models and external tools/data sources, enabling Agents to invoke external capabilities like code inspection and database queries through a unified interface.

For example, you can tell Codex all at once:
Please create five sub-tasks for me:
- First sub-task handles code review
- Second sub-task handles documentation creation
- Third sub-task handles configuration file modifications
- Fourth sub-task handles MCP-based inspections
- Fifth sub-task handles listing pending route inventory
Codex will automatically parse your prompt, intelligently split it, and generate corresponding sub-tasks. Each runs independently without interference, greatly improving parallel development efficiency.
Save as Prompt Templates for Reuse
You can even save commonly used sub-task combinations as prompt templates for instant recall next time. This workflow is especially suited for project management scenarios requiring simultaneous multi-dimensional handling.
The Correct Way to Delete Session Records
Many users encounter a confusing issue when cleaning up Codex session records: after clicking "Archive," the session appears to vanish, but the data still exists and archived information remains searchable.
Privacy & Security Background: Soft Delete vs. Hard Delete Session data in AI programming tools typically contains sensitive information like code snippets, project structures, and API keys. The "Archive" operation in most SaaS products is merely a soft delete mechanism — data remains in the server database to support recovery and audit trails. A true hard delete requires triggering through specific APIs or operational flows to completely remove data from the storage layer. For enterprise users, understanding data lifecycle management is crucial. Review the service provider's Data Retention Policy before use to mitigate compliance risks and privacy concerns.
The correct deletion process:
- Restore from archive: First restore the archived session
- Copy session ID: Right-click the session and select "Copy Session ID"
- Delete via new thread: Create a new thread, locate the session by ID, and execute deletion
- Restart the app: Restart the Codex client after deletion to ensure cache is cleared
While somewhat cumbersome, this process ensures session data is thoroughly purged, preventing privacy leaks or wasted storage space.
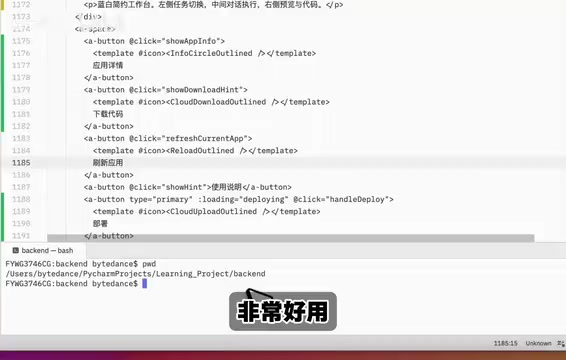
Environment Configuration and Script Setup
Proper environment configuration is crucial when using Codex. You need to set up the appropriate run scripts based on your project type:
- Node.js projects: Configure
yarn install,yarn dev, oryarn startcommands - Python projects: Use
open-related commands or virtual environment configuration - Other frameworks: For Laravel, Next.js, etc., configure the corresponding startup scripts
Technical Note: Why Environment Configuration Is Critical Codex typically executes code in an isolated sandbox environment to prevent malicious code from affecting the host system. Properly configuring run scripts isn't just about functionality — it also defines security boundaries. Node.js yarn/npm scripts, Python virtual environments (venv/conda), and Laravel's Artisan commands essentially inform the AI Agent about the project's dependency graph and entry points, enabling it to understand code semantics within the correct runtime context and generate more accurate completions or modifications. Missing or incorrect configuration causes the Agent to execute in the wrong context, producing unexpected code changes.
Environment setup directly determines whether Codex can correctly understand and run your project. Complete this configuration on first use.
Summary
With these techniques, Codex can evolve from a simple AI programming assistant into a near Cursor-level integrated development experience. The key points: leverage shortcuts for sidebar mode, batch-create sub-tasks for parallel efficiency, properly manage session data, and configure your environment correctly. These seemingly minor optimizations accumulate to significantly transform your development workflow.
Key Takeaways
- Use shortcuts (Win+L / Command+L) to summon Codex as a sidebar panel for a Cursor-like immersive development experience
- The built-in Codex editor is lighter and more efficient than VS Code with virtually zero lag — recommended as your primary editor
- Batch-creating sub-tasks (Agents) dramatically improves parallel development efficiency; each Agent has an independent context window without interference
- Archiving sessions is only a soft delete and doesn't truly erase data; hard deletion requires copying the session ID and deleting via a new thread
- Properly configuring environment scripts based on project type is the fundamental prerequisite for Codex to accurately understand project context and run efficiently in its sandbox
Related articles
 Tutorials
Cursor + Codex Dual-IDE Collaboration: A Practical Methodology for Open-Source Project Customization
A complete methodology for open-source project customization based on real-world experience, detailing the Cursor+Codex dual-IDE workflow, seven-stage process, MVP validation, and AI source code reading techniques.
 Tutorials
Cursor Multi-Agent in Practice: Building a Full-Stack Next.js Blog in 50 Minutes
Build a full-stack blog in 50 minutes using Cursor IDE's multi-Agent mode with Next.js, Clerk auth, and Supabase. Learn the 4-phase AI Agent workflow and key integration pitfalls.
 Tutorials
Building an AI Software Factory from Scratch: A Cursor Engineer's Hands-On Experience with Multi-Agent Collaboration
Cursor engineer Eric shares practical insights on building an AI software factory: automation levels, guardrail design, parallel Agent management, and scaling to 1000+ Agents for 24/7 development.