Building a Personal Blog from Scratch with Cursor: A Complete AI-Powered Development Tutorial

A step-by-step guide to building a full personal blog using Cursor AI with almost zero hand-written code.
This tutorial walks through building a complete personal blog website using Cursor AI, from generating UI prototypes with Google Teach to full-stack code generation, MySQL/Redis database configuration, and AI-powered bug debugging. The process demonstrates how developers can shift from writing code to directing AI, while still needing foundational knowledge of architecture, databases, and debugging.
Introduction
Many people have heard of Cursor, the AI-powered coding tool, but there aren't many tutorials showing how to use it to build a complete project from scratch. This article, based on a hands-on demonstration by a Bilibili content creator, walks you through the entire process — from UI design to full-stack code generation, database configuration, and bug debugging — all to build a personal blog website using Cursor.
The entire process requires almost no hand-written code; AI handles the vast majority of the work. However, you still need to understand what's happening at each step. This is the core competency of the AI programming era: it's not about writing code — it's about directing AI to write code for you.
Generating UI Prototypes with Google Teach
Before writing any code, you need to define what the product looks like. Here, we use Google's Teach tool to generate UI designs and interactive prototypes.
Google Teach is an AI-driven UI/UX design tool launched by Google that automatically generates high-fidelity interface mockups and interactive prototypes from natural language descriptions. The emergence of such tools represents a significant trend in the design field: shifting from traditional tools like Figma and Sketch that require manual drag-and-drop component placement, to AI-native workflows where you simply describe your requirements in words to get design solutions. Similar tools include v0.dev (by Vercel) and Galileo AI. Their core value lies in dramatically reducing the time from idea to visual prototype, enabling developers without design backgrounds to quickly produce professional-grade UI solutions.
Workflow
- Open the Google Teach website (requires VPN access with an overseas node)
- Select Web mode (App mode is also supported)
- Paste a pre-prepared prompt describing the blog website requirements
- Wait for the AI to generate the design
The tool automatically generated design mockups for multiple pages including the homepage, personal profile, blog list, and tech stack showcase. The color scheme features a Glassmorphism effect (a popular UI design style in recent years that creates a frosted glass appearance through semi-transparent blurred backgrounds), along with data visualization components like radar charts. The overall visual quality is quite impressive.
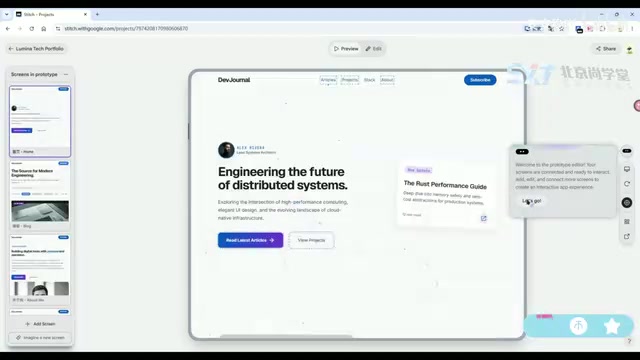
After generating the static designs, clicking a button produces clickable interactive prototypes with page navigation, dynamic interactions, and particle background effects. Once you're satisfied with the result, copy the prototype link via the share button — this link will serve as a reference input for Cursor.
Generating Full-Stack Code in Cursor
This is the core step of the entire workflow. Paste the prototype link into Cursor along with a detailed technical requirements prompt, and let the AI generate the complete front-end and back-end project in one go.
Cursor is an AI-native code editor built as a deep modification of VS Code, developed by Anysphere. The key difference between Cursor and regular IDEs with AI plugins (like GitHub Copilot) is that Cursor deeply embeds AI capabilities into the editor's core interaction flow. It supports multi-file context understanding, project-level code generation, and natural language conversational programming. Under the hood, it calls large language models like Claude and GPT-4, and uses proprietary context indexing technology that allows the AI to understand the entire project's code structure and dependencies — not just the single file currently open. This makes it particularly effective at handling complex tasks like cross-file refactoring and full-stack project generation.
Key Elements of the Prompt
A high-quality prompt should contain comprehensive technical specifications:
- Tech stack requirements: Specific choices for front-end and back-end frameworks
- Development standards: Code style, directory structure, naming conventions
- Authentication: User authentication approach
- System roles: Permission management design
- Feature modules: Blog management, tag management, project management, etc.
In AI programming scenarios, the quality of the prompt directly determines the quality of the generated code. An excellent prompt is essentially a concise technical requirements document that needs to strike a balance between "specific enough" and "not overly constraining." Descriptions that are too vague lead to uncontrollable results from the AI's free interpretation, while overly detailed constraints limit the AI's architectural design capabilities. The industry has gradually developed best practices: first describe the project overview and technology choices, then progressively detail feature modules, and finally add non-functional requirements (such as security, performance, and coding standards). This structured approach to prompt writing is becoming one of the core skills for developers in the AI era.
After pasting the prompt into Cursor and pressing Enter, the AI begins generating files step by step. You can observe the entire process in real time: first it generates the overall architecture documentation, then the back-end code, front-end code, configuration files, and finally an auto-generated API design document.
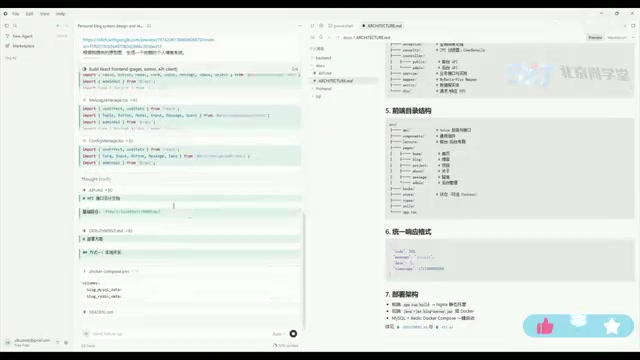
Looking at the generated results, the back end uses a MySQL database and Redis cache, and includes unified response format wrappers, a permission management module, and a complete package structure design. Redis (Remote Dictionary Server) plays two key roles in this project: first, it caches hot data (such as blog lists and tag data) to reduce direct query pressure on MySQL, bringing response times down from milliseconds to microseconds; second, it stores user login sessions or JWT Token blacklists to support user authentication and permission management. For a personal blog — a typical read-heavy, write-light application — Redis caching can significantly improve page load speed and overall system performance. The front-end project is equally well-structured and perfectly aligned with the back-end API.
Database Configuration and Project Launch
Once code generation is complete, you need to configure the environment to get the project running. Although this step doesn't involve coding, it's often where beginners get stuck the most.
Database Initialization
- Start the local MySQL service (the tutorial uses a local installation rather than Docker)
- Open Navicat and connect to the local database
- Check the configuration file for the database name, copy it, and create the corresponding database in Navicat
- Set the character set to
UTF-8 MB4(this is MySQL's true UTF-8 encoding that supports storing emoji and other 4-byte Unicode characters; MySQL's earlierutf8encoding actually only supports 3 bytes and cannot store certain special characters) - Find the SQL file in the project's
sqldirectory and run the import
After a successful import, refreshing reveals all the data tables the AI has already generated, complete with relationship designs.
Starting the Back-End Service
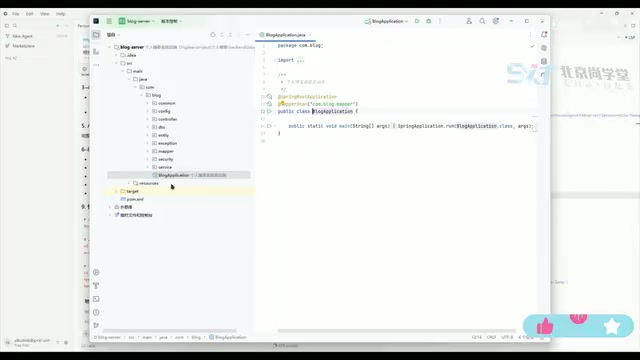
Open the back-end project in IDEA, wait for indexing to complete, find the application startup file, and click Run.
Here we encounter a common issue: port 8080 is already in use (occupied by a VMware virtual machine service). Port conflicts are one of the most common problems in local development — every network service needs to bind to a port number to listen for requests, and the same port can only be occupied by one process at a time. As the default port for Java web applications, port 8080 frequently conflicts with other local services. The solution is to find and stop the VMnet-related service in the system services. You also need to verify that the database username and password in the configuration file match your local environment. After making corrections and restarting, the back end launches successfully.
Starting the Front-End Service
Open the front-end project in a new IDEA window, wait for package.json scanning and index updates to complete, then click the Run button (or start via the command npm run dev). The front-end service runs on port 5173 by default (this is the default port for the Vite development server; Vite is a next-generation front-end build tool known for its extremely fast cold start and hot module replacement capabilities).
The front end and back end run on different ports — this is the classic front-end/back-end separation architecture. In this architecture, the front end (typically a Vue, React, or other SPA single-page application) and the back end (a Spring Boot or similar API service) are developed as independent projects, deployed separately, and communicate through RESTful APIs. The advantages of this architecture include: front-end and back-end teams can develop in parallel without blocking each other; the front end can flexibly switch UI frameworks without affecting back-end logic; and the back-end API can simultaneously serve multiple clients including web, mobile, and mini-programs.
Debugging Login Issues with Cursor
After getting the project running, the front-end pages look beautiful with high fidelity to the original design. However, when attempting to log into the admin panel, we hit a problem — the default password doesn't work.
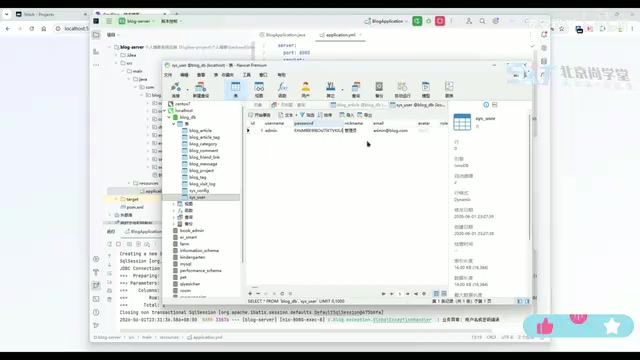
Checking the database reveals that the password field uses BCrypt encryption, making it impossible to read the plaintext password directly. BCrypt is a hashing algorithm specifically designed for password storage, created by Niels Provos and David Mazières in 1999 based on the Blowfish encryption algorithm. Unlike general-purpose hash algorithms like MD5 and SHA-256, BCrypt has a built-in "salt" mechanism and an adjustable cost factor. The salt ensures that even if two users have the same password, their stored hash values are completely different, effectively defending against rainbow table attacks. The cost factor can be increased as hardware performance improves, keeping brute-force attacks prohibitively expensive. This is why the password field in the database appears as a long, irreversible string — the system verifies passwords by re-hashing user input and comparing it against the stored value, rather than decrypting back to plaintext.
This is where Cursor demonstrates another powerful capability: simply describe the problem to the AI and let it investigate and fix it.
AI Debugging Process
Describe the problem in Cursor: "Password login fails, business exception." The AI immediately begins investigating:
- Identifies that the authentication module uses BCrypt encryption
- Locates the root cause — the password field mapping
- Automatically fixes the code
This debugging process showcases Cursor's project-level context understanding — it doesn't just see the current file but can trace the entire authentication chain across multiple files including Controllers, Services, and Repositories to accurately pinpoint the issue.
After the fix, restart the back-end service, refresh the page, and log in again — successfully entering the admin panel.
Final Verification
After logging into the admin panel, verify each feature module:
- Blog management: Adding new articles works correctly
- Tag management: Tag CRUD operations work normally (CRUD stands for Create, Read, Update, and Delete — the four basic data operations)
- Project management: New projects can be added and saved successfully
- Site settings: Supports configuring contact information, email, etc.
- Front-end display: Visiting port 5173 shows the front-end pages with newly added blog posts displayed correctly
- Comments feature: Supports visitor messages
The complete front-end/back-end separated personal blog project is now finished. If additional features are needed, you can continue iterating through Cursor.
Summary and Reflections
This hands-on case demonstrates a complete AI-assisted development workflow:
- Design phase: Generate UI prototypes with Google Teach
- Development phase: Generate full-stack code with Cursor in one shot
- Deployment phase: Manually configure the database and runtime environment
- Debugging phase: Hand bugs back to Cursor for resolution
Throughout this process, the developer's role shifts from "the person who writes code" to "the person who directs AI to write code." But this doesn't mean you can be completely non-technical — you need to understand database configuration, port conflicts, encryption mechanisms, and other fundamentals to successfully advance a project built on AI-generated code.
The fundamental shift in this workflow is this: in traditional development, developers need to memorize vast amounts of API syntax and framework details; in AI-assisted development, what matters more is systems thinking — understanding the overall design of software architecture, the collaboration between components, and the troubleshooting approach when problems arise. Syntax details can be delegated to AI, but the ability to make architectural decisions and diagnose problems still needs to come from the developer.
For developers looking to get started with AI programming, this approach of "getting a complete project running first" is far more efficient than grinding through documentation. It helps you build a holistic understanding of full-stack development through practice — and that understanding is the foundation for mastering AI programming tools.
Key Takeaways
Related articles
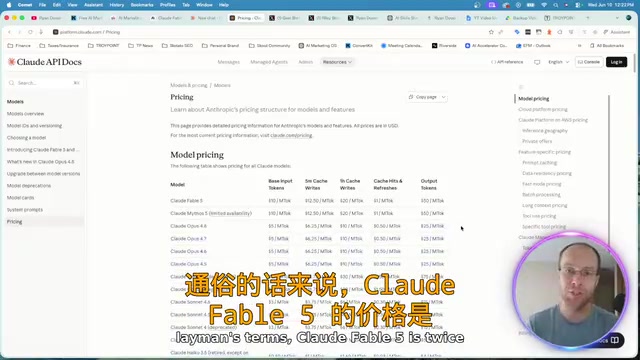
Claude Fable 5 Hands-On Review: Double the Price — Is It Worth It?
Hands-on comparison of Claude Fable 5 vs Opus 4.8 on landing page design and website rebuilds. Detailed API pricing analysis and practical advice on whether double the cost delivers double the value.

Introduction to AI Literacy: How Teachers Can Build a Systematic Cognitive Framework
A teacher's guide to AI literacy: from AI history and LLM fundamentals to the Agent era, build a systematic cognitive framework and master tool selection strategies.
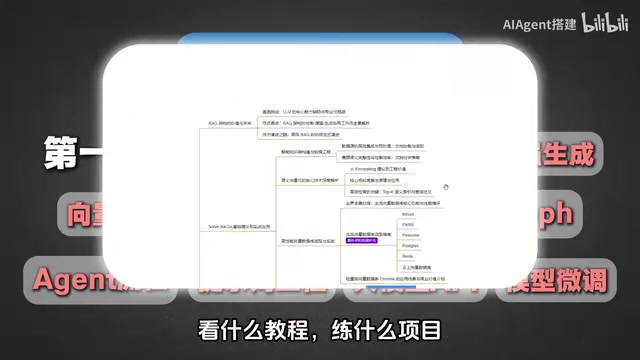
The 4-Stage Roadmap for AI Application Development: A Career Transition Guide from Beginner to Senior Engineer
A 4-stage roadmap for AI application development: from Python and RAG basics to Agent cluster architecture, covering the core skills needed for career growth.